CuHead WiFi shield, both V1 and V2, are cost-effective solutions to add WiFi connectivity to an Arduino board.
Recently, there seems to be rising confusion on how to use the popular CuHead WiFi shield. Many users thought the built-in Wifi library in Arduino IDE is for Cuhead. That is NOT the case. The built-on directory named “WiFi” under “libraries” is just for Arduino’s Wifi shield, it is NOT meant for LinkSprite CuHead WiFi Shield.
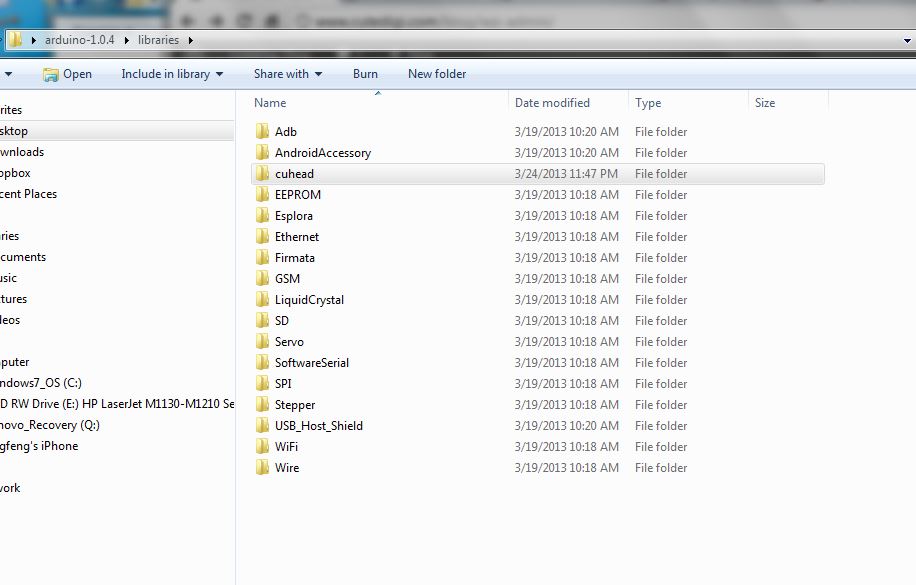
To use CuHead V1 or V2, we can download the library from github. After we download and unzip, we got a directory named “ZG2100BasedWiFiShield-master”. We should rename the directory as “cuhead” and copy it under directory “libraries”. The structure should look like:
We can then launch the arduino IDE by double clicking the arduino app:

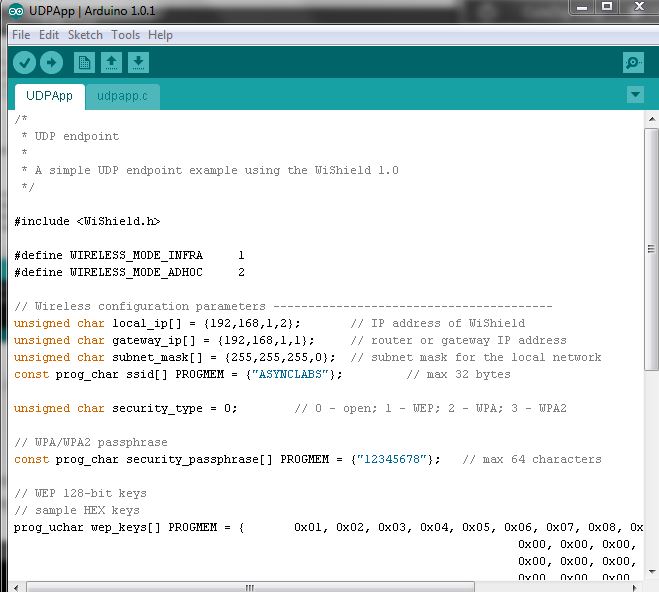
Now, we are going to test the UDPApp sample code. There are built-in samples in the CuHead library. We can open the simple web server by navigating File->Examples->cuhead->UDPApp:
CuHead cannot do DHCP. It can only be set to a static IP address.
How to set a static ip?
If your PC is also connecting to the same access point (wifi router) as the CuHead WiFi shield does, we can use “ipconfig” to check the local IP address as following:

In this case, the PC has a IP address of 192.168.1.8. Just to be safe, we will set the local_ip of CuHead to be “192.168.1.20″. Please note that although your router is set to be DHCP. It can also entertain a static IP request.
Now we need to figure out the security_type. Again, if your PC is attached to the same WiFi router, we can check the security type of the wifi of your pc:
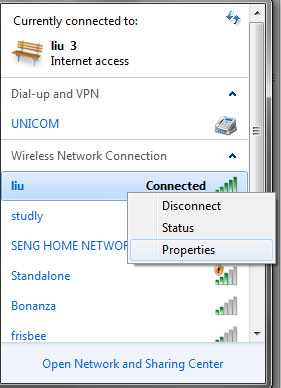
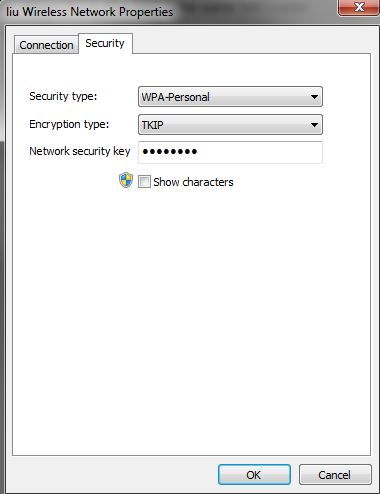
By looking at the picture above, we can tell the security type is WPA, and of course we need to passphrase.
Before we can compile the code, we need to make changes to file ‘apps-conf.h’:
//Here we include the header file for the application(s) we use in our project.
//#define APP_WEBSERVER
//#define APP_WEBCLIENT
//#define APP_SOCKAPP
#define APP_UDPAPP
//#define APP_WISERVER
We also need to make the following change to file ‘uip-conf.h’:
/**
 * UDP support on or off
 *
 * \hideinitializer
 */
#define UIP_CONF_UDP             1
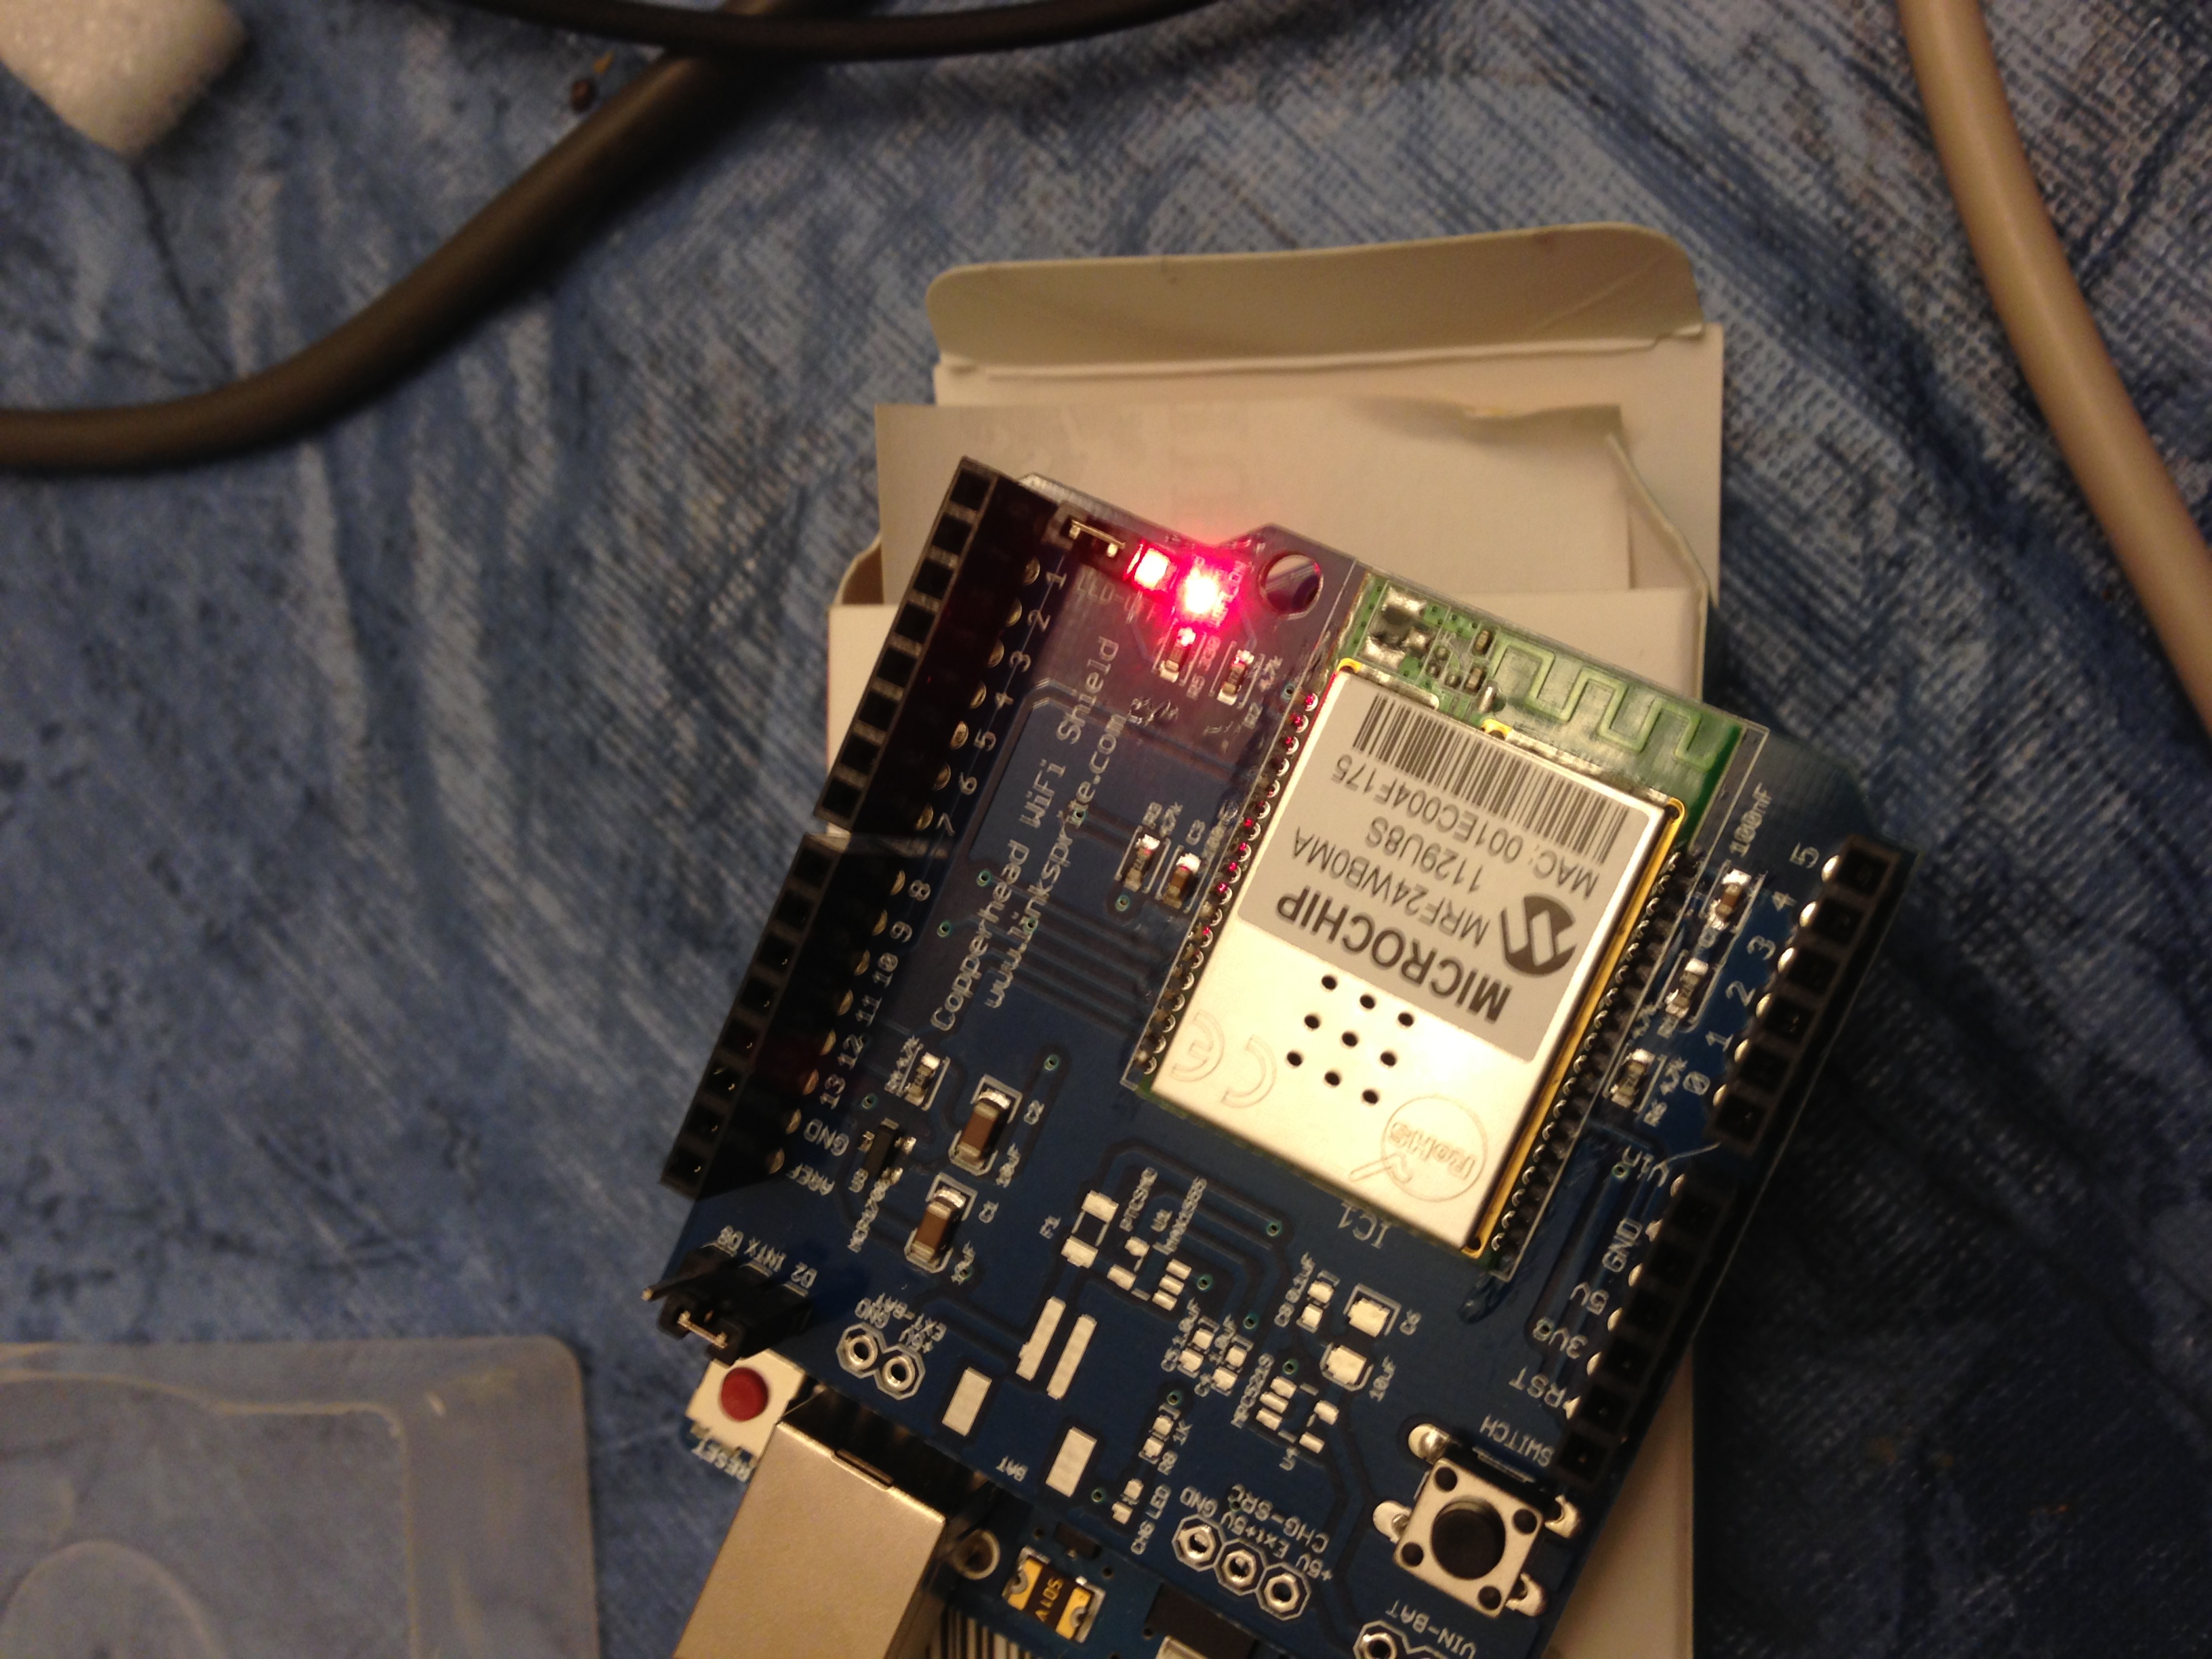
After this, we compile and load the code, at the same time, we hit the stop watch to check how long it takes for the CuHead to attach to my router:
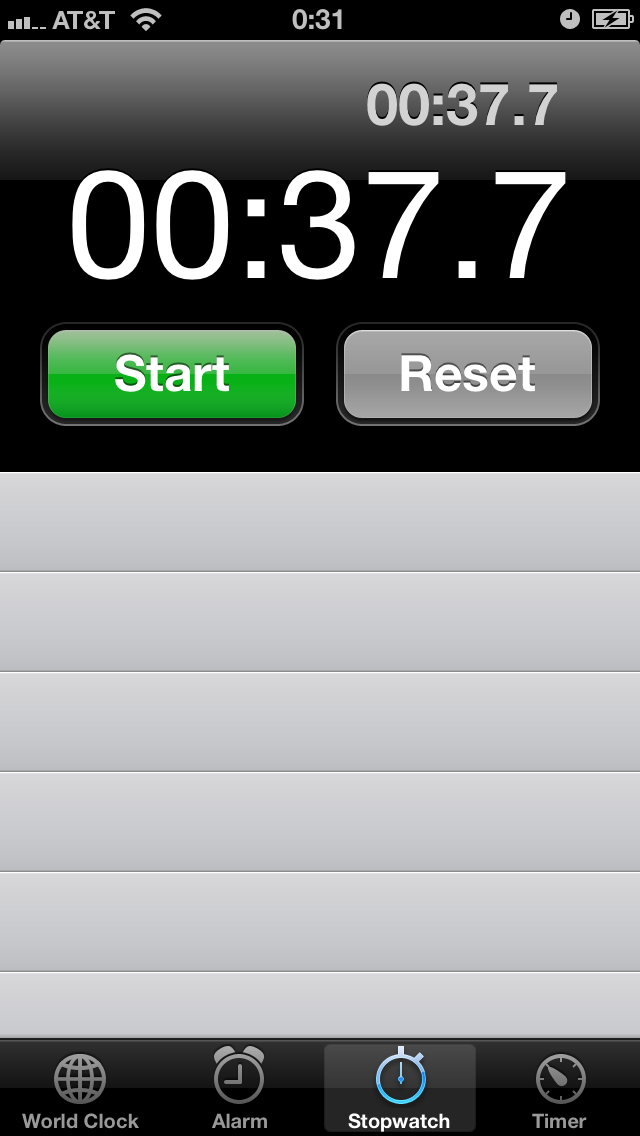
It takes 38 seconds for the connection LED to turn on:
Leave a Reply
You must be logged in to post a comment.