Jovision released an AI edge computing box that can be used to do video analytics, industry machine vision and machine control. It has integrated Intel HD graphic processor and lots of peripherals.
Frigate NVR is a popular open source NVR with configurable object detection, and it is compatible with home automation operation system: Home Assistant.
In this post, we are going to show how to install Frigate NVR as an add on to home assistant OS, as this is the most popular and convenient way to use Frigate NVR.
Installation of Home Assistant
First, we will cover how to install a fresh copy of home assistant on Jovision AI edge box.
There are four different ways to install home assistant:
- Home Assistant Operating System: This requires we take the HDD out of Jovision AI edge box and use etcher tool to write the Home assistant OS image directly into the working HDD of Jovision AI box.
- Home Assistant Container
- Home Assistant Supervised
- Home Assistant Core
The detailed explanation can be found that home assistant website here.
However, four different installation methods lead to how Home Assistant behaves. As we will install Frigate NVR as addon to Home Assistant, we need have the addon mode working.
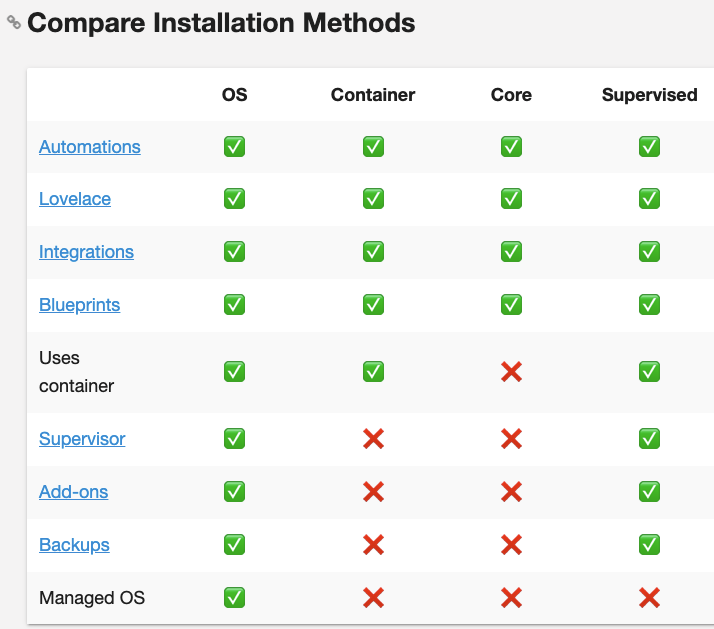
As shown in the above table, if we want to use addons, there are two ways to install Home Assistant: OS and supervised. Since install of OS need to remove the HDD out of Jovision AI edge box and flash the OS directly into the HDD using tools, we will not go this path here, instead we are left only with the supervisor way to install Home Assistant.
Install Home Assistant Supervised
The original reference page on how to install Home Assistant Supervised can be found at: https://github.com/home-assistant/supervised-installer
Refer to the steps in the supervised installer doc, we do the following:
<code>sudo apt-get install \
jq \
wget \
curl \
udisks2 \
libglib2.0-bin \
network-manager \
dbus -y
</code>
<code>curl -fsSL get.docker.com | sh</code>
Download the latest Debian package from OS Agent GitHub release page at:
https://github.com/home-assistant/os-agent/releases/latest
Install (or update) the downloaded Debian package using:
<code>sudo dpkg -i os-agent_1.0.0_linux_x86_64.deb
</code>
Please replace the deb file with the correct file name that downed from the os-agenet github.
We can test if the installation was successful by running:
<code>gdbus introspect --system --dest io.hass.os --object-path /io/hass/os
</code>
This should not return an error. If you get an object introspection with interface etc. OS Agent is working as expected.
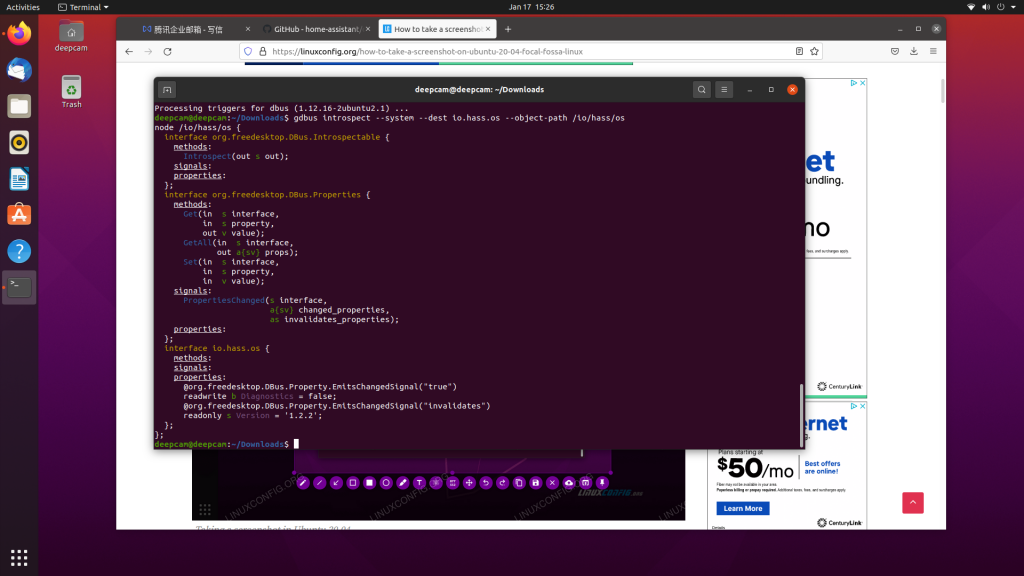
Install the Home Assisistant Supervised Debian Package:
<code>wget https://github.com/home-assistant/supervised-installer/releases/latest/download/homeassistant-supervised.deb

sudo dpkg -i homeassistant-supervised.deb
</code>
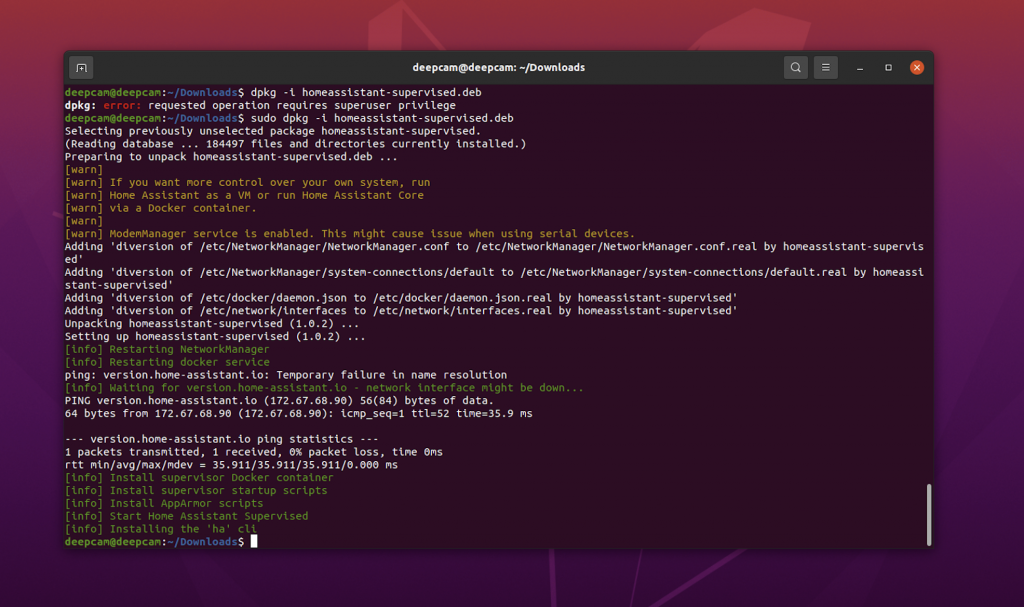
For the first use, we need to do some configuration, which is explained in this post.

Install MQTT
MQTT is an service that Frigate NVR depends on. Before we can install Frigate NVR, we need to first install MQTT and configure it with username and password for Frigate NVR MQTT client to connect to.
In Home Assistant, navigate Configuration-> Add-ons -> Add-on Store, we can type MQTT to search for MQTT, it will show MQTT Broker, select that, and hit Install,
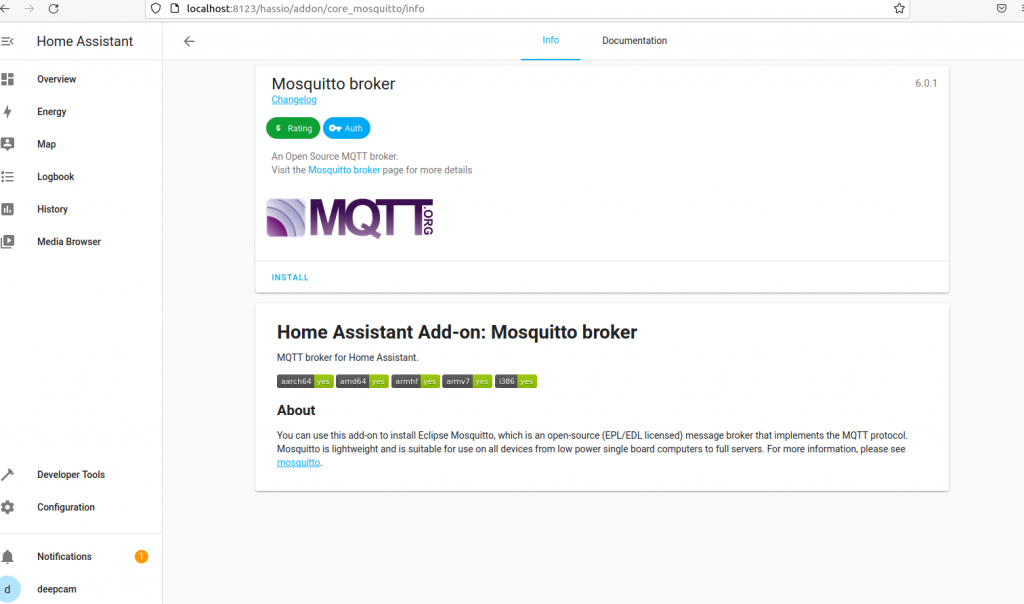
Next, we configure MQTT username and password:
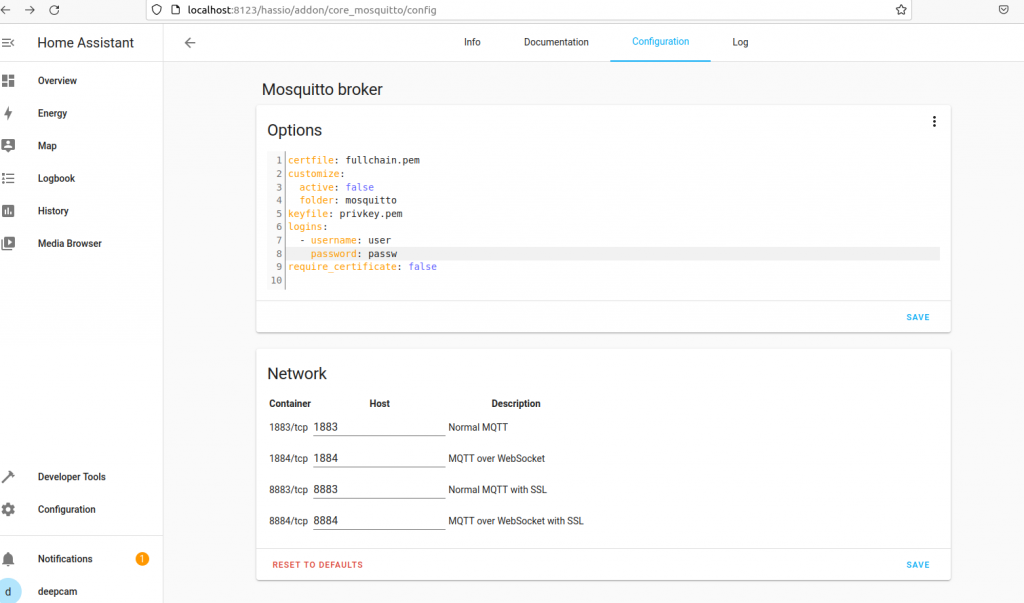
In the section titled logins, we need to configure username and password.
Next, we restart the MQTT add-ons.
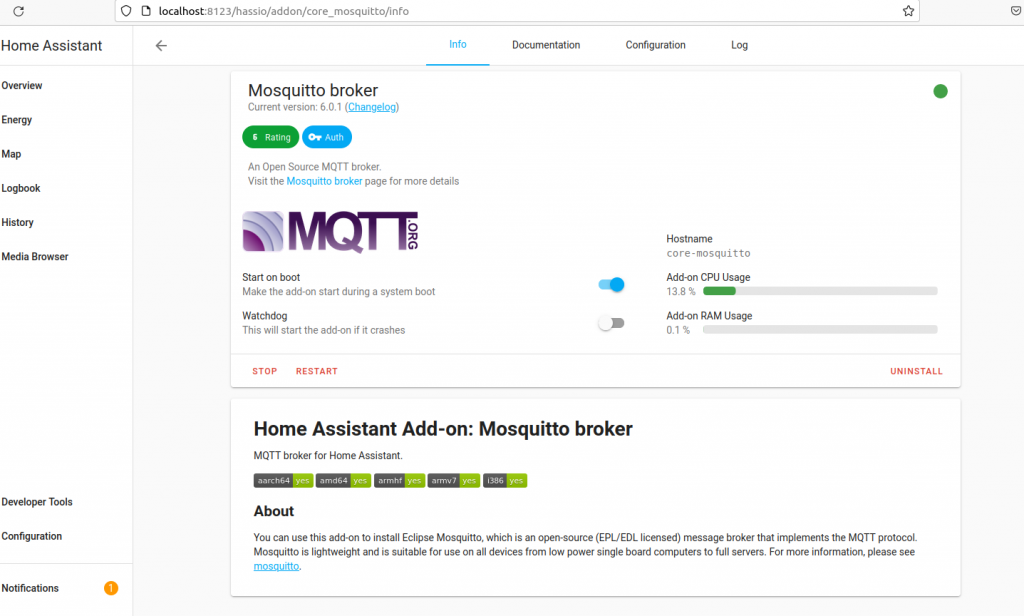
The green dot indicates that the add-ons is running well.
We can reboot the AI box, and check if the MQTT add-on starts automatically. Actually, it does so.

Comments are closed.