[vc_row][vc_column][vc_column_text]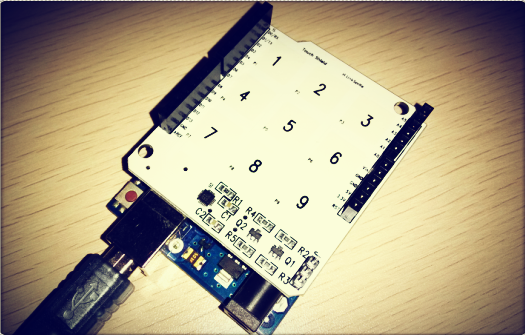
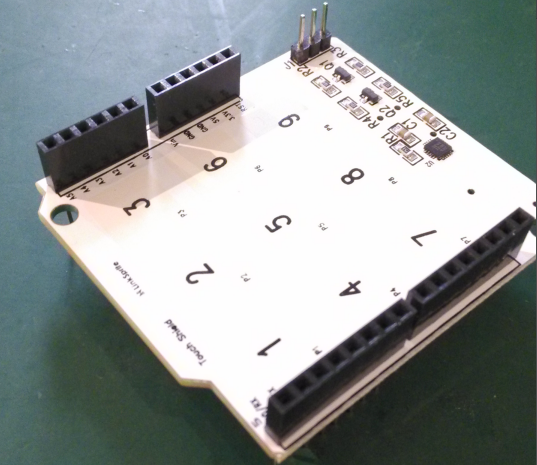
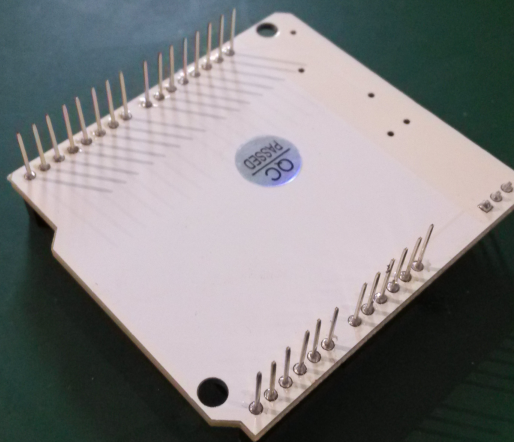
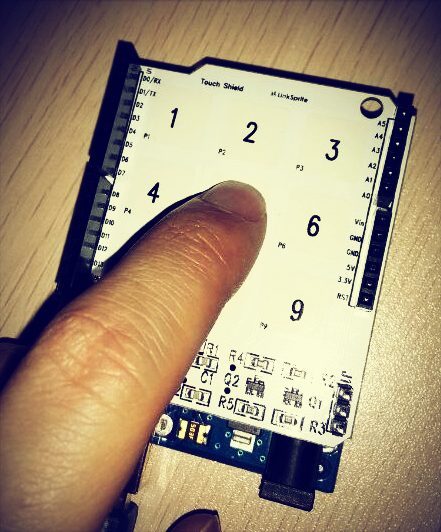
The MPR121 IC is a great way to build simple capacitive touch interfaces, and now it’s even easier to incorporate into your Arduino projects with the touch shield. The touch shield has 9 capacitive touch pads, with headers for the remaining 3 electrode connections. With this shield you can have a total of 12 touch sensitive buttons. An on-board logic level converter allows it to work with 5V and 3.3V Arduino boards. Simply solder on some header pins and stack it on to your Arduino for a convenient input device. Check below for some example code to get you started.[/vc_column_text][/vc_column][/vc_row][vc_row][vc_column width=”1/1″][vc_tour][vc_tab title=”Key features” tab_id=”1393894407-1-6″][vc_column_text]
- Supports up to 12 touch electrodes, and close to the detection
- Operating voltage : 1.71 ~ 3.6 V
- Very low power, with 29 microamps average supply current; 12 electrodes are used 16ms (62.5Hz) sampling rates
- Each electrode to achieve continuous, independent automatic calibration
- Each electrode has a separate contact and release trip thresholds; hysteresis can be set, independent of each electrode
- Enter the eight electrodes / output logic can be any combination, can drive up to eight LED
- Maximum shutdown current of 3 μ A
- I2C interface, using IRQ interrupt output to notify the electrode status changes
- 3 × 3 × 0.6mm 20-pin QFN package
- Working temperature: -40 ~ +85 ℃
[/vc_column_text][/vc_tab][vc_tab title=”Hardware preparation” tab_id=”1393894407-2-80″][vc_column_text]Arduino UNO x1
Touch Shield x1
Soldering station x1[/vc_column_text][/vc_tab][vc_tab title=”Welding process” tab_id=”1393894945220-2-0″][vc_column_text]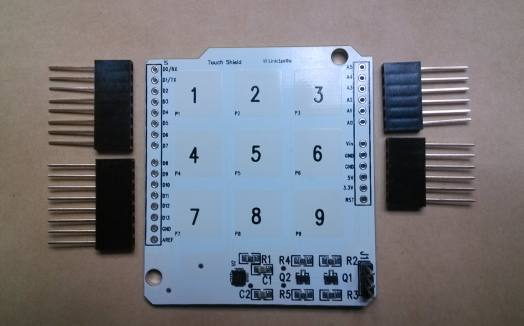
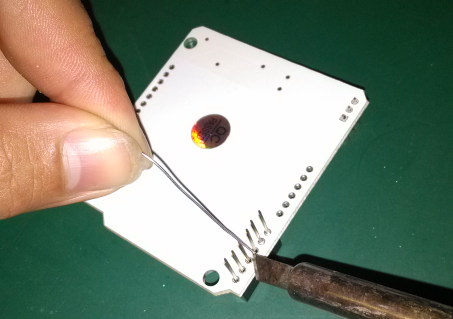
 [/vc_column_text][/vc_tab][vc_tab title=”Test running” tab_id=”1393894946402-3-9″][vc_column_text](1)put touch shieldn into arduino uno,then supply power to the board
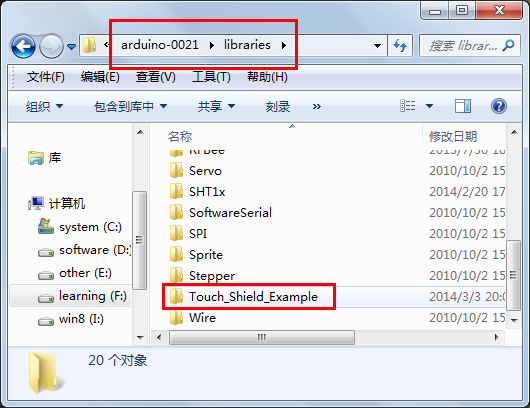
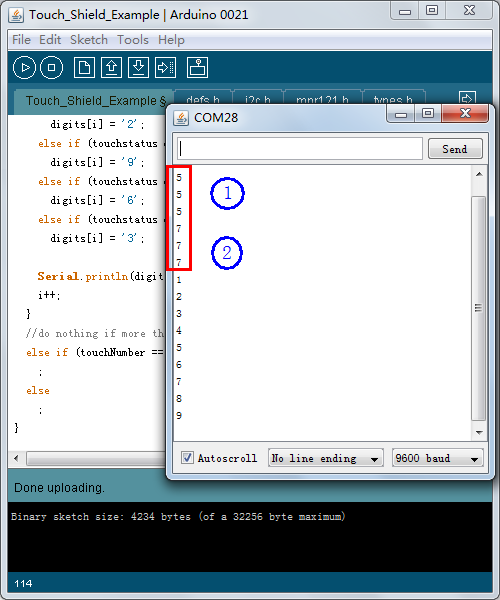
(2)download the code base in attachment,and put into “ arduino-0021/libraries ”:
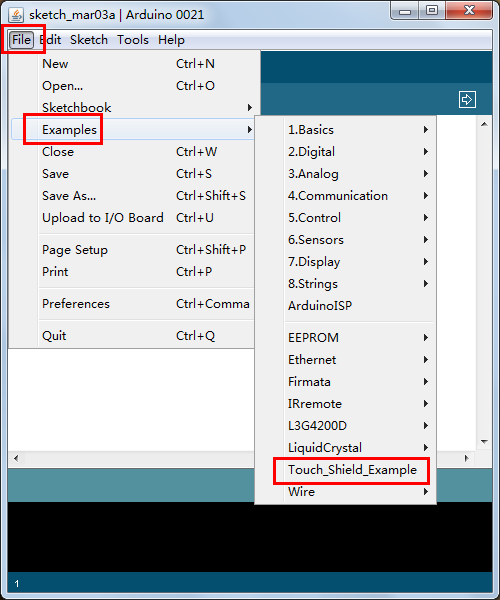
(3)Open the arduino IDE, followed by clicking“File –> Example –> Touch_Shield_Example”
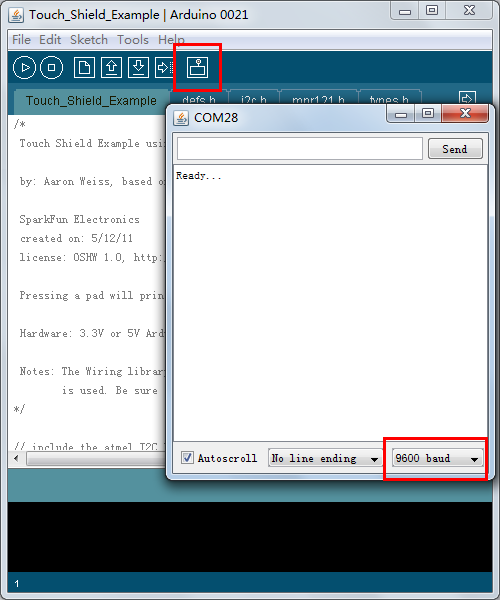
(4) Download the code to the arduino board and open the serial port (baud rate 9600), touch any key on the shield , we can see the touch keys valuer by monitor:

 [/vc_column_text][/vc_tab][vc_tab title=”Attachment download” tab_id=”1393895053064-4-7″][vc_column_text]
touch_shield_sample_code
[/vc_column_text][/vc_tab][/vc_tour][/vc_column][/vc_row]
Leave a Reply
You must be logged in to post a comment.