Note: This post is for a pre-released version of Acadia that has onboard EMMC.
In this post, we highlight the steps used to create a production SD card using Win32DiskImager for LinkSprite Acadia.
The image can be downloaded from the image page.
Windows:
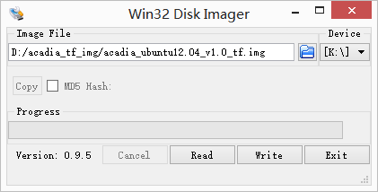
Launch win32diskimager and plug in a SD card (please use a SD USB adapter, SD card should have a capacity larger than 4GB):
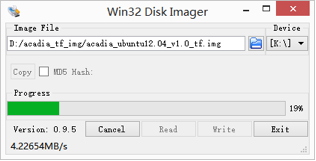
Click ‘Write’:
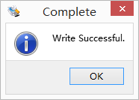
After its done, it will prompt:
Linux:
Insert a TF card larger than 4G into the USB port, and do the following:
root@ubuntu:/opt# ls -l /dev/sd*

brw-rw---- 1 root disk 8, 0 Feb 28 2015 /dev/sda

brw-rw---- 1 root disk 8, 1 Feb 28 2015 /dev/sda1

brw-rw---- 1 root disk 8, 2 Feb 28 2015 /dev/sda2

brw-rw---- 1 root disk 8, 5 Feb 28 2015 /dev/sda5

brw-rw---- 1 root disk 8, 16 Feb 27 23:00 /dev/sdb

brw-rw---- 1 root disk 8, 17 Feb 27 23:00 /dev/sdb1
We can see that tf card was mounted as sdb, and we can use the command “$umount /dev/sdb1′ to unmount all partitions, and use the following command to create a production SD card:
$dd if=./acadia_ubuntu12.04_v1.0_tf.img of=/dev/sdb bs=1M
Mac:
The TF card will be mounted as dev/rdisk3. Use the command ‘$unmount /dev/disk3s1’ to unmount, and create a SD card using:
$dd if=./acadia_ubuntu12.04_v1.0_tf.img of=/dev/rdisk3 bs=1M
The TF card will be mounted as dev/rdisk3. Use the command ‘$unmount /dev/disk3s1’ to unmount, and create a SD card using:
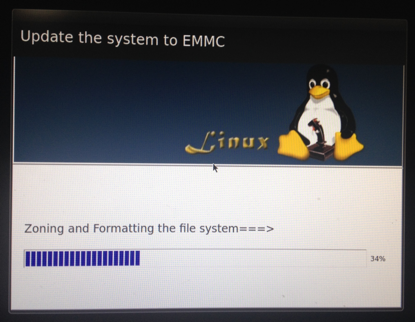
After we created the production SD card, we plug in the TF SD card into the SD slot in the front of Acadia, and set the boot configuration to SD card boot, which is all zero except 2 and 7. Power on Acadia with 5v/2A, we will see the HDMI output showing the progress:
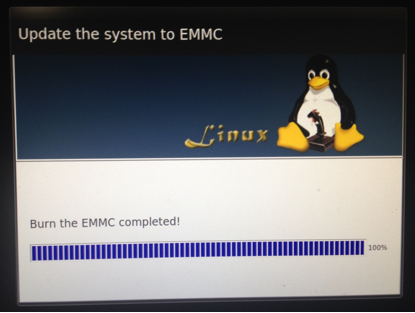
After we finish the burning, remove SD card, and configure the booting configuration switch to ‘boot from emmc’, which is all zero except ‘1,2,4,6,7’. Now the system will boot from emmc.
Final production models do not have EMMC or configuration switches so SD boot is the only option.
For the bootable SD image, we just need to create a bootable SD card using the steps creating production SD, and we can boot from it.
Leave a Reply
You must be logged in to post a comment.