[vc_row][vc_column width=”1/1″][vc_column_text]The components used in this experiment are shown below:
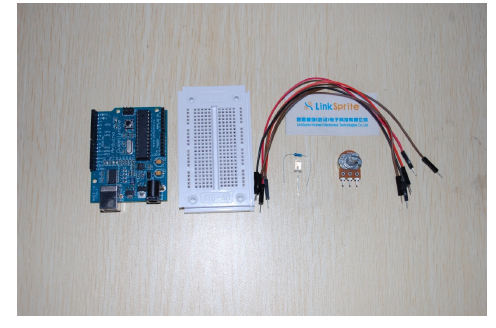
The components are one LED (color depends on pepole),one 470 ohm resistor (if you want brighter,a 100 ohm resistor can be used),one 10k ohm potentiometer, five jumper wires,and one breadboard.[/vc_column_text][/vc_column][/vc_row][vc_row][vc_column width=”1/1″][vc_tour][vc_tab title=”Schematics” tab_id=”1392621134-1-59″][vc_column_text] [/vc_column_text][/vc_tab][vc_tab title=”Wiring diagram” tab_id=”1392621134-2-2″][vc_column_text]
 [/vc_column_text][/vc_tab][vc_tab title=”Arduino code” tab_id=”1392621972281-2-2″][vc_column_text]Arduino code:
int ledPin = 11;
int analogPin = A0;
void setup()
{
pinMode(ledPin, OUTPUT);
}
void loop()
{
int period = (1023 – analogRead(analogPin)) / 2 + 25;
digitalWrite(ledPin, HIGH);
delay(period);
digitalWrite(ledPin, LOW);
delay(period);
}[/vc_column_text][/vc_tab][/vc_tour][/vc_column][/vc_row]
Leave a Reply
You must be logged in to post a comment.