[vc_row][vc_column width=”1/1″][vc_column_text]The components used in this experiment are shown below:
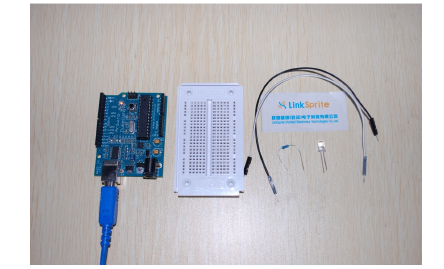
The components are one LED, one 470 ohm resistor,2 jumper wires and one breadboard.
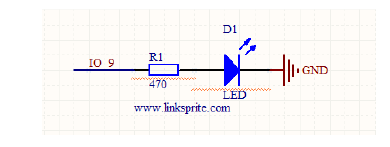
Schematics:
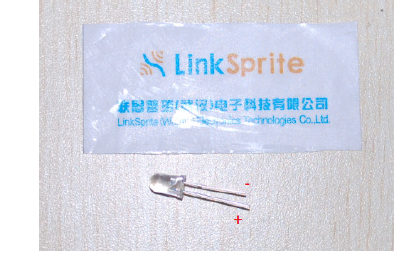
The long pin of LED is positive ,and the short pin is negative.
Wiring Diagram:
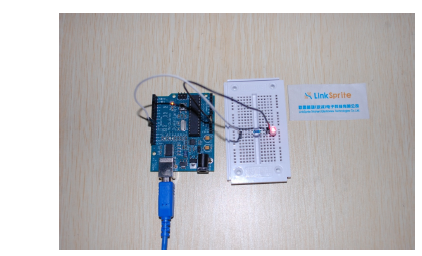
The positive pin of LED is wired to digital pin 9 of Arduino, the negative pin of LED is wired to a resister and then to the GND of the Arduino.
Arduino code:
/*
This experiment shows how to gradually change the brightness of LED
which is connected to digital pin 9 using analogWrite() command.
*/
//Define a variable brightness, which is used to represent the
brightness of the LED
int brightness = 0;
int fadeAmount = 5; //Define a variable fadeAmount, which is used to
represent the change amount of the brightness
void setup() {
pinMode(9, OUTPUT);// Set the mode of digital pin 9 to be OUTPUT
}
void loop() {
//Write the value of brightness to digital pin 9
analogWrite(9, brightness);
//Update the value of brightness to be used for next cycle
brightness = brightness + fadeAmount;
if (brightness == 0 || brightness == 255) {
//Change the sign of the fadeAmount at the largest and smallest
brightness points
fadeAmount = -fadeAmount ;
}
delay(30); //delay 30ms
}[/vc_column_text][/vc_column][/vc_row]
Leave a Reply
You must be logged in to post a comment.