You will be able to control each LED RGB individually with Addressable Sealed WS2812 RGB LED Strip. This opens up a lot of interesting applications, such as the ability to create cool lighting effects for your car, fish tank, or perhaps under cabinet lighting in your kitchen!

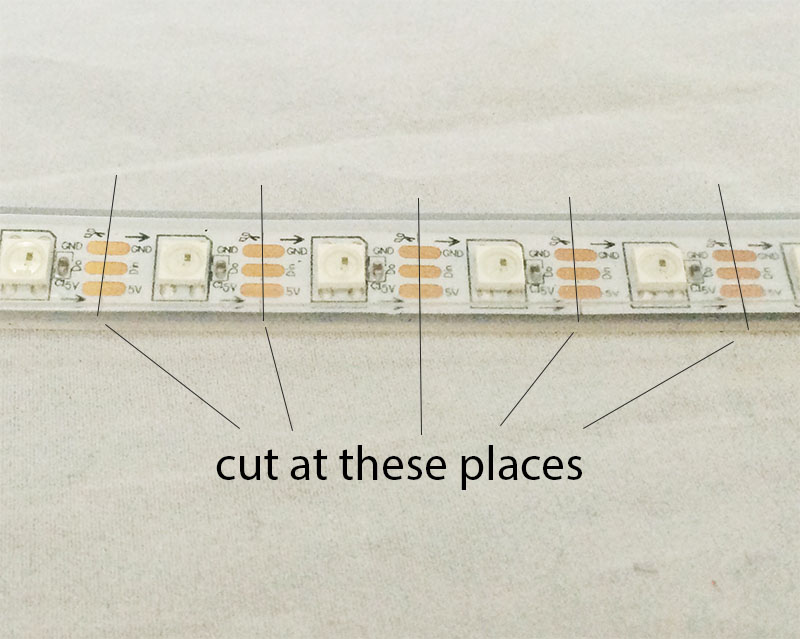
There are two models of the addressable RGB LED strip, 30 LEDs per meter, and 60 LEDs per meter. From the programming point of view, they are same. We just need to provide enough current for the strip. These LED strips can be cut, and connected in serial to form a long strip as long as we provide enough current to power them up.
Features:
- Each LED is individually addressed.
- 24 bit color control
- Controlled by single wire digital communication
- Working voltage: 5V
- Sealed to protect water and it has IP65 rating.
- The length can be cut and glued
Parts List:
In this tutorial, we will use an Arduino Uno to control this addressable RGB LED strip. The required hardware items are below:
- 1 x Arduino Uno
- 1 x USB cable
- Several male to female jumper wires
- LED strip
- Optional: 5V power supply that can deliver large current
Wiring Instruction:
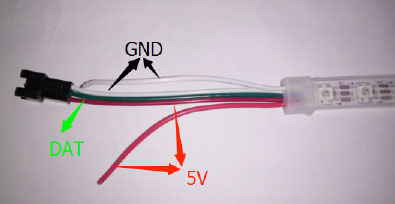
The headers of the LED strip is shown above. The green line is the data communication wire (DAT). The two red wires are for 5V power, and the two white wires are for ground. The extra set of power wires are needed in case extra currents are needed.
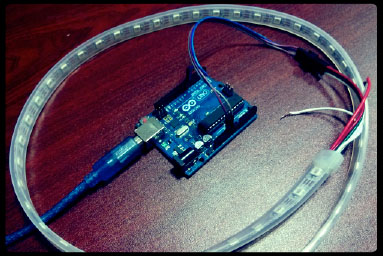
The LED strip is connect to Arduino Uno in the following way:
- DAT of LED Strip –> D6 of Arduino
- 5V of LED Strip –> 5V of Arduino
- GND of LED Strip –> GND of Arduino
Script:
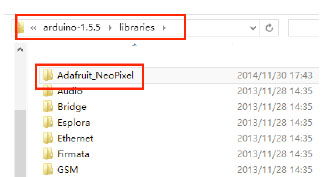
The Arduino script can be downloaded from https://github.com/adafruit/Adafruit_NeoPixel, and unzip to a directory under Arduino IDE.
Run the script:
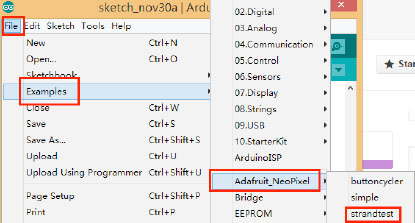
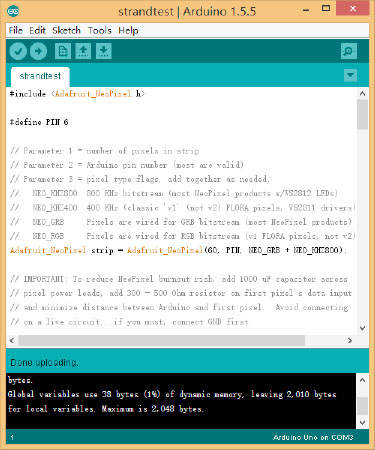
To run the script, launch Arduino IDE and navigate “File -> Examples -> Adafruit_NeoPiexel -> strand test”:
The number 60 in the code needs to be revised to reflect the actual number of LEDs in the whole strip:
Click ‘upload’ to compile and loaded into Arduino Uno. The final LED show is below:
http://www.youtube.com/watch?v=UWmVWXWVHW4
Leave a Reply
You must be logged in to post a comment.