Papilio Xilinx ISE WebPack VHDL Getting Started
Welcome to the Webpack VHDL Quickstart Guide for the Papilio Platform. This guide shows how to get a simple VHDL design up and running on the Papilio Hardware. It will cover using Xilinx Webpack to create a project, import a constraint file, synthesize a design, and load the generated bit file to the Papilio Hardware.
Quick Links
Operating Systems
Hardware this Guide Applies to:
Prerequisites
If this is the first time using the Papilio hardware then please take a moment to go through the Papilio Quickstart Guide to install the drivers, Papilio Loader, and to get the file associations setup. Then, download and install the Xilinx ISE Design Suite software. During the install choose, “ISE WebPack” as your product to install.
When downloading from Xilinx the default page will be for the Vivado Design Tools. Be sure to change to ISE Design Tools and download the latest ISE Design Suite.
If you are running 64bit Windows 8 you will run into a bug that will prevent you from loading a license file or opening any projects. Visit this page for a fix.
Start a New Project in Xilinx Project Navigator
Start Xilinx Project Navigator
Click on “New Project”
Type in the name “Webpack_Quickstart”, choose a location, and press “Next”.
Make sure all settings match the screenshot below with the following exceptions:
- For the 500K Papilio boards select “SC3S500E” instead.
- For the Papilio Pro change:
- Family to “Spartan6″
- Device to “XC6SLX9″
- Package to “TQG144″
- Speed to “-2”
Press “Next”
Click “New Source”
Select “VHDL Module” and type in a filename of Webpack_Quickstart, press “Next”.
Press “Next” on the Define Module window without entering anything. Press “Finish”.
Press “Next” on the Create New Source Window.
Download the User Constraint File (ucf) for your board from the Gadget Factory Downloads section.
Click “Add Source” in the Add Existing Sources window. Browse to the downloaded ucf file.
Make sure “Copy to Project” is selected, press “Next”
Press “Finish”
Import Example Code into the Project
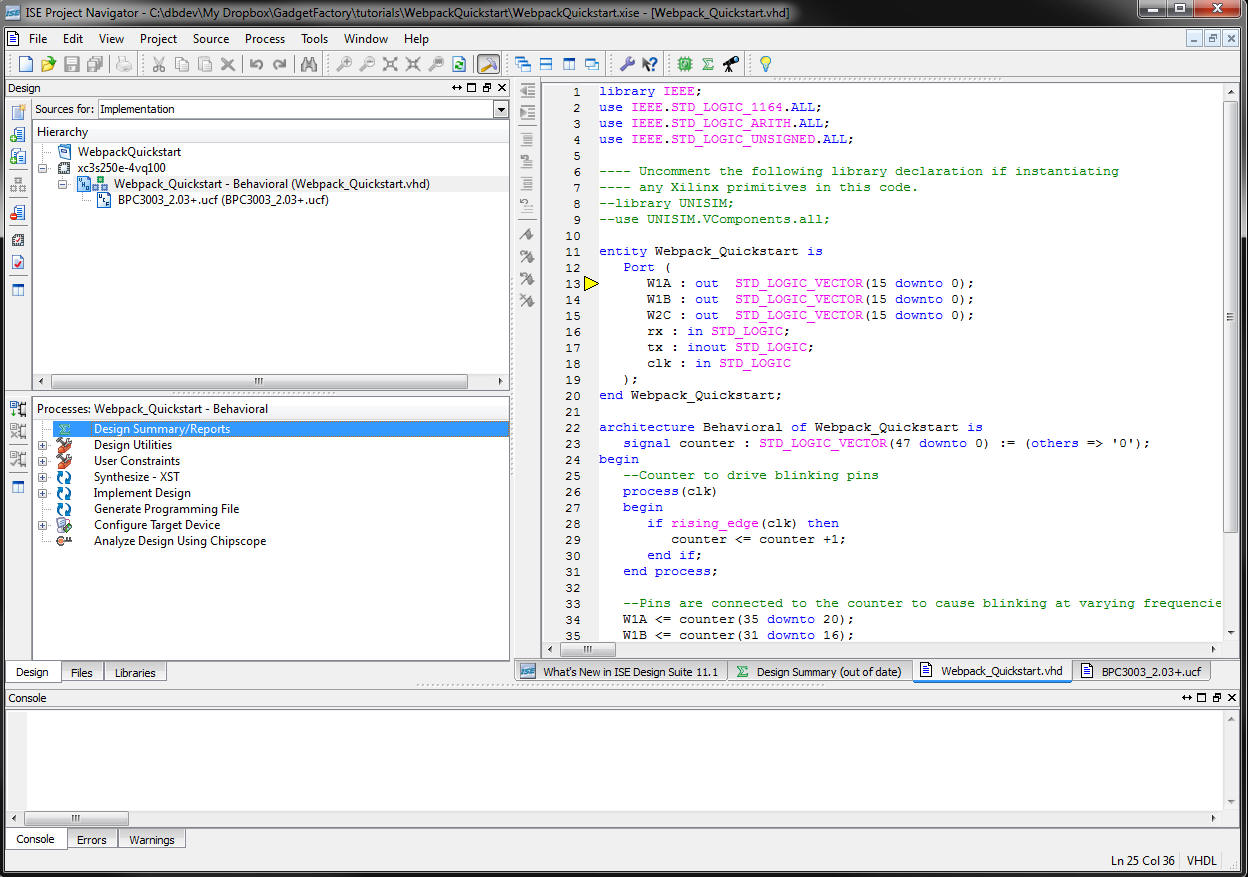
Double click on “Webpack_Quickstart” in the Hierarchy pane to open the vhdl file.
Replace the entire contents of the “Webpack_Quickstart.vhd” file with the following example code.
use IEEE.STD_LOGIC_1164.ALL;
use IEEE.STD_LOGIC_ARITH.ALL;
use IEEE.STD_LOGIC_UNSIGNED.ALL;entity WebPack_QuickStart is
Port ( A : out STD_LOGIC_VECTOR (15 downto 0);
B : out STD_LOGIC_VECTOR (15 downto 0);
C : out STD_LOGIC_VECTOR (15 downto 0);
clk : in STD_LOGIC);
end WebPack_QuickStart;architecture Behavioral of WebPack_QuickStart is
signal counter : STD_LOGIC_VECTOR(47 downto 0) := (others => ‘0‘);
begin
–Counter to drive blinking pins
count: process(clk)
begin
if rising_edge(clk) then
counter <= counter+1;
end if;
end process;
–Pins are connected to the counter to cause blinking at varying frequencies
A <= counter(35 downto 20);
B <= counter(31 downto 16);
C <= counter(15 downto 0);
end Behavioral;
Synthesize the Design
We have a slight problem with the UCF files that we downloaded that we need to take care of before we proceed. The generic UCF files have more pins defined then we are using with this project, the default settings for WebPack will generate an error when this happens. We need to change the settings so those extra pins are ignored.
Right click “Translate” under Implement Design and select “Process Properties”
Put a check mark in “Allow Unmatched LOC Constraints”
Be careful with this setting, it can mask problems such as a typo in your ucf file as illustrated here. The safest practice is to comment out unused lines from your ucf file.
You will also have to open the ucf file and comment out any lines that have a PULLUP defined.
Highlight the ucf file, expand User Constraints and double click on “Edit Constraints (Text)”
Comment out any lines with a PULLUP defined.
Double click “Generate Programming File” under the Processes pane.
Load the synthesized bit file to the Papilio board
Xilinx does not provide any method for 3rd parties to use the built in programming tools so it is necessary to use the Butterfly Loader to load the generated bit file.
Navigate to the directory where the project was created and locate the “webpack_quickstart.bit” file. Verify that the timestamp looks correct.
Ensure that the Papilio board is plugged into the USB port.
Double click on the generated bit file to program directly to the FPGA or right click on the bit file to choose other options such as writing to SPI Flash.
Verify that the design works as expected
The example code simply connects an incrementing timer to the I/O pins of the Papilio board. The end result is that connecting a Button/LED Wing to the various Wing Slots will show blinking LED’s at various frequencies. If no Button/LED Wing is available then just connect a multimeter to the I/O pins and observe voltage falling and rising.


Leave a Reply
You must be logged in to post a comment.