Note: This post is for a pre-released version of Acadia that has onboard EMMC.
The 1024×600 7″ LVDS LCD was originally designed for the pcDuino3. In this post, we will show you how to install it on the Acadia, which is the i.MX6 Quad core based single board computer.
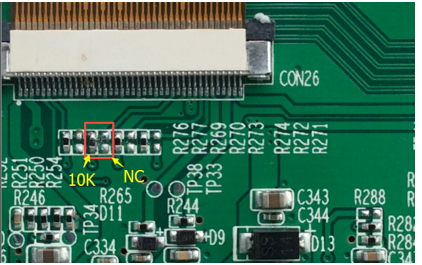
Before we install it on the Acadia, we need to make two changes.
1. Remove R219 (the one pointed by pencil)
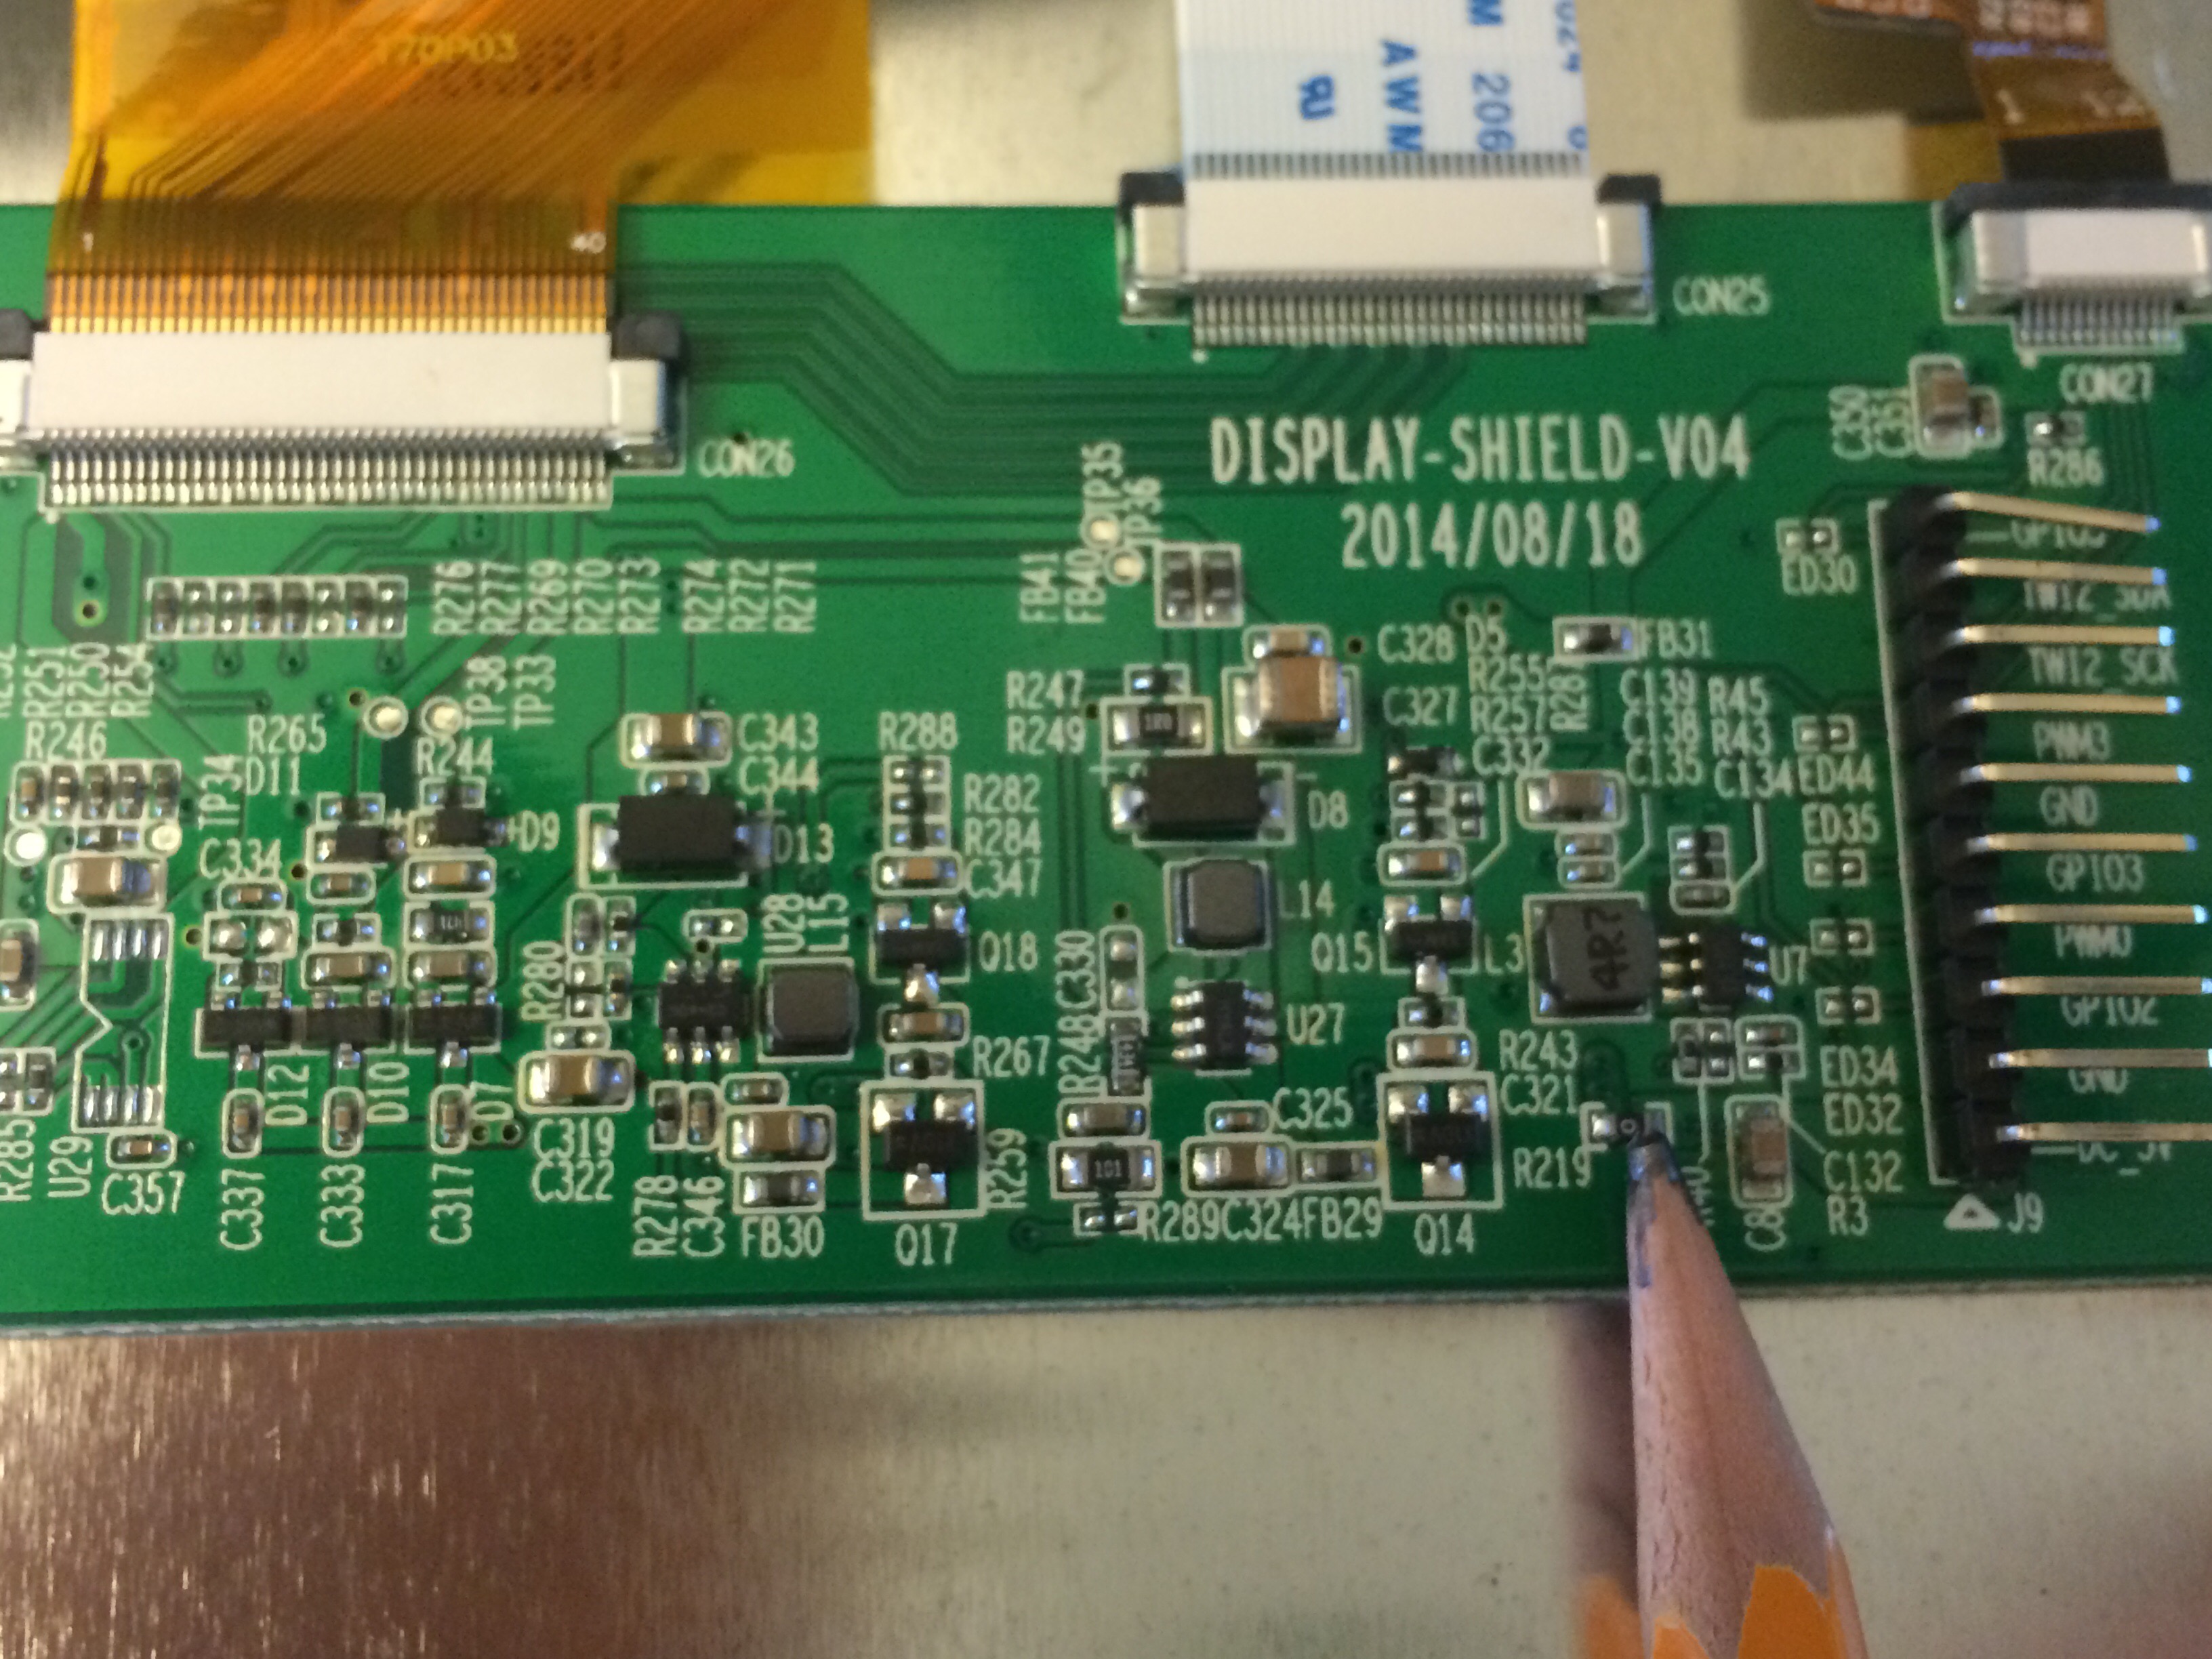
2. Move the resistor on R270 to R269 (it has a value of 10Kohm):
We wire the 10 pins of the LVDS board to Acadia in the same way as that used in pcDuino:
| Pin1 of J9 on LVDS board | Arduino Headers on Acadia |
| 1 | 5V |
| 2 | GND |
| 3 | D2 |
| 4 | D3 |
| 5 | D4 |
| 6 | GND |
| 7 | D9 |
| 8 | SCL |
| 9 | SDA |
| 10 | D8 |
The LVDS ribbon cable should be inserted into Acadia’s LVDS socket with the side without text facing up.
The OS image for LVDS can be downloaded from: http://www.linksprite.com/?page_id=1112
The final project:

A detailed video:
Leave a Reply
You must be logged in to post a comment.