[vc_row][vc_column width=”1/1″][vc_column_text]

[/vc_column_text][/vc_column][/vc_row][vc_row][vc_column width=”1/1″][vc_tour][vc_tab title=”Parts List” tab_id=”1396165245-1-25″][vc_column_text]
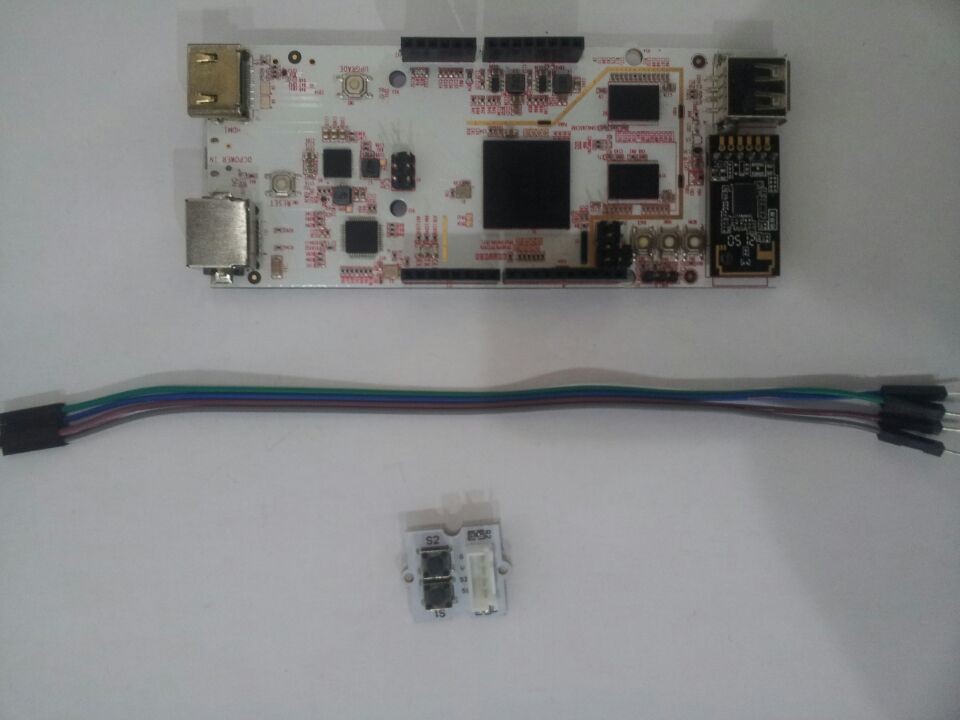
- 1 x Linker 1×2 Button Matrix Module
- 1 x [bigcommerce link=”/pcduino-v2-an-minipc-with-arduino-headers-ubuntu-android-google/” target=”_blank”]pcDuino V2[/bigcommerce]
- 4 x Jumper wires
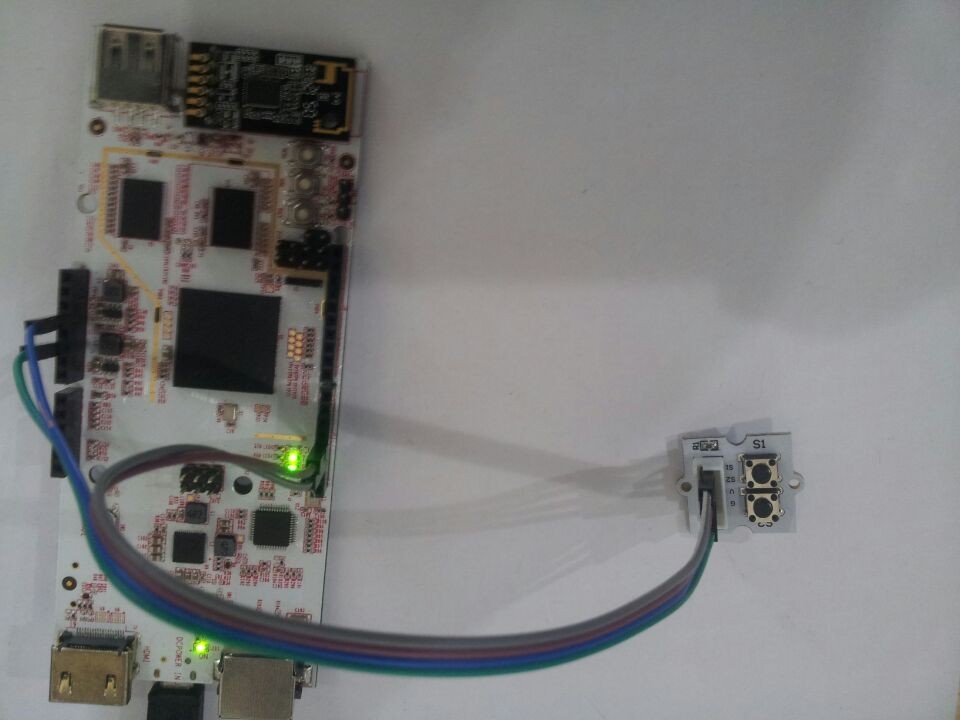
 [/vc_column_text][/vc_tab][vc_tab title=”Wire Diagram” tab_id=”1396165245-2-6″][vc_column_text]Linker Buttonv2 S1 => pcDuino D2
Linker Buttonv2 S2 => pcDuino D3
Linker Buttonv2 G => pcDuino GND
Linker Buttonv2 V => pcDuino +3v
 [/vc_column_text][/vc_tab][vc_tab title=”Code” tab_id=”1396166934619-2-9″][vc_column_text]
#include  “core.h”

const int button_s1 = 2;

const int button_s2 = 3;

void setup  (){

pinMode (2, INPUT);

pinMode (3, INPUT);

}

void loop  (){

if  (digitalRead (2){

printf (“button_s1 have been hold down!\n”);

}

delay (50);

if  (digitalRead (3){

printf (“button_s2 have been hold down!\n”);

}

delay (50);

}
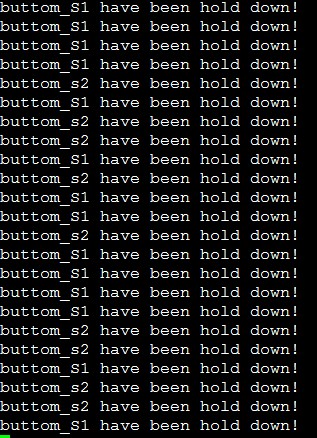
[/vc_column_text][/vc_tab][vc_tab title=”Test Result ” tab_id=”1396166976465-3-7″][vc_column_text]Press the S1, display “button_S1 have been hold down!”
Press the S2, display “button_S2 have been hold down!”
 [/vc_column_text][/vc_tab][/vc_tour][/vc_column][/vc_row]
Leave a Reply
You must be logged in to post a comment.