[vc_row][vc_column width=”1/1″][vc_column_text]9 Degrees of Freedom IMU can be used as a fly control board. The detailed info can be found at LinkSprite WiKi. This tutorial how to make IMU talk to pcDuino.
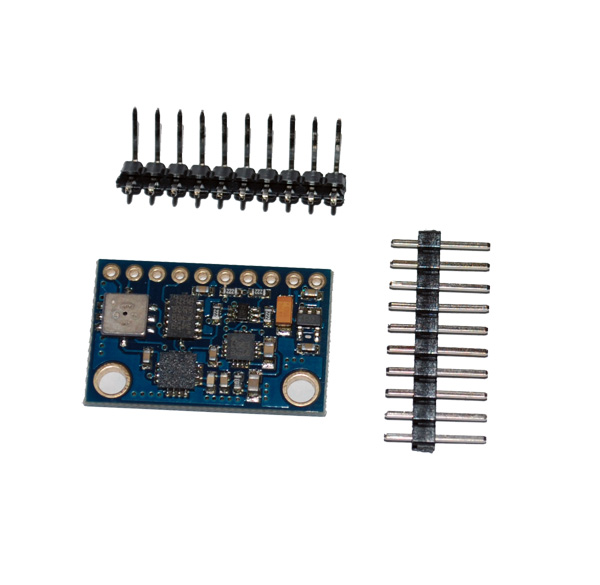 [/vc_column_text][vc_tour][vc_tab title=”9 Degrees of Freedom IMU Spec” tab_id=”1381950563-1-90″][vc_column_text]This is an IMU module that has sensors of 3-axis gyro, 3-axis accelerator, 3-axis magnetic field and air pressure.
The chipset used are L3G4200D+ADXL345+HMC5883L+BMP085.
Supply voltage ranges from 3 to 5V, and the interface is I2C (3-5V).
Module size: 25.8 mm X 16.8 mm.[/vc_column_text][/vc_tab][vc_tab title=”Wiring Instruction” tab_id=”1381950563-2-77″][vc_column_text]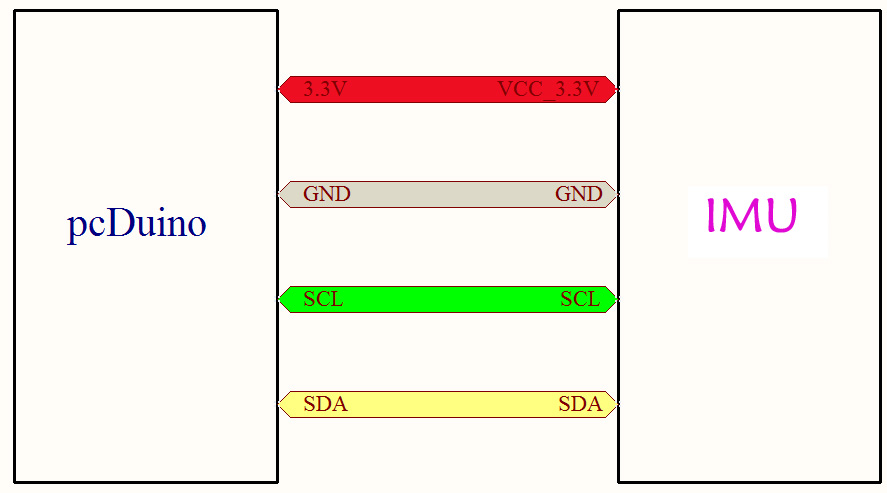
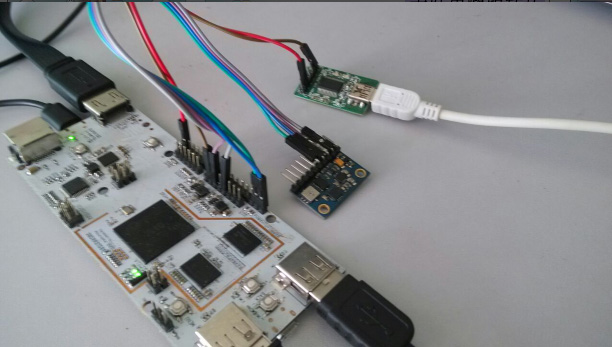
In this tutorial, the sensors results are output through the UART of pcDuino, and not printed on the screen. So we need a UART to USB converter to transform the results of UART.
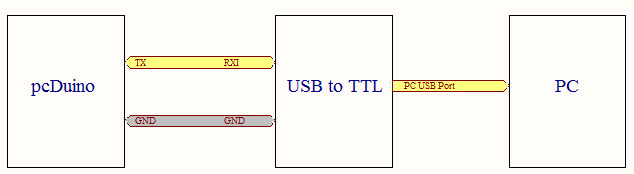
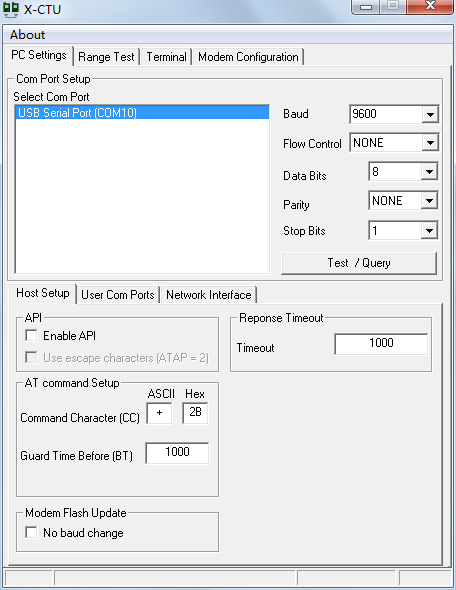
On the PC side (which is used to display the UART results), we are using X-CTU:
Configuration: Baud Rate=9600, Data Bits=8, Stop Bits=1
[/vc_column_text][/vc_tab][vc_tab title=”How does pcDuino talk to IMU” tab_id=”1381951011306-2-9″][vc_column_text]IMU uses I2C interface, and pcDuino also provides I2C API, so it’s fairly easy to make IMU to talk to pcDuino.
We can obtain the latest Arduino API of pcDuino from github.
Next, we are going to show how to port the example codes of IMU ([easy_media_download url=”http://learn.linksprite.com/wp-content/uploads/2013/10/9D-IMU.rar”])on 8051 or STM32 to pcDuino.
1. Copy the four test codes (adxl345_test.c / BMP085_test.c / HMC5883_test.c / L3G4200D_test.c) to directory sample of Arduino API:
“/home/ubuntu/c_enviroment-master/sample”
The test codes are included in the package 9D-IMU. The Arduino API is what was downloaded from the github.
2. Copy the library “L3G4200D” to directory libraries under Arduino API: “/home/ubuntu/c_enviroment-master/libraries”.
The library L3G4200D is included in the package 9D-IMU.
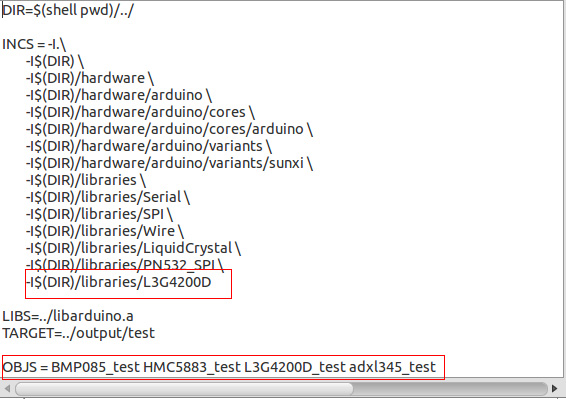
3. Enter into Arduino directory “/home/ubuntu/c_enviroment-master” to modify Makefile:
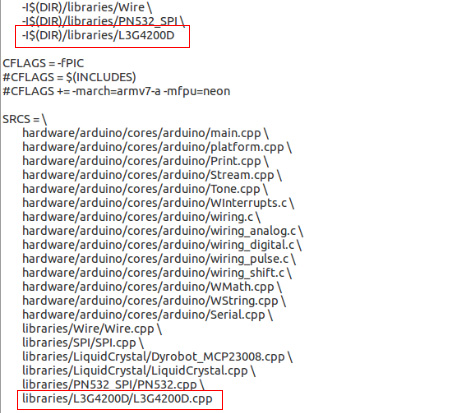
4. Enter into Arduino API directory “sample” to modify Makefile:
5. Enter into terminal to build the library:
ubuntu@ubuntu:~$ cd c_enviroment-master
ubuntu@ubuntu:~/c_enviroment-master $ make
6. Run the code in directory “test”:
ubuntu@ubuntu:~$ cd c_enviroment-master/output/test
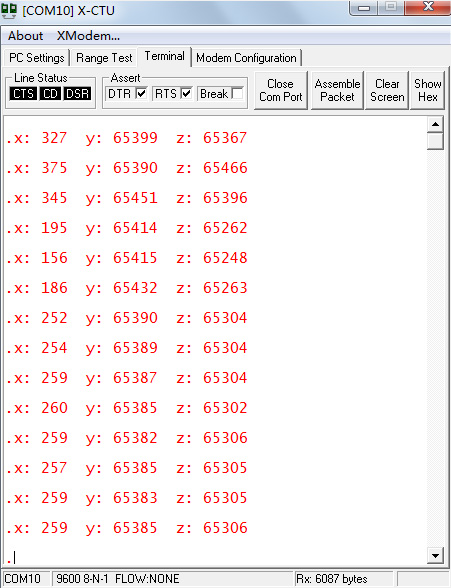
[/vc_column_text][/vc_tab][vc_tab title=”3-axis accelerator test” tab_id=”1381952862709-3-0″][vc_column_text]ubuntu@ubuntu:~c_enviroment-master/output/test$ ./adxl345_test
It will output results on the screen.
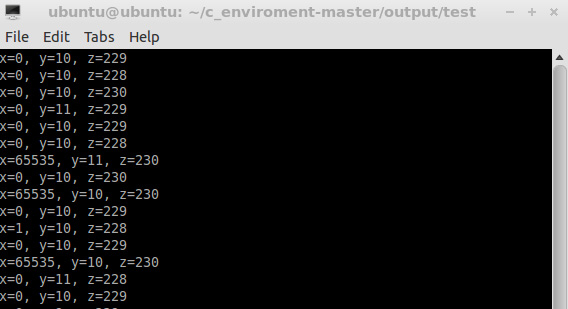 [/vc_column_text][/vc_tab][vc_tab title=”3-axis gyro test” tab_id=”1381952900050-4-2″][vc_column_text]ubuntu@ubuntu:~c_enviroment-master/output/test$ ./L3G4200D
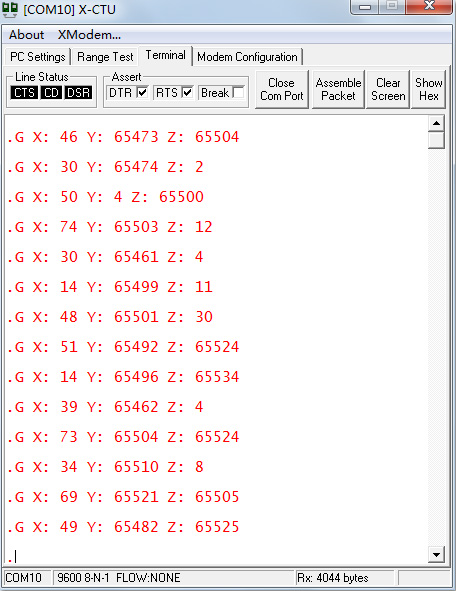 [/vc_column_text][/vc_tab][vc_tab title=”3-xias magnetic shield test” tab_id=”1381952911953-5-6″][vc_column_text]ubuntu@ubuntu:~c_enviroment-master/output/test$ ./HMC5883_test
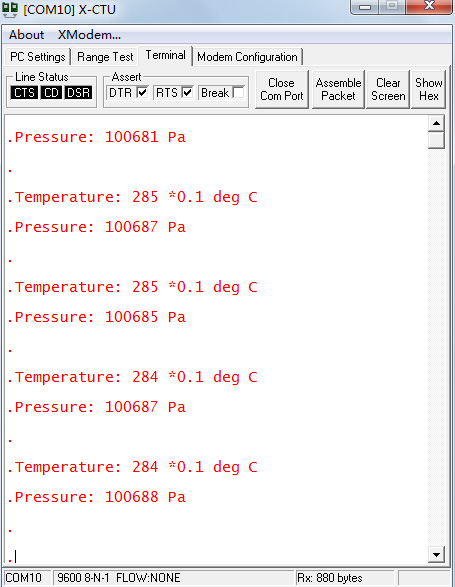
 [/vc_column_text][/vc_tab][vc_tab title=”Air pressure test” tab_id=”1381952923460-6-5″][vc_column_text]ubuntu@ubuntu:~c_enviroment-master/output/test$ ./BMP085_test
 [/vc_column_text][/vc_tab][/vc_tour][/vc_column][/vc_row]
Leave a Reply
You must be logged in to post a comment.