[vc_row][vc_column][vc_column_text]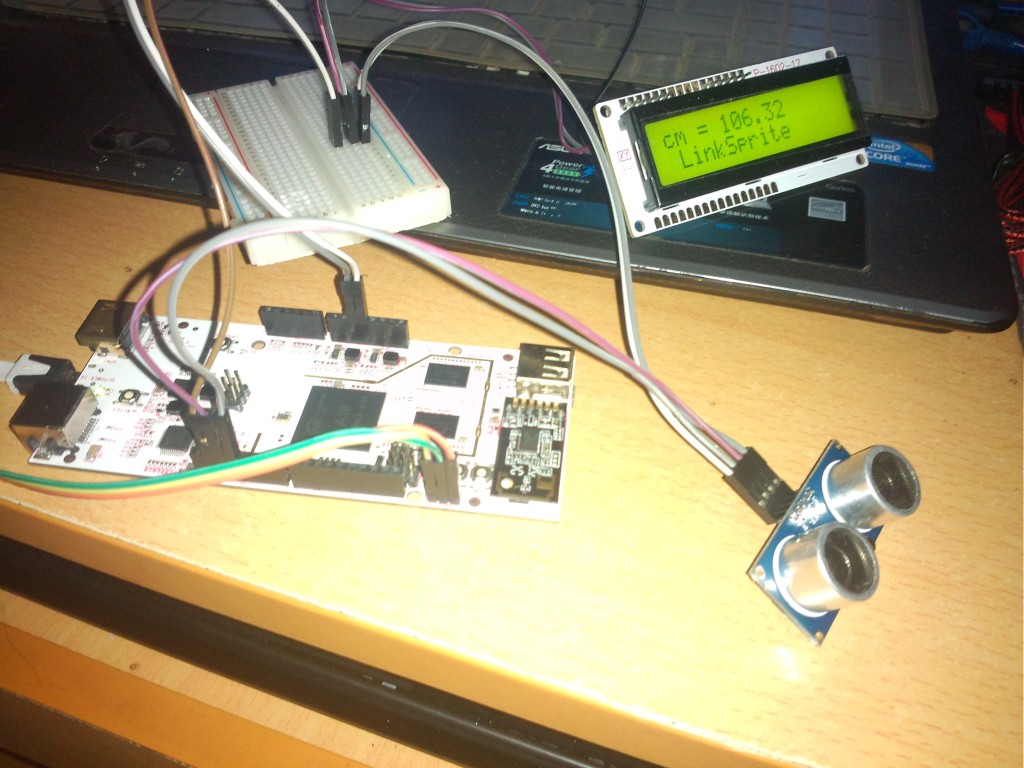 In this project, we will use a serial 16×2 LCD and ultrasonic ranging to do an interesting experiment.[/vc_column_text][/vc_column][/vc_row][vc_row][vc_column width=”1/1″ el_class=”Results”][vc_tour][vc_tab title=”Parts List” tab_id=”1394503810-1-24″][vc_column_text]
- 1 x [bigcommerce link=”/serial-basic-16×2-character-lcd-black-on-green-5v-uart/” target=”_blank”]Serial 16 × 2 LCD[/bigcommerce]
- 1 x HC-SR04 Ultrasonic Module
- 1 x [bigcommerce link=”/pcduino-v2-an-minipc-with-arduino-headers-ubuntu-android-google/” target=”_blank”]pcDuino v2[/bigcommerce]
- 1 x [bigcommerce link=”/protoshield-for-arduino-with-mini-breadboard/” target=”_blank”]Breadboard[/bigcommerce]
- Jumper wires
[/vc_column_text][/vc_tab][vc_tab title=”Wire Diagram” tab_id=”1394503810-2-9″][vc_column_text]
- ultrasonic module VCC —–>pcDuino +5 v
- ultrasonic module GND —–> pcDuino GND
- ultrasonic modules Trig—–> pcDuino D2
- ultrasound module Echo—–> pcDuino D3
- Serial 16 × 2 LCD +5 v —–> pcDuino +5 v
- Serial 16 × 2 LCD GND—–> pcDuino GND
- Serial 16 × 2 LCD RX—–> pcDuino TX
Because pcDuino only have a +5 v output port, so use a T-board to do voltage translation.[/vc_column_text][/vc_tab][vc_tab title=”Sample Code” tab_id=”1394505988024-2-5″][vc_column_text]
#include <core.h>

const int LCDdelay=10;
 const int TriPin = 2;
 const int EchoPin = 3;
 float cm;
 void lcdPosition(int row, int col) {
 Serial.write(0xFE); //command flag
 Serial.write((col + row*64 + 128)); //position
 delay(LCDdelay);
 }
 void clearLCD(){
 Serial.write(0xFE); //command flag
 Serial.write(0×01); //clear command.
 delay(LCDdelay);
 }
 void backlightOn() { //turns on the backlight
 Serial.write(0x7C); //command flag for backlight stuff
 Serial.write(157); //light level.
 delay(LCDdelay);
 }
 void backlightOff(){ //turns off the backlight
 Serial.write(0x7C); //command flag for backlight stuff
 Serial.write(128); //light level for off.
 delay(LCDdelay);
 }
 void serCommand(){ //a general function to call the command flag for issuing all other commands
 Serial.write(0xFE);
 }

void setup()
 {
 Serial.begin(9600);
 pinMode (TriPin, OUTPUT);
 pinMode (EchoPin, INPUT);
 }

void loop()
 {
 digitalWrite (TriPin, LOW);
 delayMicroseconds (2);
 digitalWrite (TriPin, HIGH);
 delayMicroseconds (10);
 digitalWrite (TriPin, LOW);
 cm = pulseIn (EchoPin, HIGH, 100000) / 58.0;
 cm = (int (cm * 100.0)) / 100.0;
 backlightOn ();
 clearLCD ();
 lcdPosition (0, 0);
 Serial.print (“cm = “);
Serial.print (cm);
 Serial.print (” LinkSprite”);
delay (1000);
 }
[/vc_column_text][/vc_tab][vc_tab title=”Results” tab_id=”1394505989558-3-5″][vc_column_text]When there is a object in front of the ultrasonic module , and pcDuino will show the distance on the Serial 16 × 2 LCD.[/vc_column_text][/vc_tab][/vc_tour][/vc_column][/vc_row]
Leave a Reply
You must be logged in to post a comment.