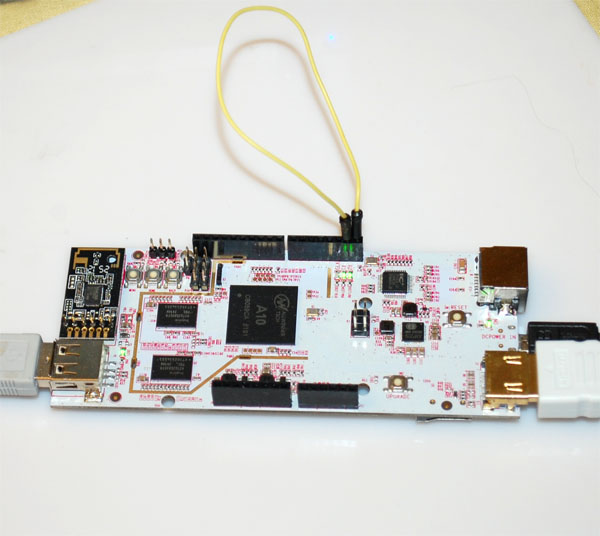
[vc_row][vc_column width=”1/1″][vc_column_text]In cases, we would like to do a quick test of pcDuino UART. Loop back is often a handy method. When doing loop back, we will connect RX to TX as the following:
 [/vc_column_text][vc_tour][vc_tab title=”Test Code” tab_id=”1388980772-1-14″][vc_column_text]
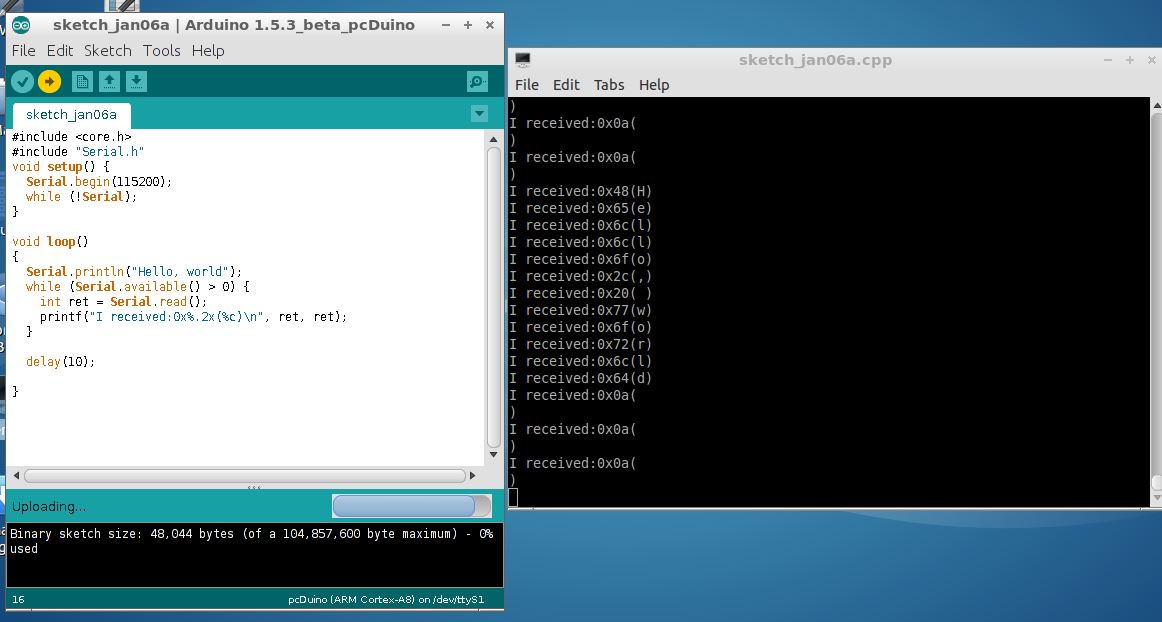
#include <core.h>

#include "Serial.h"

void setup() {

Serial.begin(115200);

while (!Serial);

}
void loop()

{

Serial.println("Hello, world");

while (Serial.available() > 0) {

int ret = Serial.read();

printf("I received:0x%.2x(%c)\n", ret, ret);

}
delay(10);
}
[/vc_column_text][/vc_tab][vc_tab title=”Results” tab_id=”1388980772-2-13″][vc_column_text]When we run the code, we can see the output on the screen:
 [/vc_column_text][/vc_tab][/vc_tour][/vc_column][/vc_row]
September 10, 2014 at 6:31 pm
Thank You!
This just answered my last two days of searching for an easy way to do inter process communication between Arduino-ish code and other processes running on the same pcDuino.
So simple, brilliant.