The original post can be found here.
Hardware setup
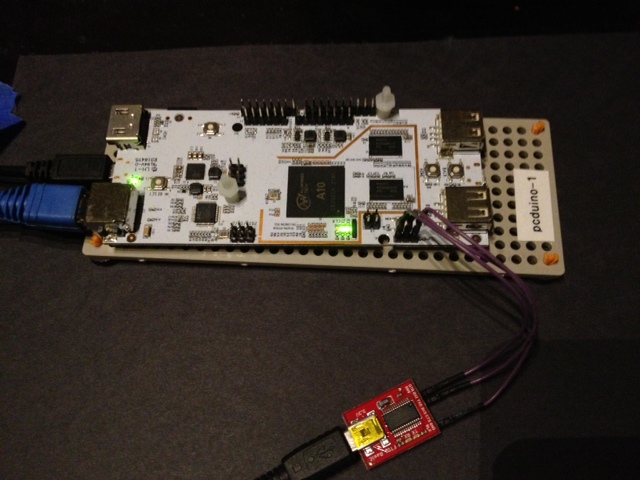
The image below shows my pcDuino hardware setup. Some notes:
- USB power (center left) is connected to 5V, 2 Amp power adapter.
- Ethernet (lower left) connection to LAN.
- FTDI basic 3.3V, connect RXI, TXO and GND to the pcduino debug port (lower right) at 115200 baud (8/1/N). Use this to watch boot process and as a root shell.
Ubuntu initial setup
Used PhoenixCard to install this 2013-1126 kernel and then install the matching Ubuntu image into the NAND flash as described in the pcDuino documentation.
The console cable connection provides a root shell. The commands below assume the root user is running them. If a non-root user is doing the setup, prepend sudo and otherwise adjust as necessary.
Micro SD card setup notes
- Insert (new) SD card after boot sequence complete.
- Beware of data loss!
- Use
fdisk /dev/mmcblk0to edit partitions of SD card. - Delete existing partitions; add new primary partition (defaults); write; quit.
- Format the new partition with
mkfs.ext4 /dev/mmcblk0p1.
- Use
- Edit the
/etc/fstabfile and add a line:/dev/mmcblk0p1 /media/sd ext4 rw,nosuid,nodev 0 0
- Reboot with
sudo shutdown -r now.- Do
ls -l /media/sdto verify SD card is now mounted in expected place. - Use
chmod ugo+w /media/sdto allow normal users to create files and directories on the SD card.
- Do
Package installation
Run the following commands to install components needed by the Napkin server (some of these may already be present):
apt-get update
apt-get install -y ssh git lsof
These next 2 dependencies are needed by the software floating point variant of the Java runtime (more on this in the Java setup section below):
apt-get install -y libc6-armel libsfgcc1
Disable unnecessary services
Edit /etc/rc.local and comment out the lines containing enable_otg, check_factory,dhcpd.
System configuration
To set the system timezone:
dpkg-reconfigure tzdata
Also need to increase open files limit (the value reported by running: ulimit -n). Edit /etc/security/limits.conf and add lines like this (replace ubuntu below with the userid you will use to run the Napkin server, if different):
ubuntu hard nofile 40000
ubuntu soft nofile 40000
You can set a password for the ubuntu user account like this:
passwd ubuntu
Reboot the system after editing the limits.conf file for the changes to take effect:
shutdown -r now
Login with ssh
For the rest of the configuration, login as the default ubuntu user, or other non-root user. Use ifconfig in console/root shell to determine DHCP assigned IP address.
Setup Java
I have tried both the hardware float and software float Oracle Java 7 JRE packages. With the hflt package, I am stuck on https://github.com/cjdaly/napkin/issues/3 . The sfltpackage seems to work as long as the libc6-armel and libsfgcc1 have been installed with apt-get (see above).
From the Oracle embedded downloads page, download the Java 7 for ARM, server, headless, software floating point download, ejre-7u45-fcs-b15-linux-arm-vfp-sflt-server_headless-26_sep_2013.gz on a separate system (download from web browser) and use sftp (Linux) or WinSCP (Windows) to copy it to the pcDuino.
On the pcDuino:
cd ~
mkdir java
cd java
mkdir sflt
cd sflt
Use the sftp client to copy the Java download to the directory just created. Then extract the download:
tar xvf ejre-7u45-fcs-b15-linux-arm-vfp-sflt-server_headless-26_sep_2013.gz
Setup Neo4J
cd ~
mkdir neo4j
cd neo4j
wget -O neo4j-community-2.0.0.tgz 'http://download.neo4j.org/artifact?edition=community&version=2.0.0&distribution=tarball'
tar xvf neo4j-community-2.0.0.tgz
cd neo4j-community-2.0.0/conf
Edit the neo4j-server.properties file and change the database location property value to use storage on the SD card:
org.neo4j.server.database.location=/media/sd/napkin-neo4j-db
Edit the neo4j-wrapper.conf file, uncomment and set values for the properties below:
wrapper.java.initmemory=128
wrapper.java.maxmemory=128
Also, add this line to the neo4j-wrapper.conf file:
wrapper.java.additional=-XX:MaxPermSize=48M
Now edit the neo4j.properties file and uncomment and set these values to constrain usage of memory mapped IO:
neostore.nodestore.db.mapped_memory=0M
neostore.relationshipstore.db.mapped_memory=0M
neostore.propertystore.db.mapped_memory=0M
neostore.propertystore.db.strings.mapped_memory=0M
neostore.propertystore.db.arrays.mapped_memory=0M
See Neo4j issue 1384 for more details on how these configuration settings were determined.
Setup JRuby (part 1)
cd ~
mkdir jruby
cd jruby
wget -O jruby-bin-1.7.9.tar.gz 'http://jruby.org.s3.amazonaws.com/downloads/1.7.9/jruby-bin-1.7.9.tar.gz'
tar xvf jruby-bin-1.7.9.tar.gz
Clone Napkin
Next, clone the napkin code from github:
cd ~
git clone https://github.com/cjdaly/napkin.git
Now add java, neo4j and jruby to the path, and confirm each one gives a reasonable version/status message.
source ~/napkin/server/sinatra/server-setup.sh
Setup JRuby (part 2)
Now install gems used by Napkin:
gem install --no-rdoc --no-ri rest-client sinatra json kramdown
Typical startup
cd ~/napkin/server/sinatra
source server-setup.sh
./napkin.sh -start systems/pcduino1
tail -f napkin.log
Typical shutdown
./napkin.sh -status
./napkin.sh -stop
.Net Gadgeteer serial sidekick
The pcduino1 Napkin system configuration is a pcDuino v1 model which is powering and talking to (via /dev/ttyS1 UART) the Fez Cerberus .Net Gadgeteer system originally known as cerb2.
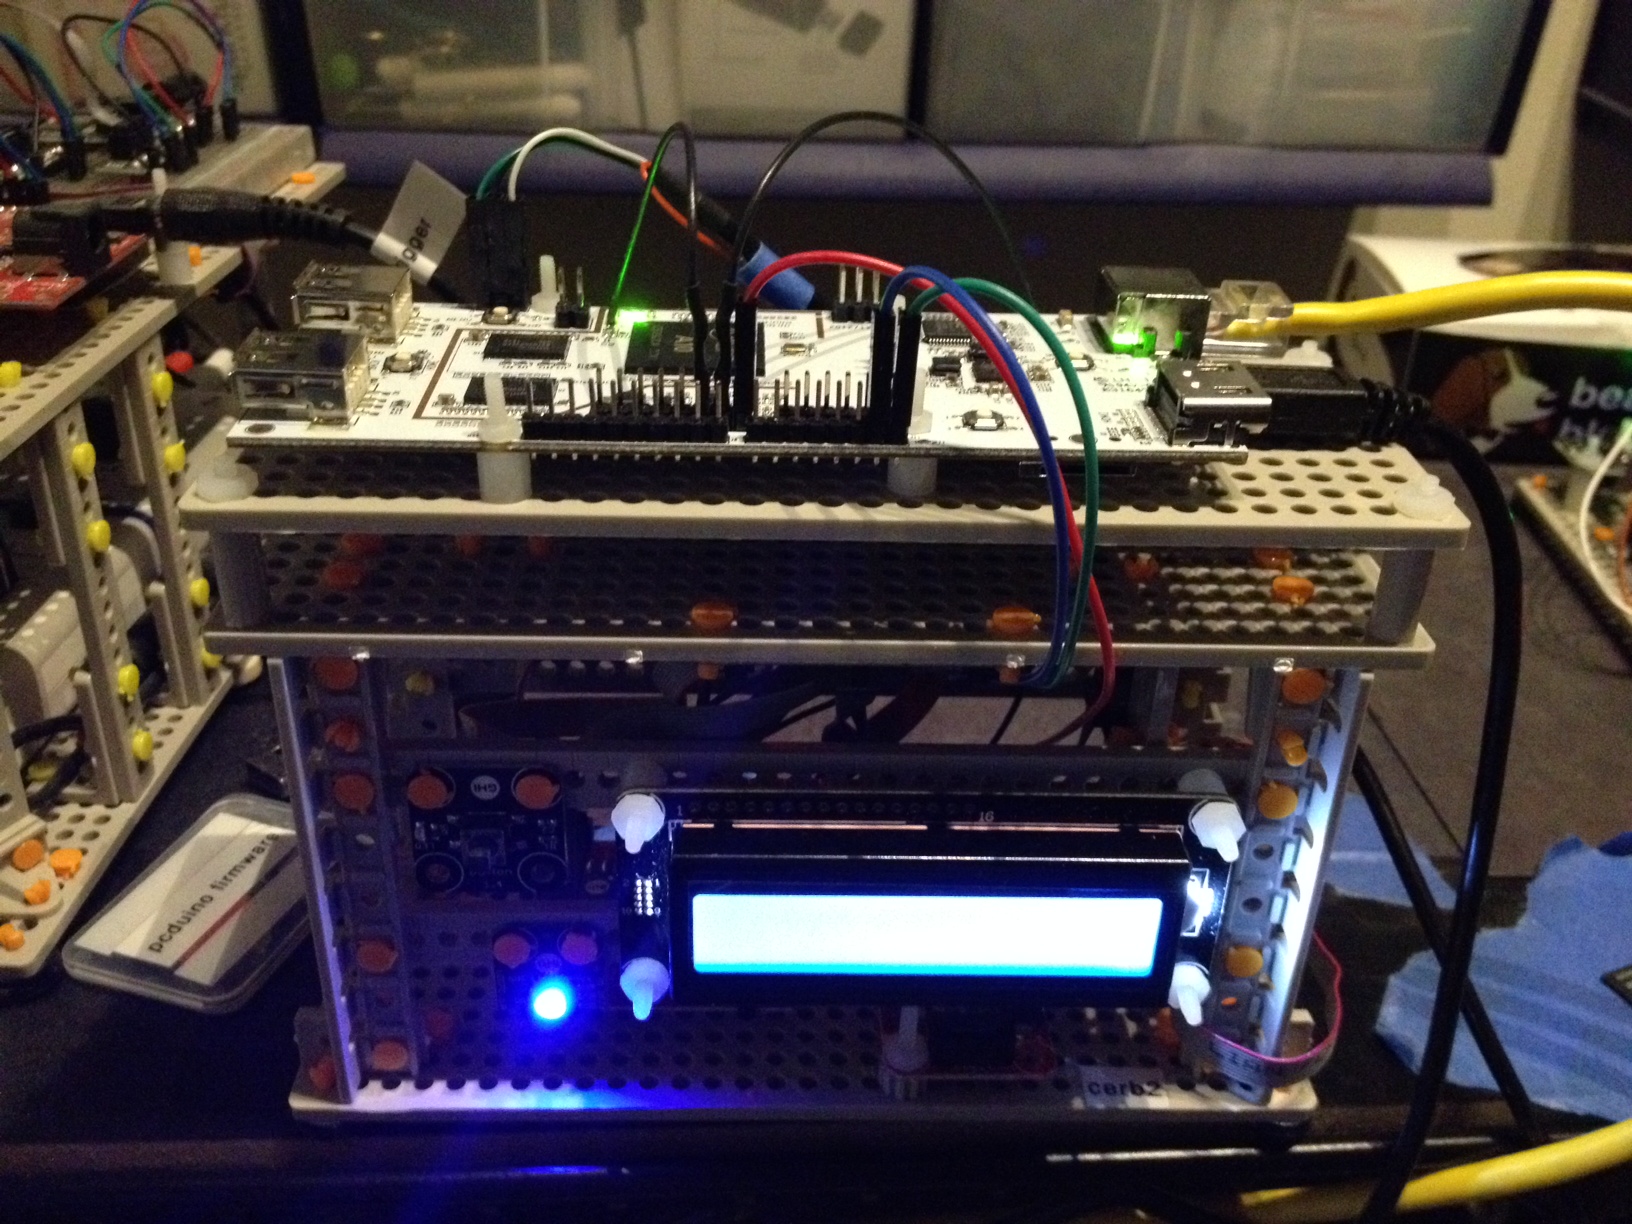
Fez Cerberus hardware
- socket 1: empty
- socket 2: Barometer
- socket 3: Button
- socket 4: GasSense
- socket 5: LCD 7
- socket 6: Breakout Module connected to pcDuino Arduino-ish RX, TX and GND pins per Gadgeteer U socket documentation
- socket 7: 2×16 LCD
- socket 8: USB client SP (power)
Serial port setup
Some black magic is involved in configuring the Arduino-ish RX and TX pins to work as the serial port /dev/ttyS1. I had the best success with the setuart2.c provided bybgreat in this forum post. I compiled this with gcc -o setuart2 setuart2.c. Currently need to run setuart2 on as root after each reboot to enable the serial port. Use cat /dev/ttyS1 to confirm Gadgeteer is periodically spewing out sensor data.
Here is a view from the back of the enclosure: 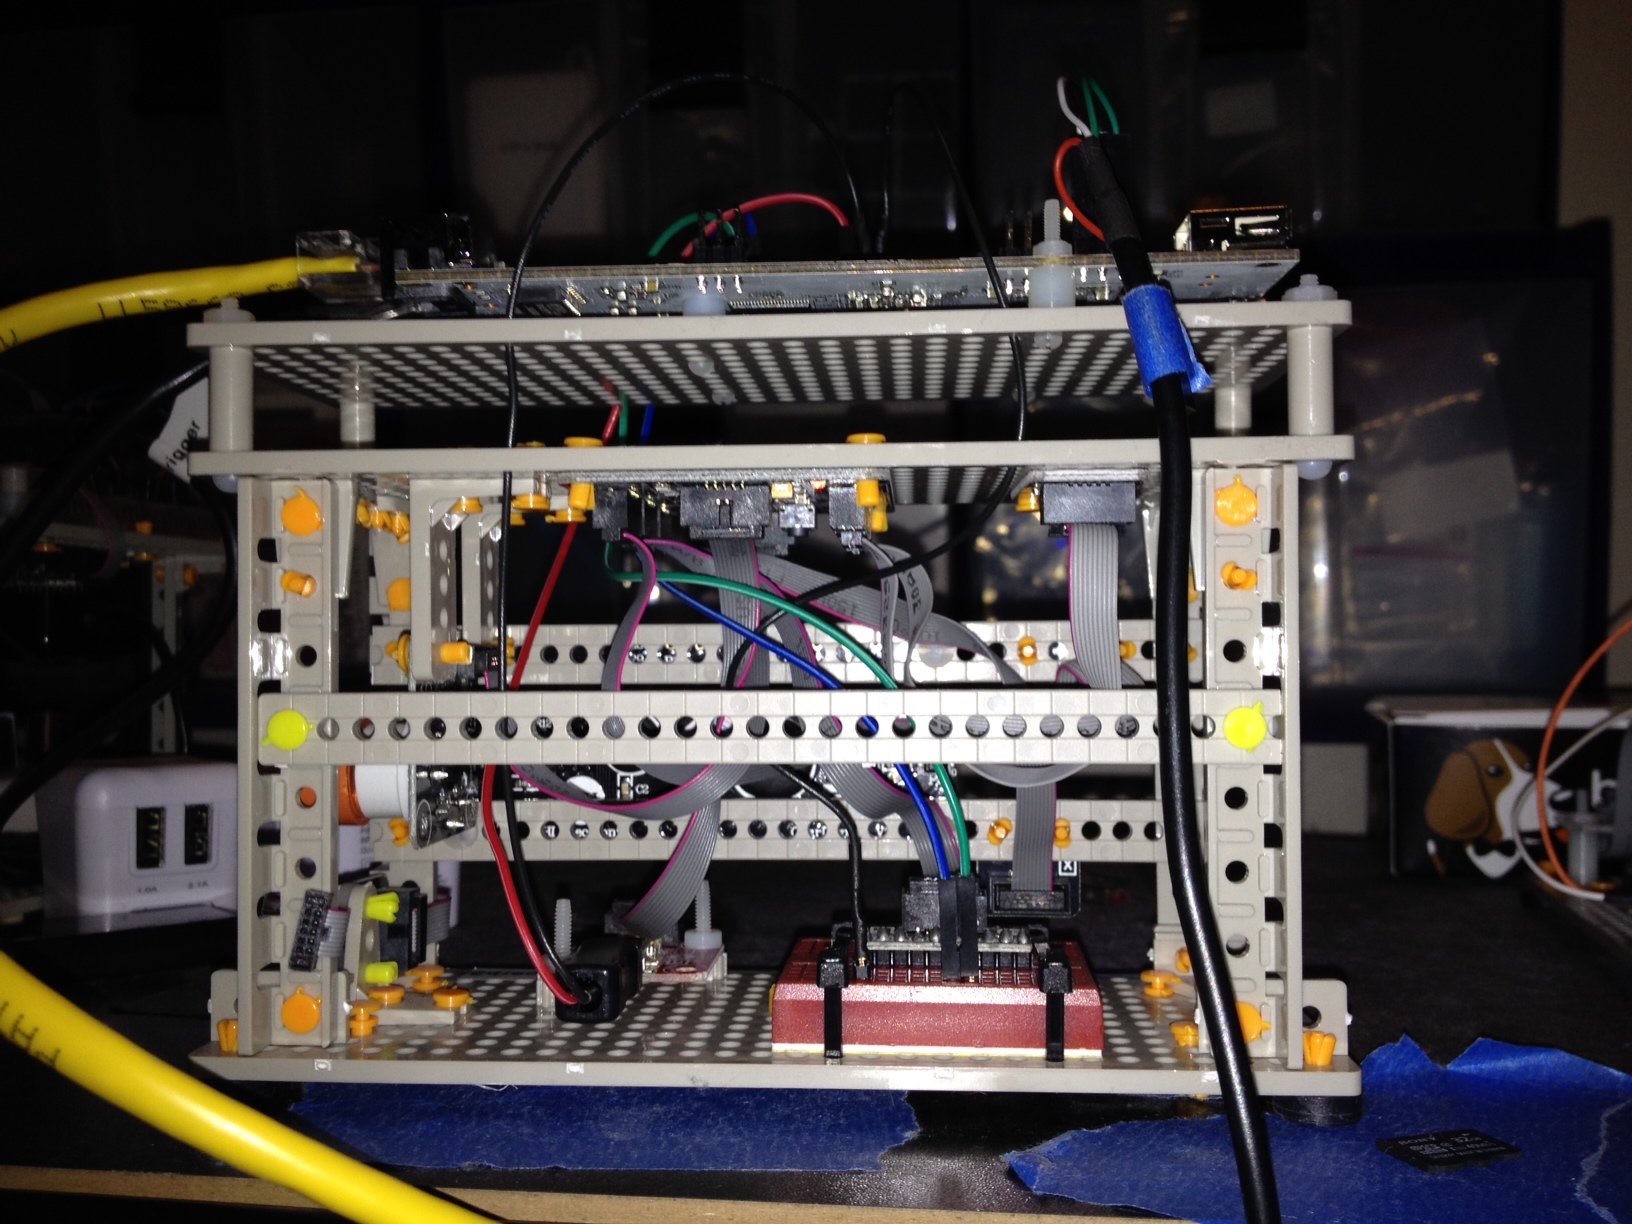
Leave a Reply
You must be logged in to post a comment.