[vc_row][vc_column width=”1/1″][vc_column_text]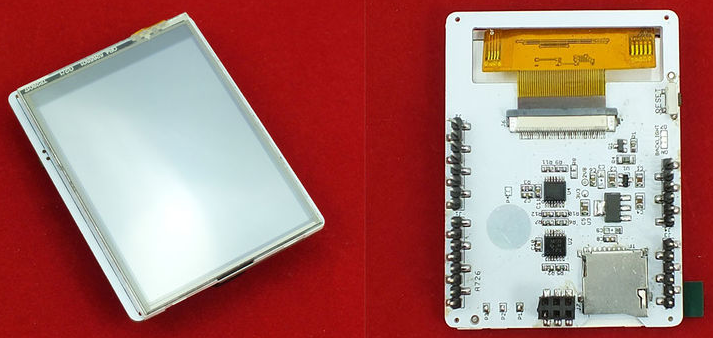
TFT LCD( Thin Film Transistor LCD) is one of the most widely used LCD, liquid crystal pixels on the LCD drive by the internal integration of thin-film transistor driver with high drive speed, can provide high-resolution, high-brightness, high-speed color image display. LinkSprite Touch LCD Shield module use ILI9341 chip with 320 × 240 resolution, 65K color display with a touch screen.[/vc_column_text][/vc_column][/vc_row][vc_row][vc_column width=”1/1″][vc_tour][vc_tab title=”Specification” tab_id=”1421630107-1-91″][vc_column_text]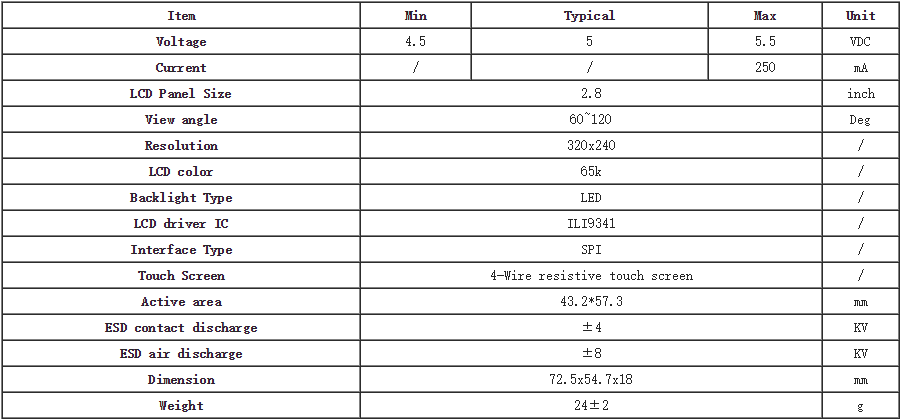 [/vc_column_text][/vc_tab][vc_tab title=”Hardware Preparation” tab_id=”1421630107-2-24″][vc_column_text]Hardware List
Touch LCD Shield X 1
Soldering station (electric iron, solder wire, etc.) X 1
When you use the Touch LCD Shield on pcDuino, you need solder these 3 points which on the back of the shield together, as the picture shown.
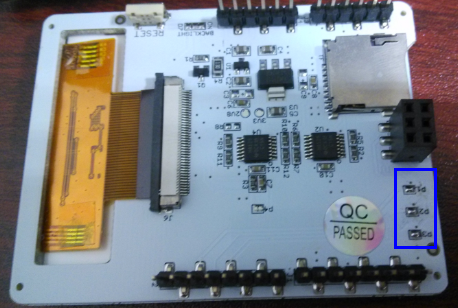
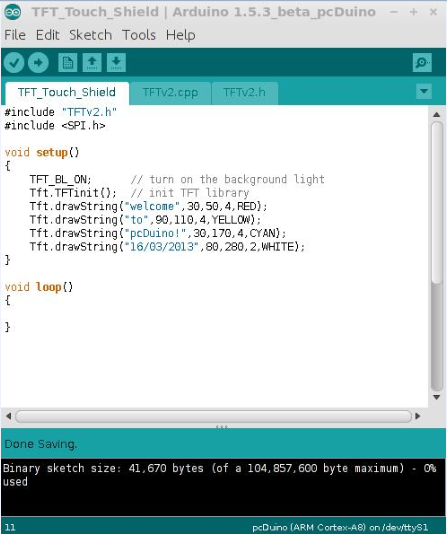
The 3 points is default not soldering at the factory. Arduino has a 2*3 pins with SPI interface, but pcDuino doesn’t have that SPI interface. When you soldered the 3 points, pcDuino will communicate Touch LCD Shield through GPIO 11, 12, 13.[/vc_column_text][/vc_tab][vc_tab title=”Test Code” tab_id=”1421631406833-2-5″][vc_column_text]This a part of the code, please download the complete code here:Code TFT_Touch_Shield
#include "TFTv2.h"
#include <SPI.h>

void setup()
{
    TFT_BL_ON;      // turn on the background light
    Tft.TFTinit();  // init TFT library
    Tft.drawString("welcome",30,50,4,RED);
    Tft.drawString("to",90,110,4,YELLOW);
    Tft.drawString("pcDuino!",30,170,4,CYAN);
    Tft.drawString("16/03/2013",80,280,2,WHITE);
}

void loop()
{

}
[/vc_column_text][/vc_tab][vc_tab title=”Test” tab_id=”1421721124052-3-8″][vc_column_text]
- Solder the 3 points on the back.
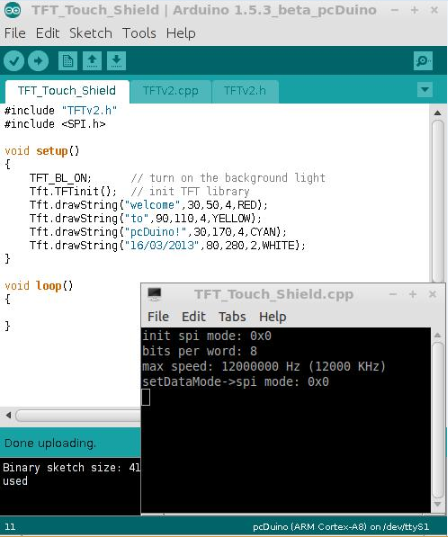
- Download the code into pcDuino
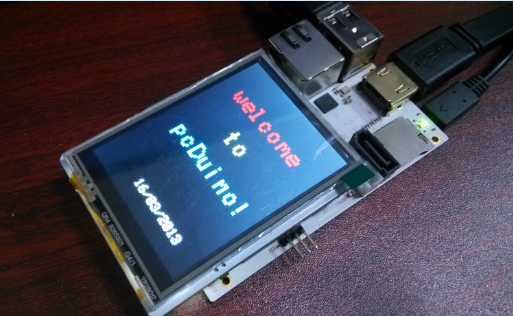
- Plug Touch LCD Shield into pcDuino, and open the test code by Arduino IDE.
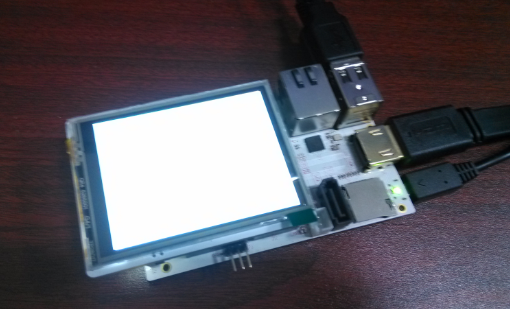
- Running, you will see as below:
[/vc_column_text][/vc_tab][/vc_tour][/vc_column][/vc_row]
Leave a Reply
You must be logged in to post a comment.