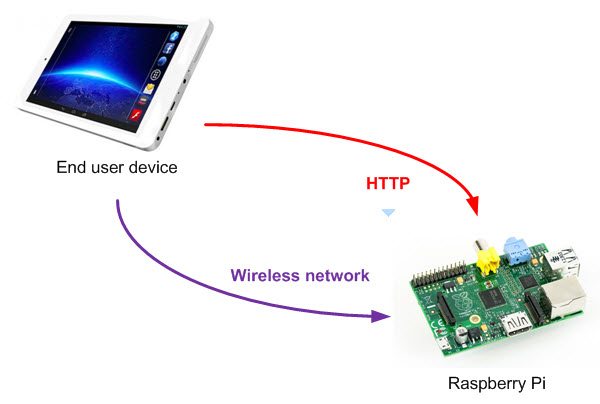
I’m working on a project based on a Raspberry Pi, controlled by an external device (laptop, smartphone…) and therefore I was looking for the most universal way to connect the device to the Raspberry. Thanks to a small usb->wifi adapter you can transform the Raspberry in a wireless access point that broadcasts a wireless network your device can connect to: in this post I’m going to explain you how to do that.
Wifi module
The Raspberry Pi doesn’t include a wifi adapter, so you need to buy a usb->wifi module.
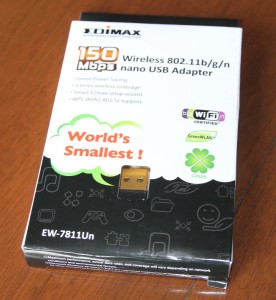
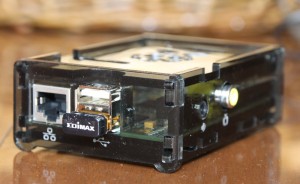
I chose the Edimax EW-7811Un, a very small and cheap (you can buy it for less than 10 euros fromAmazon) adapter:
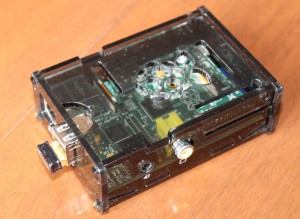
Thanks to its small size, the adapter juts out slightly when inserted in one of the Raspberry’s USB ports:
I installed the latest version of the Raspbian Linux distro and the adapter is automatically recognized (you can verify it running the dmesg command):

A new network device is created, named wlan0:

Network configuration
The new access point we’re going to configure broadcasts a network with the following settings:
- SSID: Pi_AP
- protection: WPA2-PSK
- password: PiPasswd
- IP addresses: DHCP (range 192.168.10.11-20, mask 255.255.255.0)
First you have to set a static IP address for the wlan0 interface, editing the /etc/network/interfaces file:
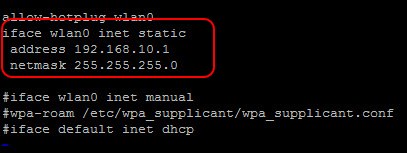
Reload the configuration with the following commands:
sudo ifdown wlan0
sudo ifup wlan0
DHCP and DNS
I chose dnsmasq as daemon for the DHCP and DNS services.
Before installing it, make sure your distribution is updated running the following commands:
sudo apt-get update
sudo apt-get upgrade
then install the software:
sudo apt-get install dnsmasq
Now change its config file (/etc/dnsmasq.conf) adding the following lines at the end:
interface=wlan0
dhcp-range=192.168.10.11,192.168.10.20,,255.255.255.0,24h
The first configures dnsmasq to listen only on the wifi interface, while the second configures the range of the IP addresses that dnsmasq provides and the lease time (24h).
Restart the deamon with:
sudo /etc/init.d/dnsmasq restart
Access Point
The access point functionalities are provided by hostapd:
sudo apt-get install hostapd

Create a new config file (<strong>/etc/hostapd/hostapd.conf</strong>) and add the following content:
interface=wlan0
driver=rtl871xdrv
ssid=Pi_AP
hw_mode=g
channel=6
macaddr_acl=0
auth_algs=1
ignore_broadcast_ssid=0
wpa=2
wpa_passphrase=PiPasswd
wpa_key_mgmt=WPA-PSK
wpa_pairwise=TKIP
rsn_pairwise=CCMP
Edit the /etc/default/hostapd file and uncomment the line that defines the path of the config file you’ve just created:

Unfortunately the hostapd shipped with Raspian does not support my adapter: you have to compile the version provided by Realtek (that is the manufacturer of the chipset the adapter uses).
Download from the official website the Linux version of the driver (scroll down the page until you find theRTL8188CUS chipset):
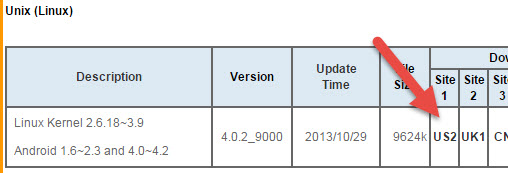
Copy the downloaded file into the /tmp directory. Run the following commands (change the filename with the one you downloaded if different) to unzip the different packages:
sudo unzip RTL8188C_8192C_USB_linux_v4.0.2_9000.20130911.zip
cd RTL8188C_8192C_USB_linux_v4.0.2_9000.20130911/
cd wpa_supplicant_hostapd/
sudo tar -xvf wpa_supplicant_hostapd-0.8_rtw_r7475.20130812.tar.gz
cd wpa_supplicant_hostapd-0.8_rtw_r7475.20130812
cd hostapd

Now you can start the compilation process and wait until it ends:
sudo make
sudo make install

Copy the compiled version of hostapd overwriting the old one:
sudo mv hostapd /usr/sbin/hostapd
sudo chown root.root /usr/sbin/hostapd
sudo chmod 755 /usr/sbin/hostapd
Now you can test the configuration running the hostapd daemon in console mode:
sudo /usr/sbin/hostapd /etc/hostapd/hostapd.conf
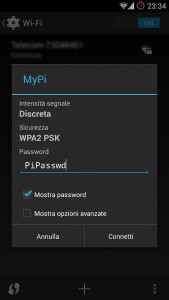
If everything works, the new wifi network will be available and you’ll be able to connect:
At the end, you can configure Linux to run the hostapd daemon at the boot:
sudo update-rc.d hostapd enable
For more details,please refer to original post
http://www.lucadentella.it/en/2014/11/12/raspberry-pi-come-access-point/


Leave a Reply
You must be logged in to post a comment.