What is Pelco-D protocol?
https://youtu.be/7wNBW7eB8G8
Pelco-D is a popular PTZ (Pan/Tilt/Zoom) camera control protocol used in the surveillance industry.
Pelco-D consists of 7 hexadecimal bytes
The format would be showed in the following table:
| Byte 1 | Byte 2 | Byte 3 | Byte 4 | Byte 5 | Byte 6 | Byte 7 |
| Sync |
Camera Address |
Command 1 | Command 2 | Data1 | Data 2 | Checksum |
Note: All of bytes are hexadecimal format in this protocol.
- Byte 1 -Sync: the synchronization byte, which always FF
- Byte 2 -Camera Address: logical address of the camera being controlled
- Byte 3 -Command 1: different command actions, such as Iris close,iris open.
- Byte 4- Command 2:different command actions,such as pan left, pan right.
Note: the detail information of Command 1 and Command 2
As Command 2 for an example, if you want to set camera to pan right.
Pan Left – 0 0 0 0 0 0 1 0, which equals to 02, so that the Byte4 is 02.
| Command 1 | Command 2 | |
| Bit 7 | Sense | Focus Far |
| Bit 6 | Reserved | Zoom Wide |
| Bit 5 | Reserved | Zoom Narrow |
| Bit 4 | Auto/Manual Scan | Tilt Down |
| Bit 3 | Camera On/Off | Tilt Up |
| Bit 2 | Iris Close | Pan left |
| Bit 1 | Iris Open | Pan right |
| Bit 0 | Focus Near | 0 |
- Byte 5 -Data 1: pan speed, range from 00 (stop) to 3F (high speed) and FF for “turbo” speed (the maximum pan speed that the device can go)
- Byte 6 -Data 2: tilt speed, range from 00 (stop) to 3F (maximum speed)
- Byte 7 -Checksum: sum of bytes 2 to bytes 6, then modulo 100 (checksum= MOD{(byte2+byte3+byte4+byte5+byte6)/100H})
Here are some of Pelco D standard commands for address 1 (0x01).
STOP – FF 01 00 00 00 00
LEFT – FF 01 00 04 3F 00
RIGHT – FF 01 00 02 3F 00
UP – FF 01 00 08 00 3F
DOWN – FF 01 00 10 00 3F
LEFT-UP – FF 01 00 0C 3F 3F
RIGHT-UP – FF 01 00 0A 3F 3F
RIGHT-DOWN – FF 01 00 12 3F 3F
LEFT-DOWN – FF 01 00 14 3F 3F
AUTOSCAN – FF 01 10 00 00 00
ZOOM+: FF 01 00 20 00 00
ZOOM-: FF 01 00 40 00 00
FOCUS+: FF 01 00 08 00 00
FOCUS- :FF 01 01 00 00 00
How to use Pelco-D protocol to control rotating bracket
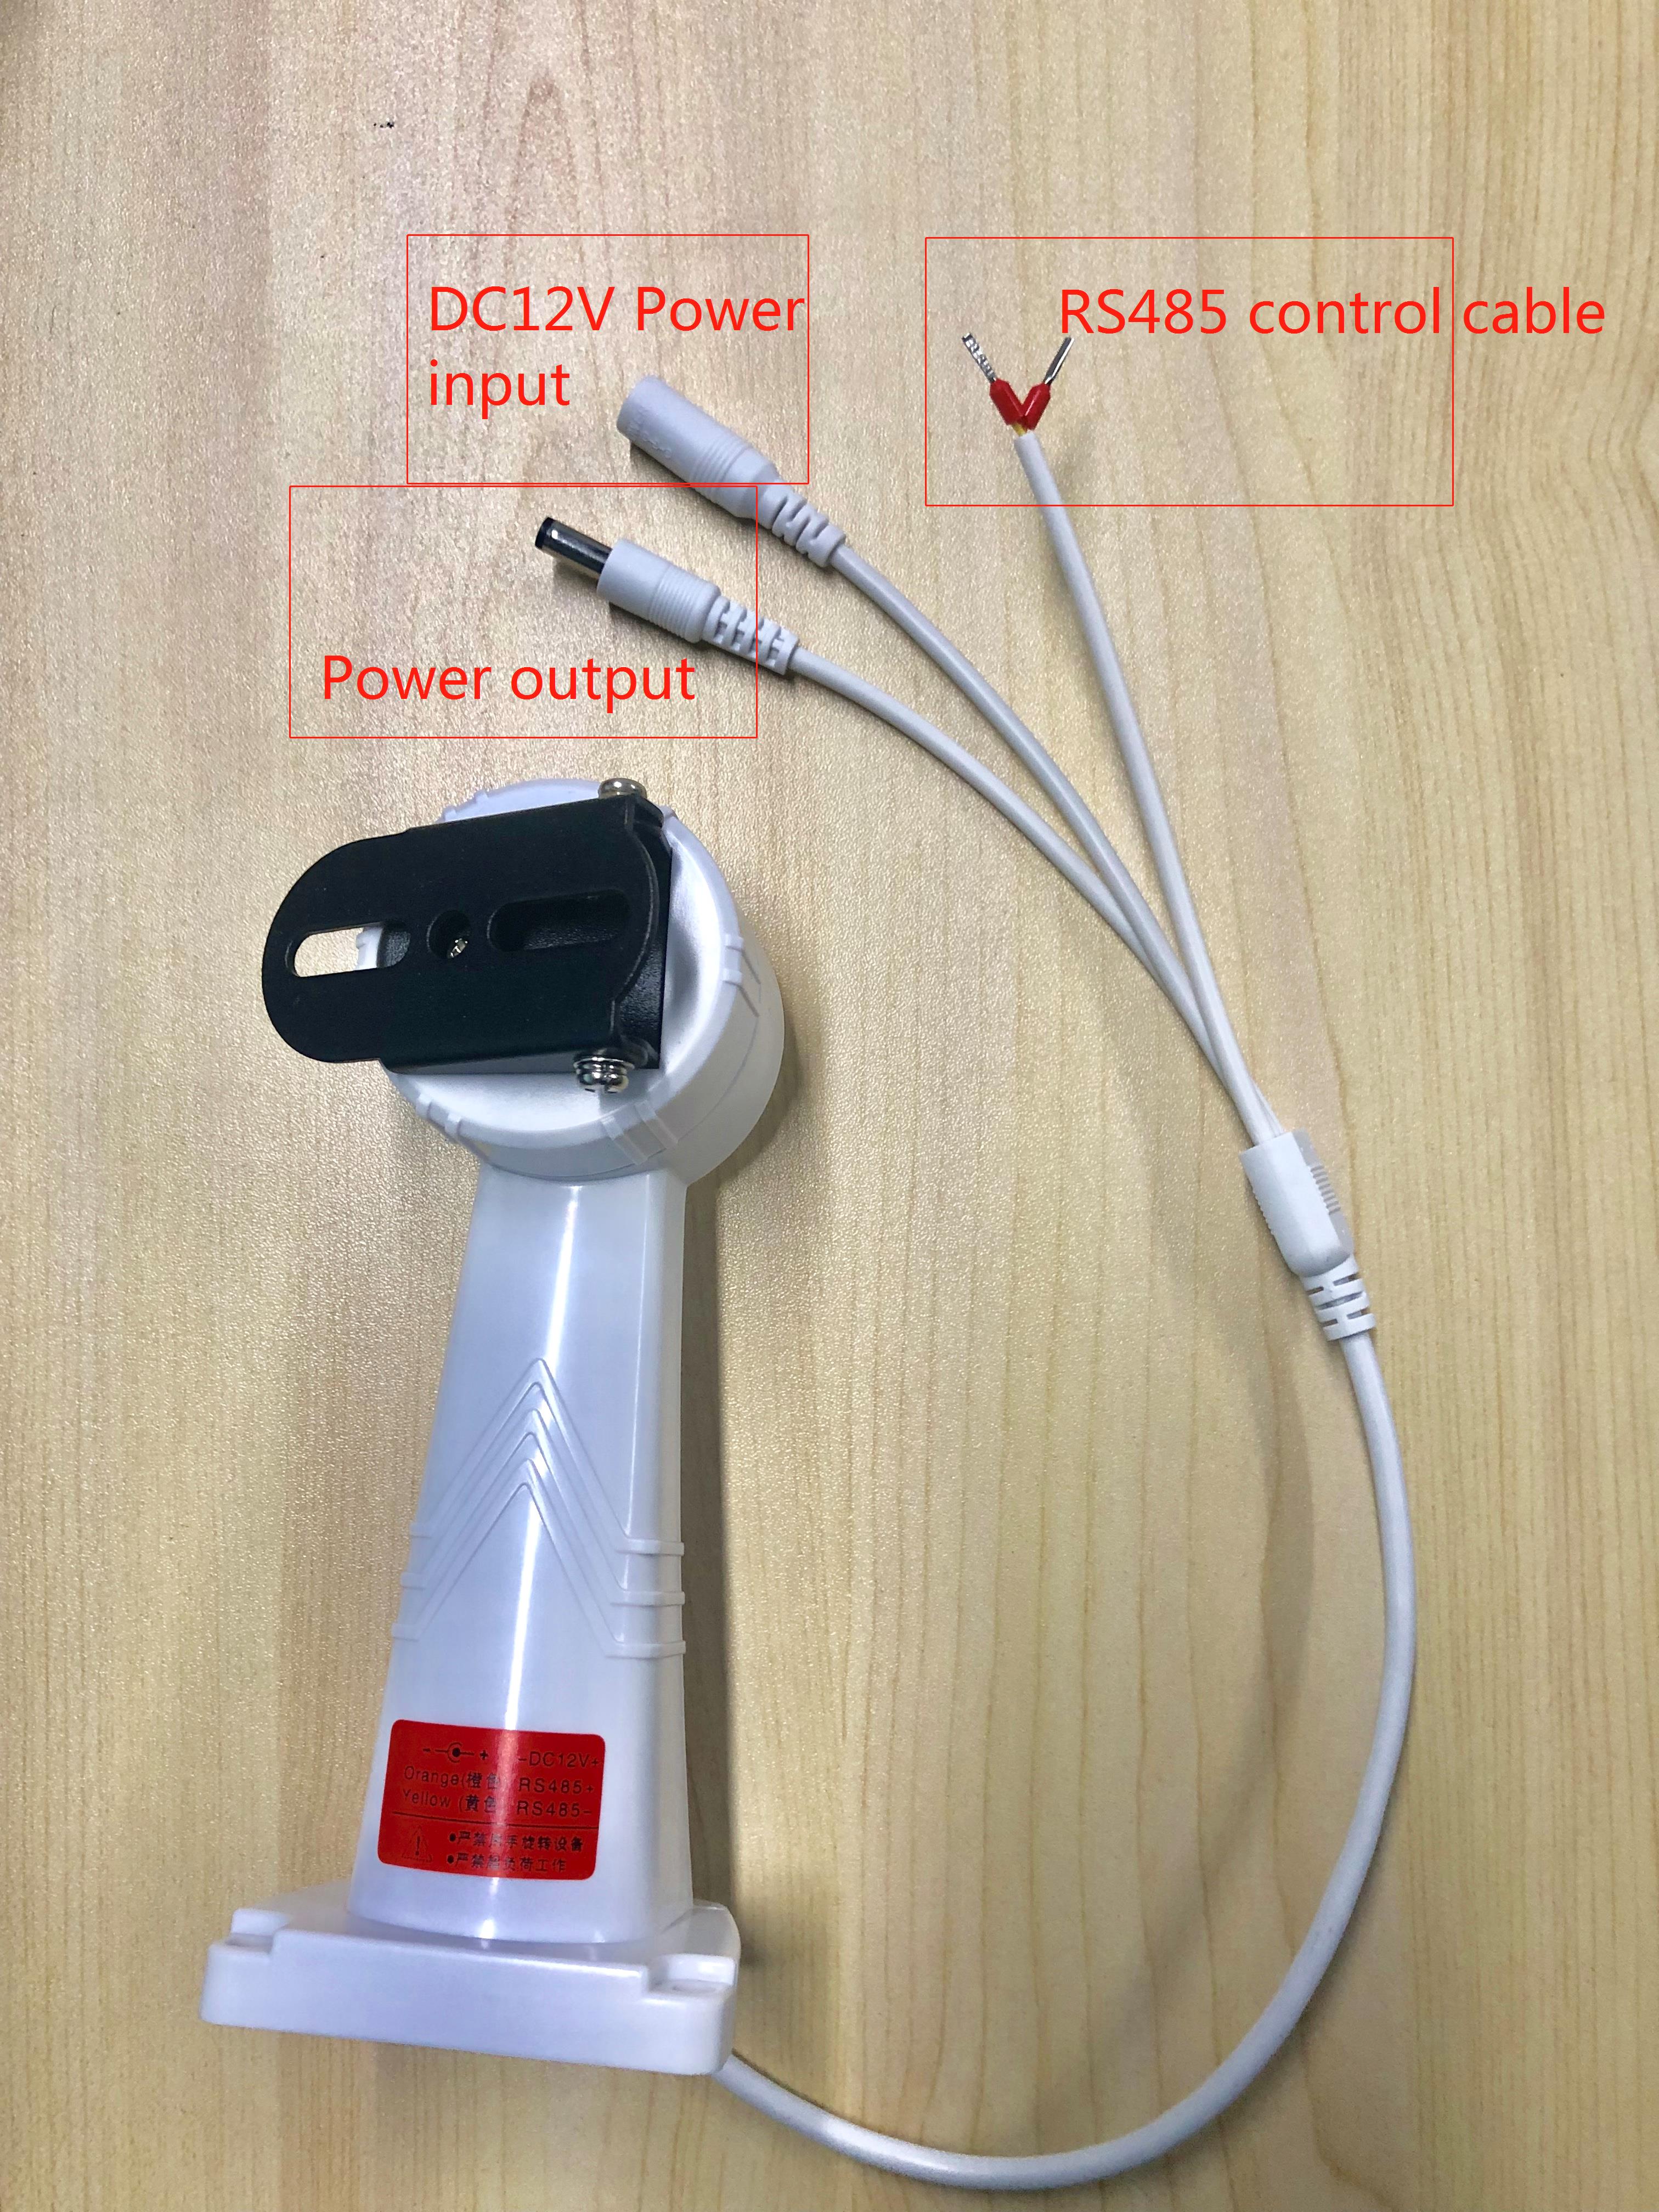
Note: This electrical rotating bracket only support:
① Pelco-d protocol.
② Address 1.
③ 2400 baud rate.
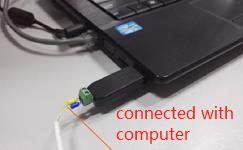
Step1: Be sure your Pan/Tilt bracket connected with your computer by USB to RS 485 Controller. (you need an USB to RS 485 controller in this part.) (Note: The following pictures would be more clear after you click it)

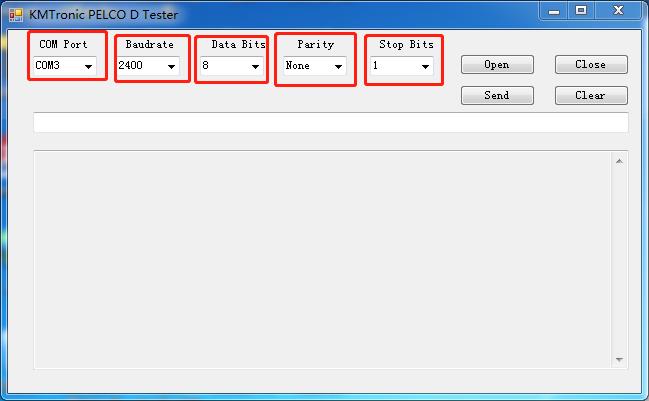
Step 2: Download, install and launch this tool. (Download Address: https://deepcam123.s3.amazonaws.com/KMTronic_PelcoD_Tester/KMTronic_PelcoD_Tester.zip) Make sure your COM port settings in the tool matches with camera’s settings (Pelco-D cameras use No parity, 8 Data bits and 1 Stop bit, baud rate is 2400)
Step 3: Click “open” button to open the port.
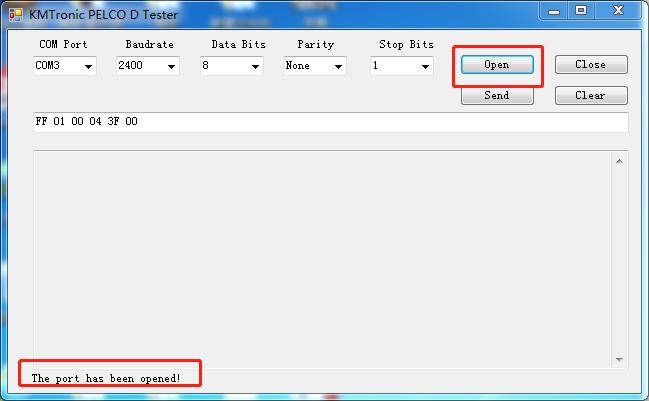
Step 4: Input the above standard commands into the box, and click “send” button. You don’t need to calculate the checksum for each command. The Checksum will be added and sent out automatically in this tool.
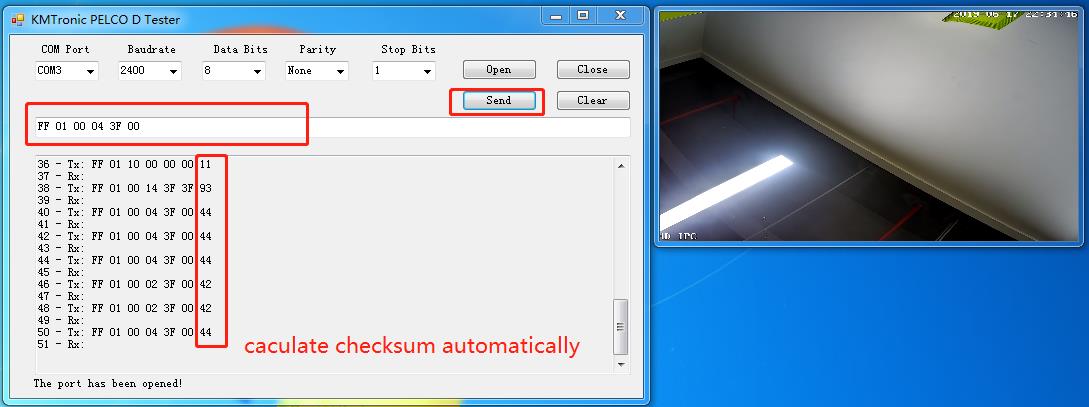
Step 5: You can control your bracket rotation via different commands.
https://youtu.be/wsSu1rd9wW0

Leave a Reply
You must be logged in to post a comment.