[vc_row][vc_column][vc_column_text]Many PCB services now are able to produce custom shaped PCBs: for example Seeedstudio’s FusionPCB service (I’ve already blogged about it) in the past published photos of round PCBs… and even doll-shaped ones:

In this tutorial I’m going to show how to draw custom shaped PCB using Inkscape and Eagle.[/vc_column_text][/vc_column][/vc_row][vc_row][vc_column][vc_tta_tour][vc_tta_section title=”Workflow” tab_id=”1463104103584-84fec124-fa0e”][vc_column_text]Eagle’s PCB editor doesn’t offer advanced drawing tools (Bezier curves…); that’s the reason why I’ll to draw the PCB shape in Inkscape, save my drawing in DXF format and, using an ULP script, import it in Eagle:
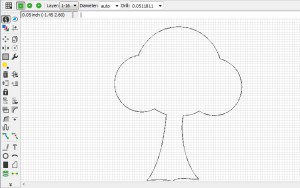
 [/vc_column_text][/vc_tta_section][vc_tta_section title=”Inkscape” tab_id=”1463104103638-22a4f68d-881d”][vc_column_text]After having traced the PCB shape in Inkscape, select all the drawing (CTRL-ALT-A) and convert objects and strokes to path:

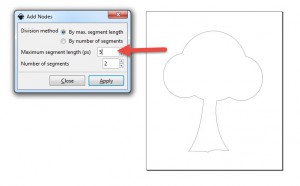
Choose now the node editor tool (F2) and select again all the nodes (CTRL-A). The ULP plugin importssegments, therefore you need to add to the drawing a number of nodes enough to have well-defined curves (for example a circle with only 4 nodes would be imported as a diamond!)
Run the extension Modify Path – Add Nodes and type a value between 5 and 10px (depending on the size of the drawing and its complexity) as the maximum segment length:
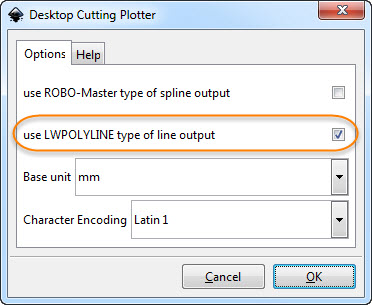
Then save the drawing in DXF format and make sure the use LWPOLYLINE option is checked:
 [/vc_column_text][/vc_tta_section][vc_tta_section title=”Eagle” tab_id=”1463104111345-2f048f66-8ec3″][vc_column_text]Download the import-dxf script from Github and save it in the ulp subfolder within the folder where Eagle was installed.
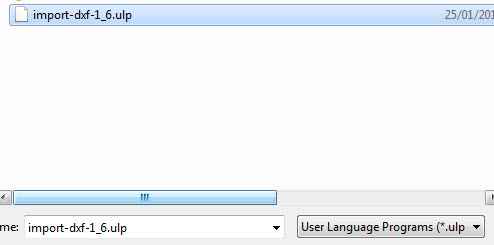
From the Eagle’s PCB editor, click on File – Open ULP and choose the script you’ve just downloaded:
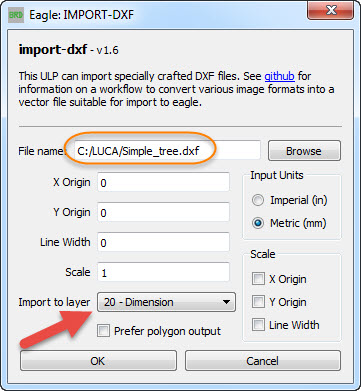
Load the DXF file and choose 20 – Dimension ad the layer where the drawing will be imported to:
The final result:
 [/vc_column_text][/vc_tta_section][/vc_tta_tour][/vc_column][/vc_row][vc_row][vc_column][vc_column_text]For more details,please refer to original post
http://www.lucadentella.it/en/2015/01/31/pcb-non-rettangolari-grazie-a-inkscape-e-eagle/[/vc_column_text][/vc_column][/vc_row]
Leave a Reply
You must be logged in to post a comment.