On the market you can now find leds that also include a control chip (WS2811, WS2812, APA106…).
The main advantages of this kind of leds are:
- you can control them using just one digital pin
- they can be connected in cascade but still individually controlled
- they can be supplied with 5V without the need of external resistors (like the “normal” leds)
Leds
Troniqa sells 8mm RGB leds that include an APA106 chip: in this short tutorial I’ll explain you how to control them with Arduino.
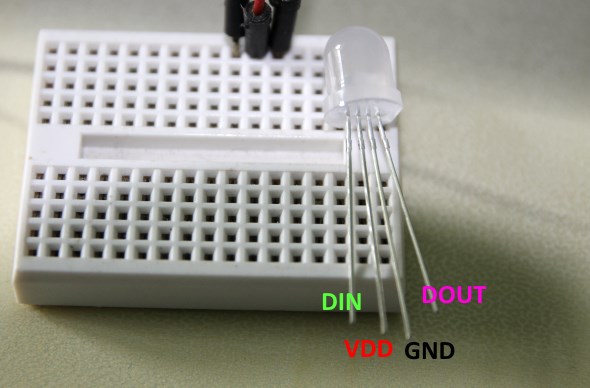
Each led has 4 pins:

The connection is simple: power (5V and ground) must be connected to VDD and GND pins.
DIN and DOUT (data-in e data-out) pins are the control pins: to connect the leds in cascade, you must connect the DOUT pin of the first led to the DIN pin of the second and so on… The DIN pin of the first led must be connected to Arduino while the DOUT pin of the last led can be left unconnected.
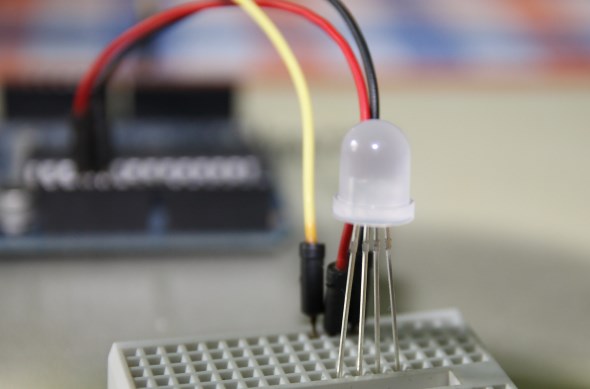
In this example I’ll use one led put on a breadboard and pin 6 of my Arduino to control it:

Arduino
Adafruit developed an Arduino library (NeoPixel) to drive this kind of leds.
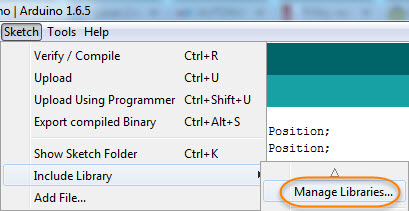
If you have an updated IDE, you can install the library through the Library Manager:

With the search function, you can find the Adafruit NeoPixel library; install it with a click on the Install button:

The usage of the library is very simple: define the number of leds that you want to drive, the Arduino pin you’re going to use and create a new instance of the Adafruit_NeoPixel object:
#define PIN            6
#define NUMPIXELS      1
Adafruit_NeoPixel pixels = Adafruit_NeoPixel(NUMPIXELS, PIN, NEO_GRB + NEO_KHZ800);

void setup() {
  pixels.begin();
}
|
Adafruit published a fantastic tutorial that explains all the features of the library. For this blog post, I developed a simple sketch (you can download it from Github) that changes the color of the led through all the color wheel:

Leave a Reply
You must be logged in to post a comment.