1. First, make sure that you have successfully created the store and added device, as shown in the following figure:


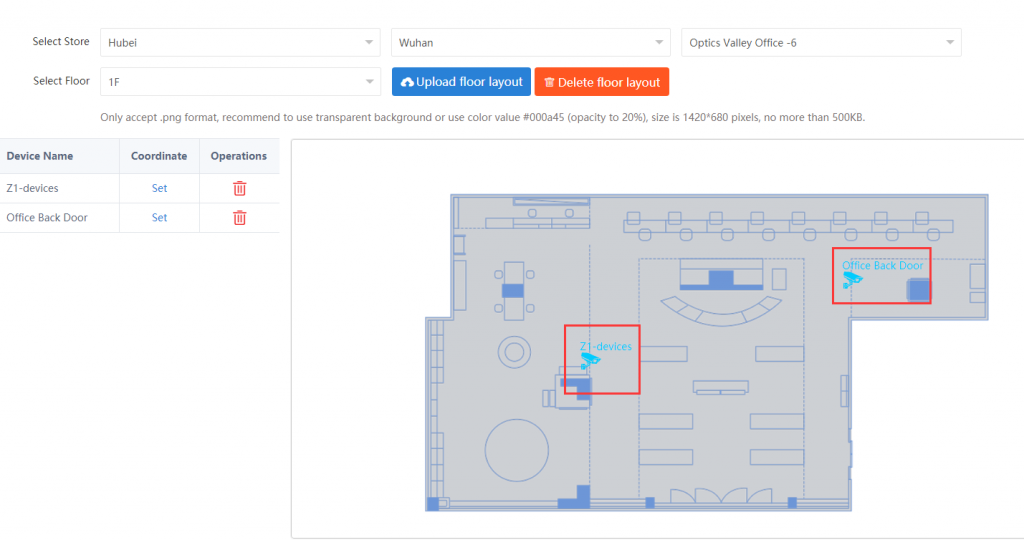
2. Click “Store Layout”,choose the stores and floors you want to add layout,then click “Upload floor layout”, as shown below,
(Note: Only accept .png format, recommend to use transparent background or use color value #000a45 (opacity to 20%), size is 1420*680 pixels, no more than 500KB.)
After successful upload, as shown below,
3. Then, click on “+” at the back of the device, then according to the actual installation location of the device in the floor, click on the corresponding location in the layout map, as shown below,


4. Click on “Settings” – “Dashboard Settings” – “Configure a New Dashboard”, then fill in the store information you want to set up according to the requirements, as shown below,


After successful setup, as shown below,

5. If you have multiple stores and dashboards in your account, you can click on the green icon behind the corresponding store in the dashboard list to set the default dashboard store, as shown in the figure below

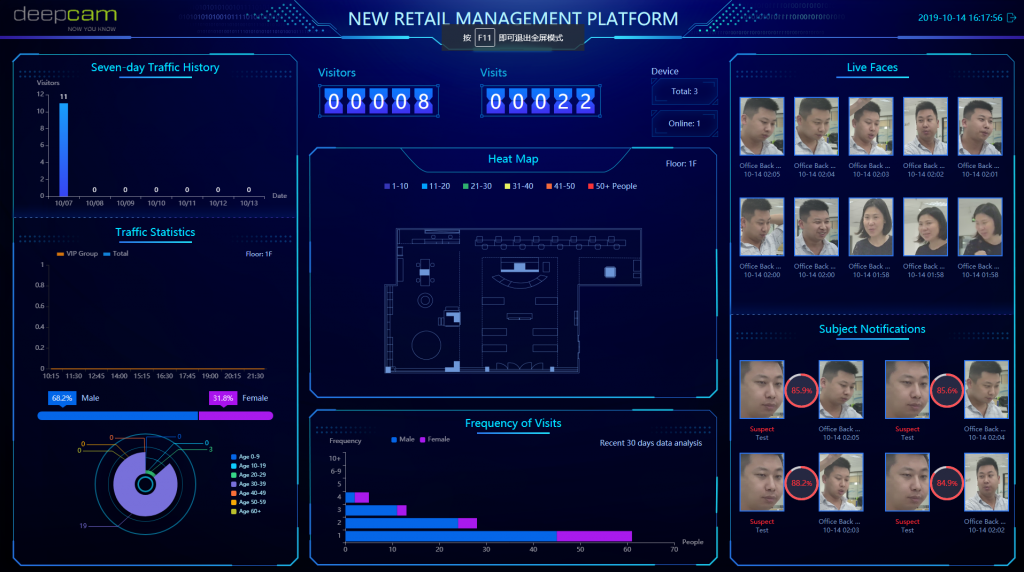
6. After setting up the default dashboard store, you can click on “Settings” – “Dashboard Settings” – “Dashboard” (or click on “Store Management” – “Store Layout” – “Dashboard”) to open the Visual Statistics Display Panel for Default Dashboard Stores, as shown below,


Leave a Reply
You must be logged in to post a comment.