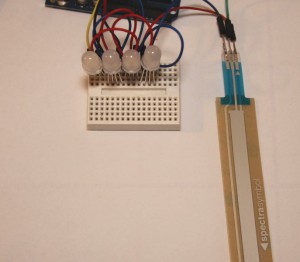
I found that Troniqa webshop sells a membrane potentiometer named SoftPot (datasheet):

This potentiometer, that is available in lengths of 10 and 20cm, changes its resistance depending on the point on which pressure is applied.
The connection to Arduino is very simple and doesn’t differ from what is explained in the official tutorial for a “normal” potentiometer: I connected 5V to pin 1 (indicated by the arrow), an Arduino’s analog pin to the central pin and the ground to pin 3.
The value you read in the sketch using the analogRead function varies from 0 to 1023, depending on the point the membrane of the potentiometer is pressed on.
To demonstrate a practical use of SoftPot, I prepared a simple circuit using the APA106 leds I’ve already presented in a previous post.
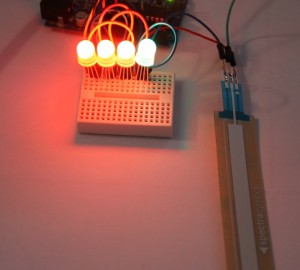
I cascaded 4 leds and connected the DIN pin of the first one to pin 6 of my Arduino. I then connected SoftPot as described above, using the AN0 pin of Arduino:
The sketch (available on Github) turns on the leds depending on the value read from the potentiometer… to make the result more similar to an audio v-meter, the first 3 leds have a red color, while the last one a green color.
To create the lighting effect, the value read is divided into 4 “zones”, each one with 256 values. Each zone refers to one of the leds:
int potValue = analogRead(A0);
if(potValue < 256) {
 pixels.setPixelColor(0, pixels.Color(potValue, 0, 0));
 [...]
else if(potValue < 512) {
 pixels.setPixelColor(1, pixels.Color(potValue - 256, 0, 0));
 [...]
else if(potValue < 768) {
 pixels.setPixelColor(2, pixels.Color(potValue - 512, 0, 0));
 [...]
else {
 pixels.setPixelColor(3, pixels.Color(0, potValue - 768, 0));
|
Here’s a video that shows the result:


Leave a Reply
You must be logged in to post a comment.