Today’s tutorial, split in two parts, will explain how to use a webcam with your Arduino Yun.
Choose the webcam
The Linux distribution (Linino) running on the Yun supports the webcams using the UVC driver: the complete list of the compatible webcams is available on its official page.
It is not actually supported the Gspca driver; support for that is planned and will be available soon.
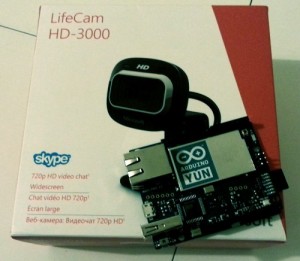
I chose – after having read positive tests by other users – the Microsoft LifeCam HD-3000 webcam, available for about 20 euros:
Install the software
Before connecting the webcam, you must install some software packages on your Arduino Yun. The installation can be performed from the command line (using an SSH connection) or via GUI… for this tutorial I chose the latter.
With your favorite browser, connect to the Arduino’s web interface and, after having inserted its password, click on Configure, then advanced configuration panel:

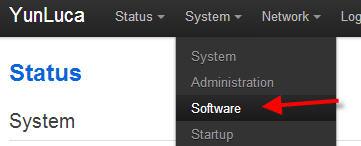
From the top menu, choose System, Software:
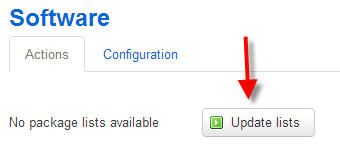
Click on Update lists to update the list of the available packages:
Find the kmod-video-uvc package, then select the Available packages tab and install it:

Do the same for the fswebcam packet:

Now connect the webcam to the USB port of your Yun. To be sure that Linino detected and installed it, inspect the system log:
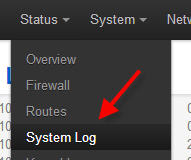
The last lines of the logs should say that the webcam was correctly installed:

Shoot a picture
Now connect to your Yun via SSH: you’re going to use the fswebcam tool to shoot a picture and save it on the SD card, to make it visible using a web browser.
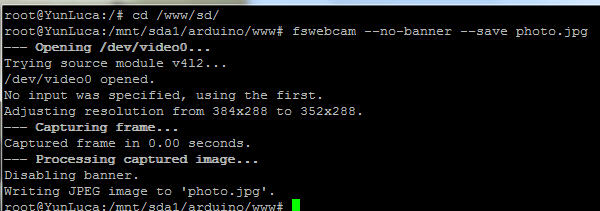
Move to the SD card (cd /www/sd) and type the command
fswebcam --no-banner --save photo.jpg
With this command fswebcam will capture a picture from the webcam and save it, without adding any text (–no-banner), with the name photo.jpg:
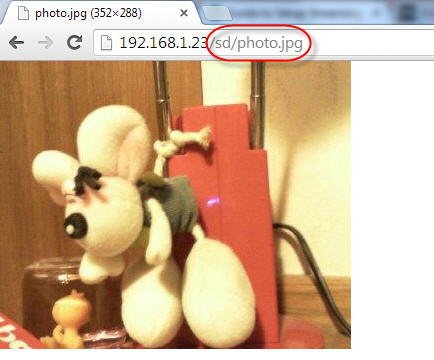
Now you can display the saved picture from the web browser:
For more details,please refer to original post
http://www.lucadentella.it/en/2013/11/15/yun-colleghiamo-una-webcam-1/

Leave a Reply
You must be logged in to post a comment.