[vc_row][vc_column width=”1/1″][vc_column_text]RS232/GPIO Shield For Raspberry Pi is a level switch module, we konw compture’s level is RS232 level, but Raspberry Pi is TTL level. We need transfer TTL level to RS232 level so that RPI can communicate with PC. RS232/GPIO Shield can do this. [/vc_column_text][/vc_column][/vc_row][vc_row][vc_column width=”1/1″][vc_tour][vc_tab title=”What is RS232 level and TTL level?” tab_id=”1389577965-1-85″][vc_column_text]Explain RS 232 level and TTL level simply.
(1) RS232 level or serial port level, even computer level, all of these refer to computer’s 9 pins (RS232 level) . Use the negative logic, -15v ~ -3v means logic “1”, +3v ~ +15v means logic “0”.
(2) TTL level output high level >2.4V, output low level <0.4V. Generally, at the room temperature, the output high level is 3.5 V, the output low level is 0.2 V. The min input high level and low level: input high level >=2.0V, input low level <=0.8V, noise margin is 0.4 V[/vc_column_text][/vc_tab][vc_tab title=”Install GPIO and serial library” tab_id=”1389577965-2-42″][vc_column_text]1. Update
$ sudo apt-get update
2.Install python-pip
$ sudo apt-get install python-pip
3.Install WiringPi by pip ( WiringPi is a wiring driver library for Raspberry Pi like Arduino library, after installed, you can call a function and control GPIO by c/shell/python.
$ sudo pip install wiringpi
4.Install serial port library:
$sudo apt-get install python-serial
5. Testing GPIO library and serial library install completed or not
$python
$import RPi.GPIO
$import serial
If there is no error, the 2 libraries were correct installation.
 [/vc_column_text][/vc_tab][vc_tab title=”Disable other module to use serial port” tab_id=”1389581656624-2-9″][vc_column_text]1. /boot/cmdline.txt Remove the kernel boot and debugging output information at /boot/cmdline.txt
$sudo nano /boot/cmdline.txt
You will find
dwc_otg.lpm_enable=0 console=ttyAMA0,115200 kgdboc=ttyAMA0,115200 console=tty1 root=/dev/mmcblk0p2 rootfstype=ext4 elevator=deadline rootwait
Delete console=ttyAMA0,115200 kgdboc=ttyAMA0,115200,
change it to:
dwc_otg.lpm_enable=0 console=tty1 root=/dev/mmcblk0p2 rootfstype=ext4 elevator=deadline rootwait
2. Disable serial port log in function.
$sudo nano /etc/inittab
Commented T0: 23:respawn:/sbin/getty -L ttyAMA0 115200 vt100
3.Reboot raspberrypi[/vc_column_text][/vc_tab][vc_tab title=”Python test code” tab_id=”1389587067826-3-0″][vc_column_text]Test Code (serial_test.py) download here Serial_test
import serial
port = ”/dev/ttyAMA0″
usart = serial.Serial(port,9600)
usart.flushInput()
print (“serial test: BaudRate = 9600″)
usart.write(“please enter the character:\r”)
while True:
if( usart.inWaiting()>0 ) :
receive = usart.read(1)
print ”receive: ”,receive
usart.write(“ send: ’”)
usart.write(receive)
usart.write(“‘\r”)[/vc_column_text][/vc_tab][vc_tab title=”RS232/GPIO Shield function test” tab_id=”1389587434114-4-5″][vc_column_text]Test tools:
1*USB to RS232 wire
1*RS232 GPIO Shield
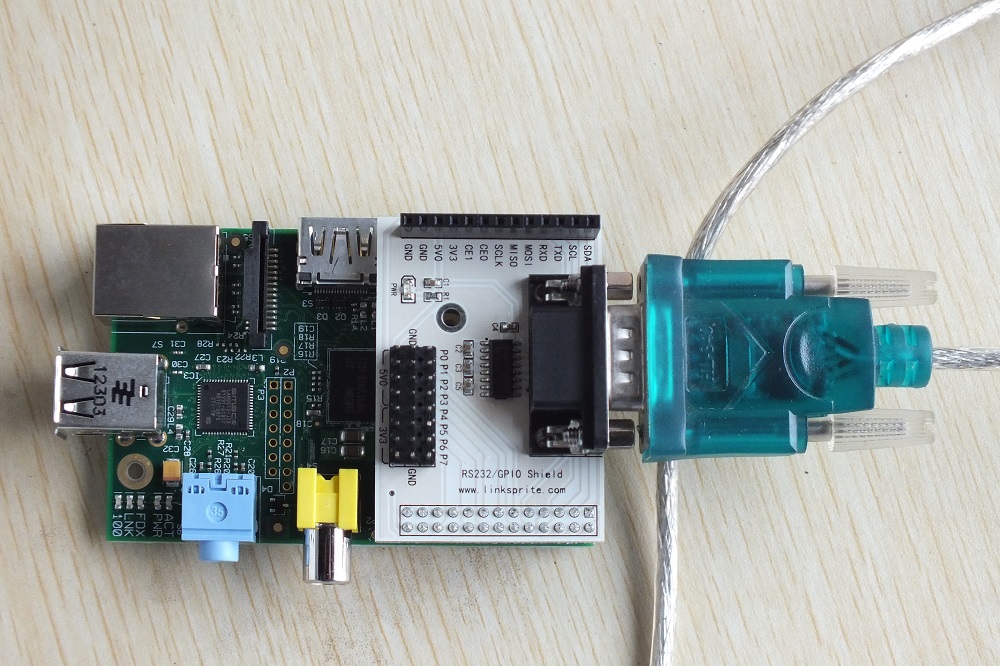
After connected, open X-CTU, set baud rate to 9600:

Run serial_test.py, then you can use the /dev/ttyAMA0 like a common serial port.
Input characters in X-CTU:

 [/vc_column_text][/vc_tab][/vc_tour][/vc_column][/vc_row]
Leave a Reply
You must be logged in to post a comment.