[vc_row][vc_column][vc_column_text]pcDuino team developed a custom version of Scratch for pcDuino. It’s fairly easy to install it. We simply need to type:
$sudo apt-get install pcduino-scratch
This post begins our serial tutorial on how to use pcDuino scratch. In this tutorial, we are going to see how to blink LED on pcDuino using Scratch.
Compared to the MIT scratch, the Scratch of pcDuino has a hardware tab, and this makes the hardware programming really easy.[/vc_column_text][vc_tour][vc_tab title=”Parts List” tab_id=”1393093400-1-18″][vc_column_text]
- 1 x pcDuino v2
- 1 x Linker Base Shield
- 1 x Linker LED
- 1 x 20mm cable
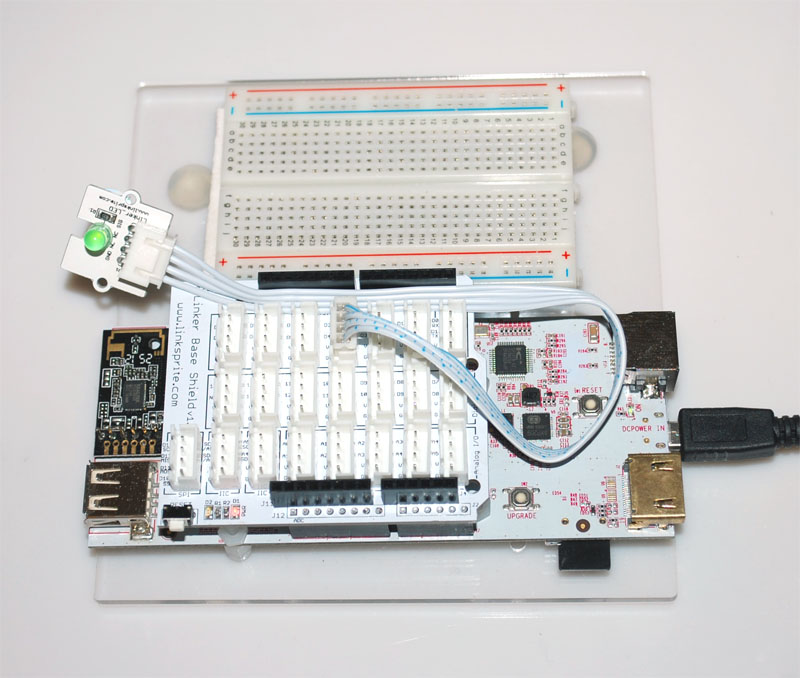
[/vc_column_text][/vc_tab][vc_tab title=”Setup” tab_id=”1393093929965-2-4″][vc_column_text]We install the Linker base shield onto pcDuino and connect LED module to D3 of pcDuino.
The whole setup will look like:
 [/vc_column_text][/vc_tab][vc_tab title=”Scratch Screen Shot” tab_id=”1393093400-2-94″][vc_column_text]The Scratch used to blink LED will look as:
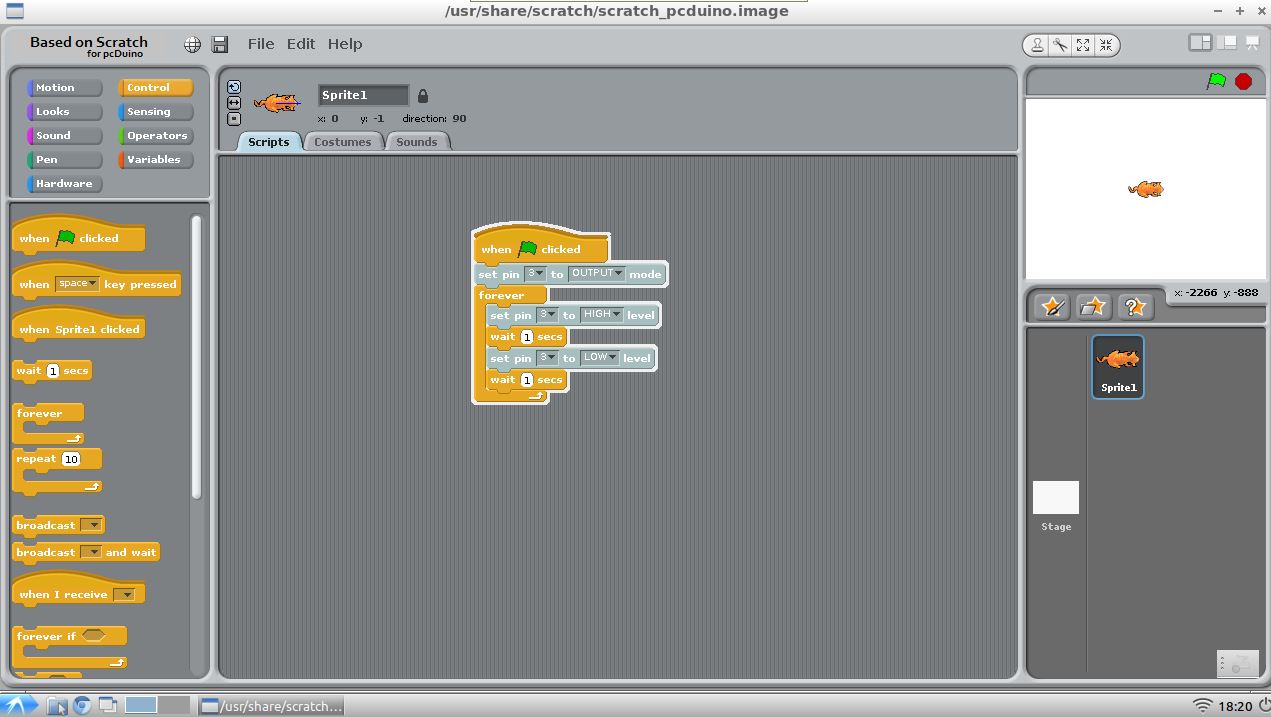
Click the little green flag, we will observe the LED is blinking. Horay![/vc_column_text][/vc_tab][/vc_tour][/vc_column][/vc_row]

Leave a Reply
You must be logged in to post a comment.