[vc_row][vc_column width=”1/1″][vc_column_text]pcDuino team developed a custom version of Scratch for pcDuino. It’s fairly easy to install it. We simply need to type:
sudo apt-get install pcduino-scratch
In this tutorial, we are going to see how to turn on LED by pressing a button on pcDuino using Scratch.
Compared to the MIT scratch, the Scratch of pcDuino has a hardware tab, and this makes the hardware programming really easy.[/vc_column_text][vc_tour][vc_tab title=”Parts List” tab_id=”1393127193-1-44″][vc_column_text]
- 1 x pcDuino v2
- 1 x Linker Base Shield
- 1 x Linker LED
- 1 x Linker Button
- 2 x 20mm cable
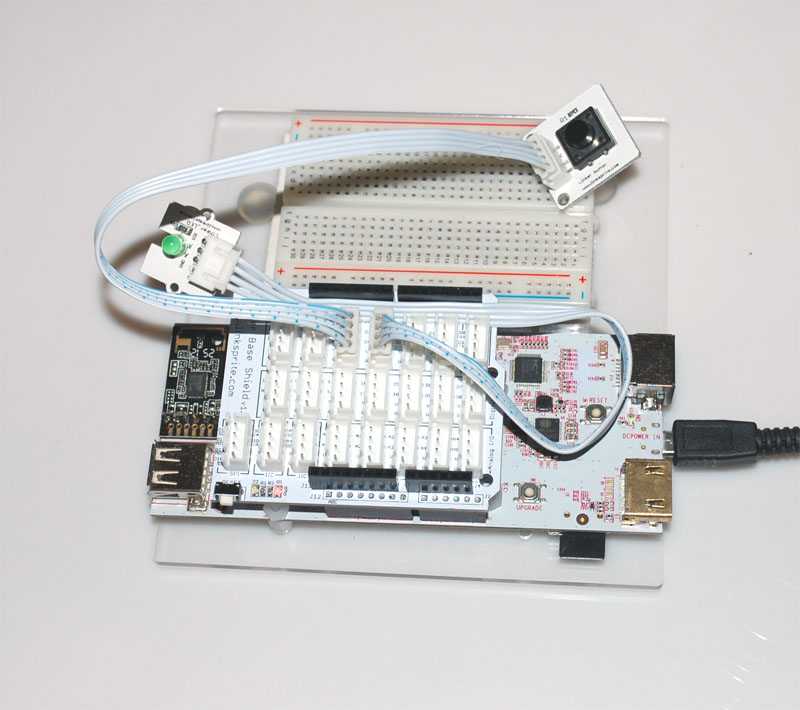
[/vc_column_text][/vc_tab][vc_tab title=”Setup” tab_id=”1393127193-2-87″][vc_column_text]We install the Linker base shield onto pcDuino, connect LED module to D3 of pcDuino. and connect Button module to D4 of pcDuino.
 [/vc_column_text][/vc_tab][vc_tab title=”Scratch Sreen Shot” tab_id=”1393127415945-2-4″][vc_column_text]The Scratch used will look as:
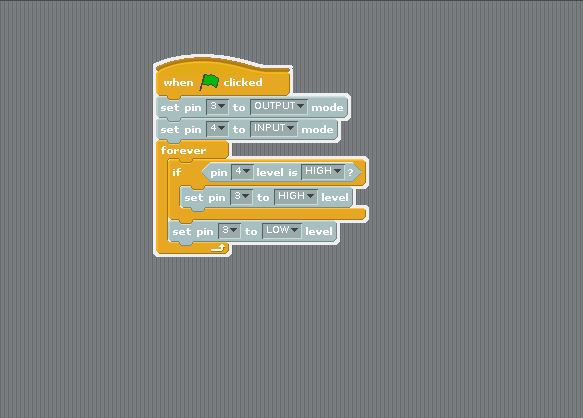
Click the little green flag, we will see the LED is on when we press the button!
[/vc_column_text][/vc_tab][/vc_tour][/vc_column][/vc_row]

Leave a Reply
You must be logged in to post a comment.