- Add WiFi camera to APP
1.1 Search “NVSEE” in APP store or Google Play, and install the APP, and Sign up for an account.
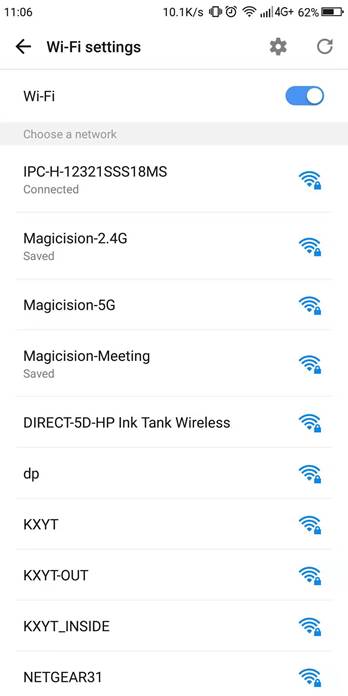
1.2 Power on the Wi-Fi Face Capture Camera, after you heard” Waiting for the configuration”, find the device’s Wi-Fi AP which named “IPC-H-12321……”, connect to the AP, password is 12345678.
Note: If you do not hear” Waiting for the configuration”, please reset factory Settings.
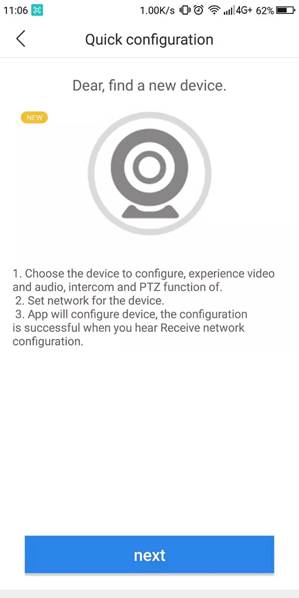
1.3 After connected to device’s AP, run the APP: NVSEE, see the “Quick configuration” page, tap next
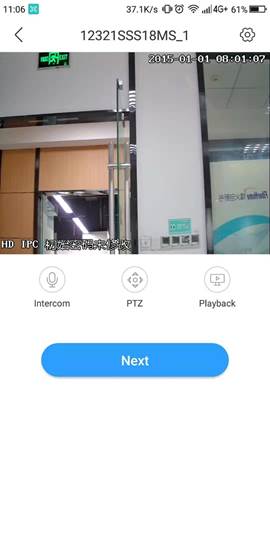
1.4. After the device connection is successful, click the next to enter the page of WiFi configuration
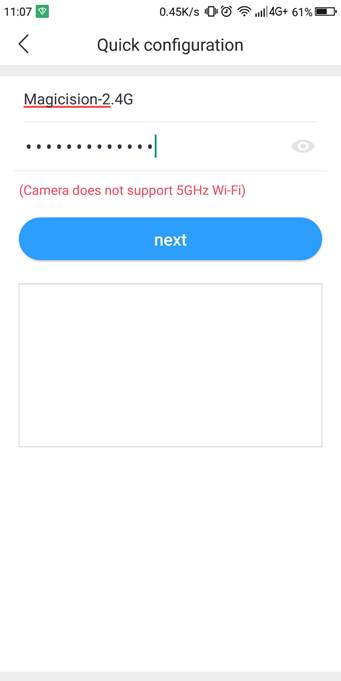
1.5 Enther or choose the WiFi AP which you want to conect, input password. Wait until heard” Network configuration successful”. Note: The camera does NOT support 5G WiFi

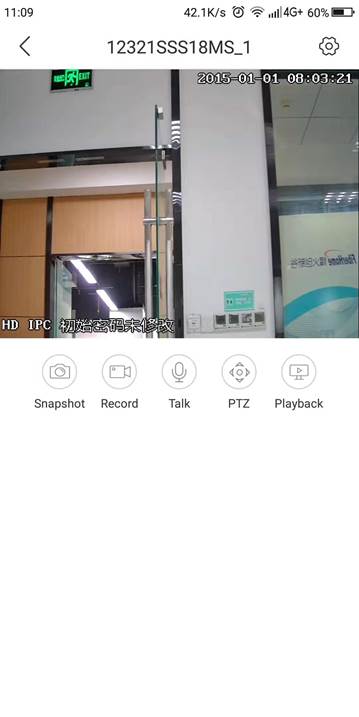
1.6 After successful configuration, the configured device will be automatically added to the device list. Click the device to connect and see the video.
2. Configure Wi-Fi Face Capture Camera
2.1 Install management tool
Download and install camera software “CMS”
2.2 Add device
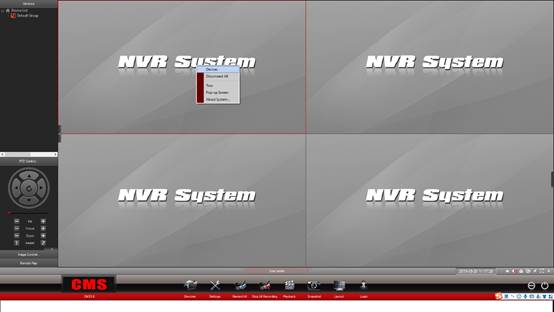
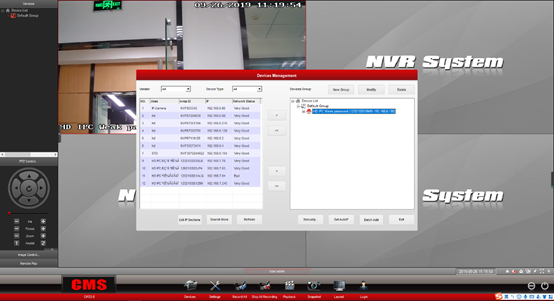
2.2.1 Click right button and choose “Device”
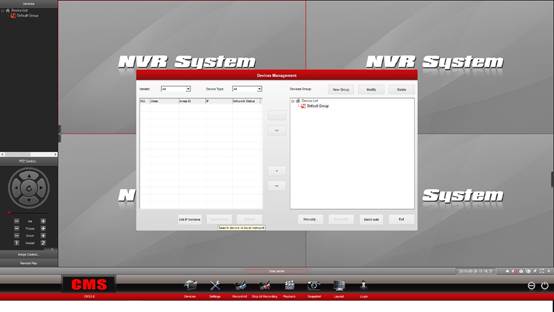
2.2.2 Click “Search more” to search devices
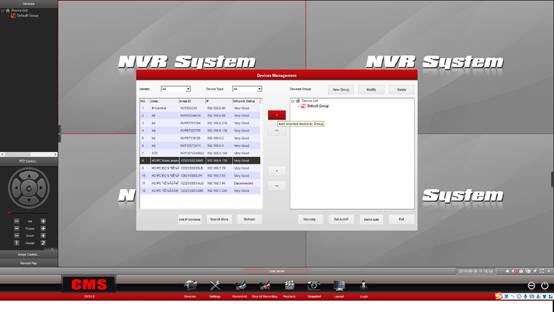
2.2.3 Add the camera which you want. Nvsip ID is the UUID on the label which stick on the camera.
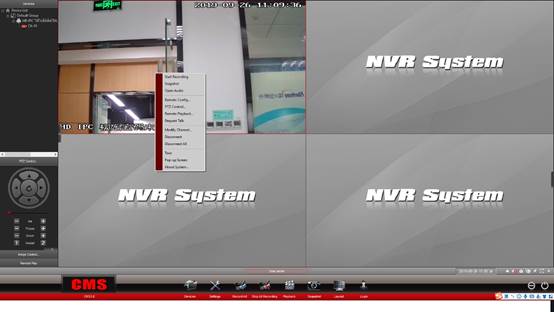
2.2.4 After added click exit and configure FTP settings. Click right button, and choose “Remote configuration”
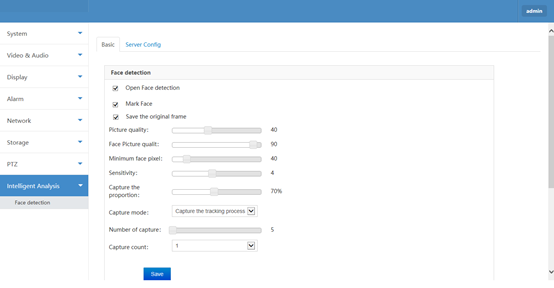
2.2.5 After login, click Intelligent Analysis->Face detection, change the Capture mode to “Capture the tracking process” and save.
2.2.6 Click “Server config”, Select”Grab face upload FTP”. Enter the information as the below picture shown
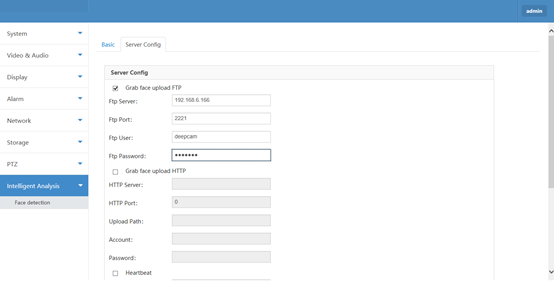
FTP Server is the AIbox’s IP address
FTP port: 2221
FTP name: deepcam
FTP password: deepcam
Click save after input and root the camera.
3. Run welcome software
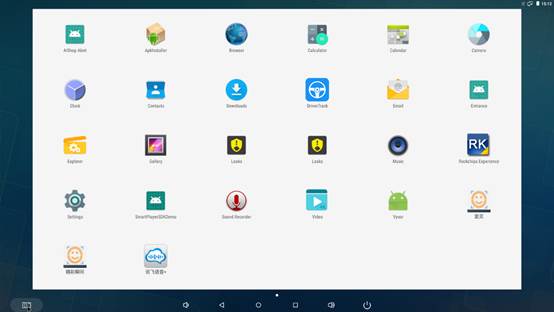
3.1 Run “Entrance” as shown below
3.2 Software settings
Move the mouse to the top left corner then you can the settings like the following image
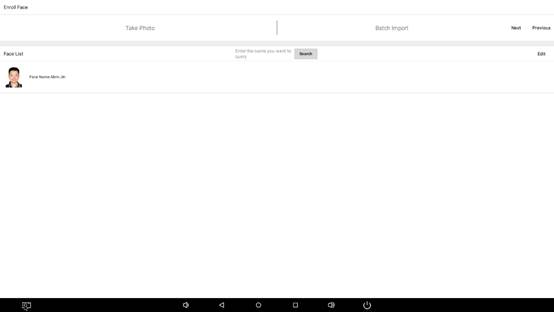
3.2.1 face management
We have 2 way to enroll face, take picture and batch enroll

2.1.1 Take picture enroll
If you want to use this way to enroll, you need to connect a USB camera to AI box.
Click Camera icon to take picture
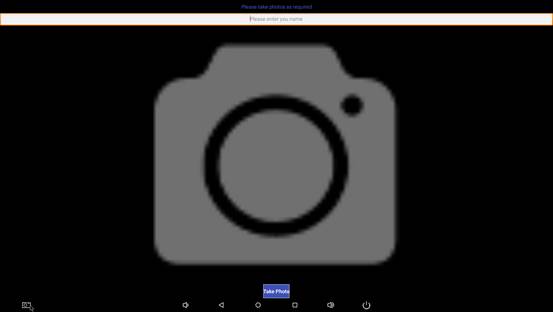
After you save the face the face enrolls successfully.
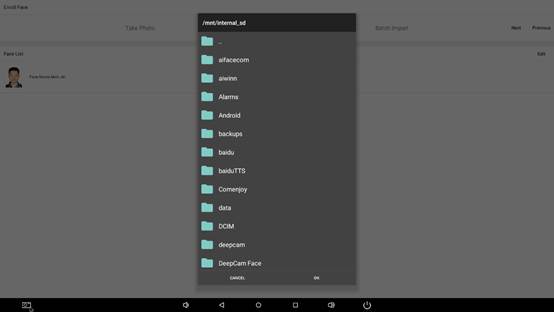
2.1.2 Batch enroll
Click batch enroll, you can choose the faces which you want to enroll. Put the face images in one folder and choose the folder, then click ok to enroll
Note: the name of the image is the registration name
After finished is shown as below:
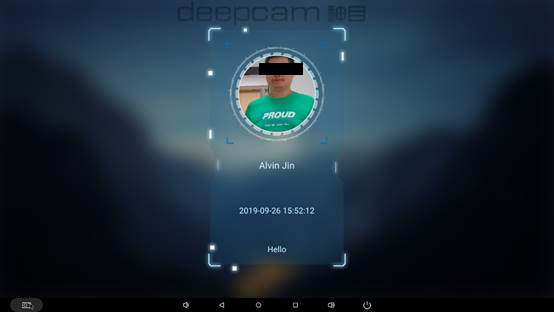
When you finished the face enroll, go back to the home page of the app.
If the registered person goes through the deepcam capture camera, the app will be shown as below:
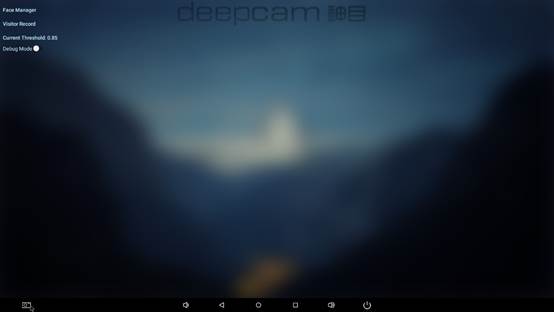
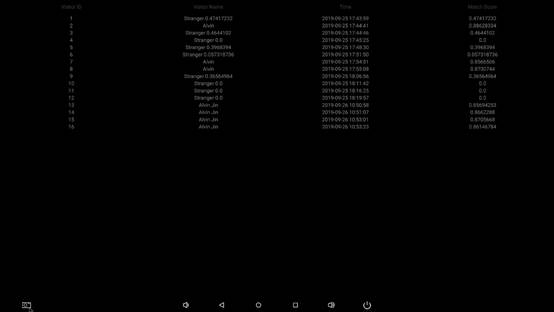
2.2 Visitor records
Click visitor records you can see the records as below:
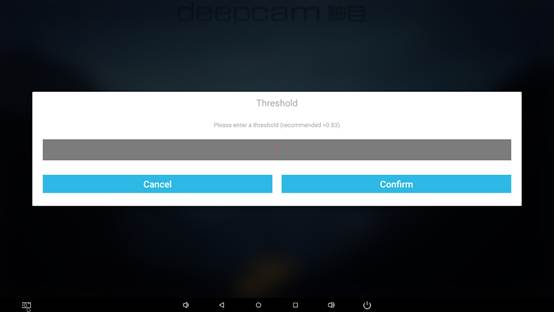
2.3 threshold
Click current “Current threshold” to set compare threshold
2.4 debug model
If debug model off, only shows the registered person.
If debug model on, shows registered person and strangers.
Leave a Reply
You must be logged in to post a comment.