System Installation and Account Settings
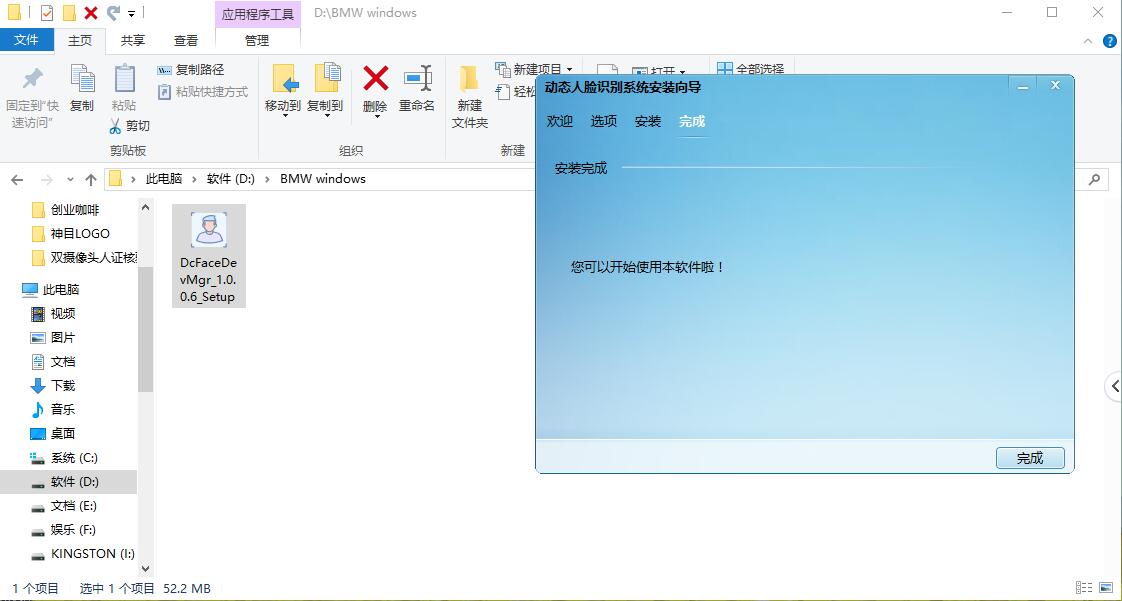
- Download and install the DeepCam BMW system for Windows. The installation is complete, as shown in the following figure:
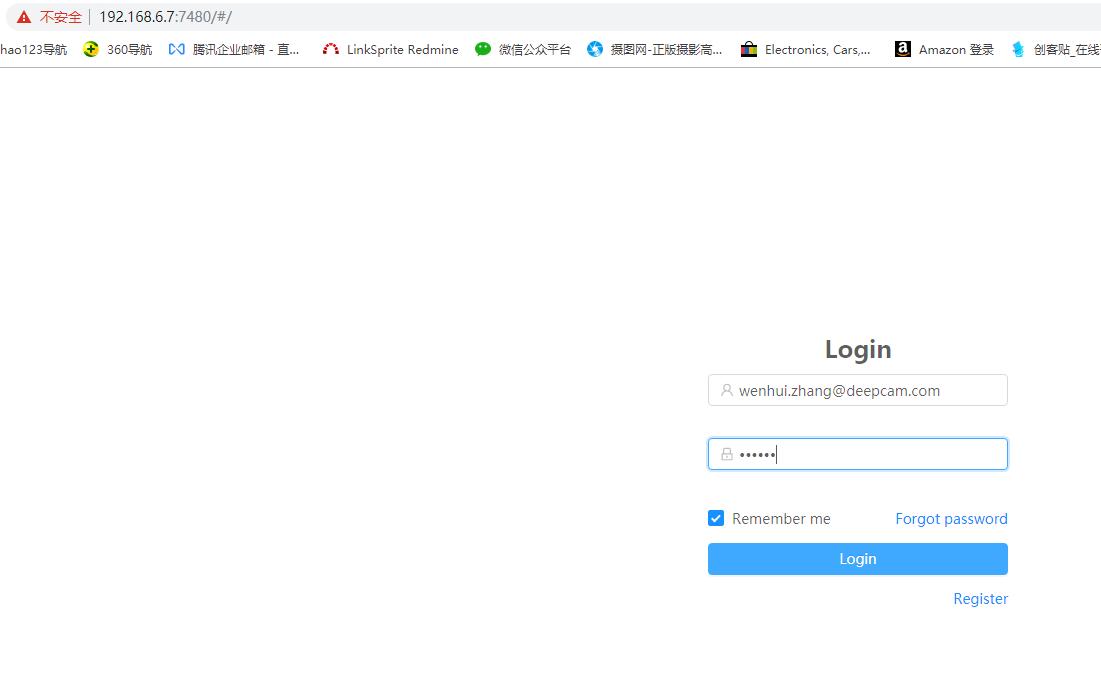
- After installation, open the application and automatically enter the user login page, as shown in the following figure:
3. Modify the login address (add “admin” after the port number) and enter the administrator account login page, as shown in the following figure:
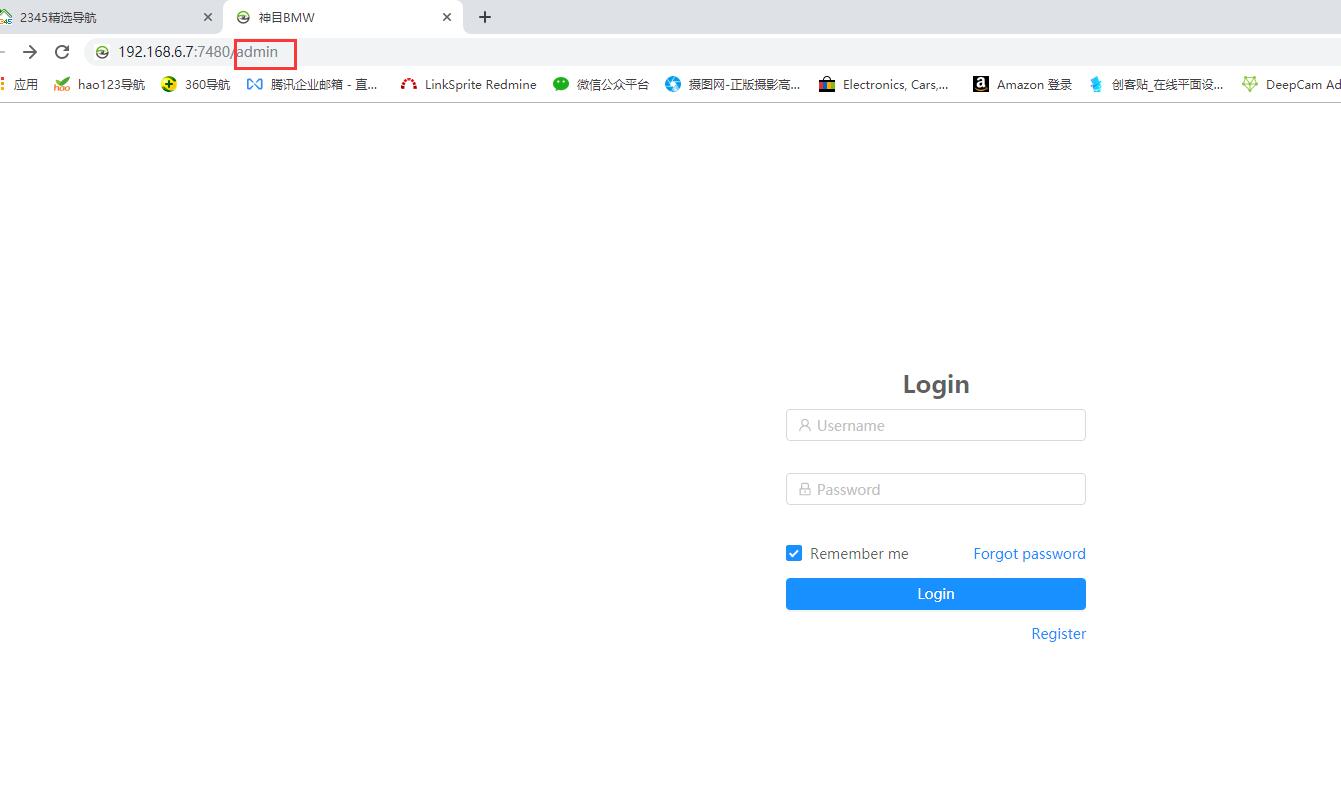
Administrator account default login account. Account: admin; Password: admin
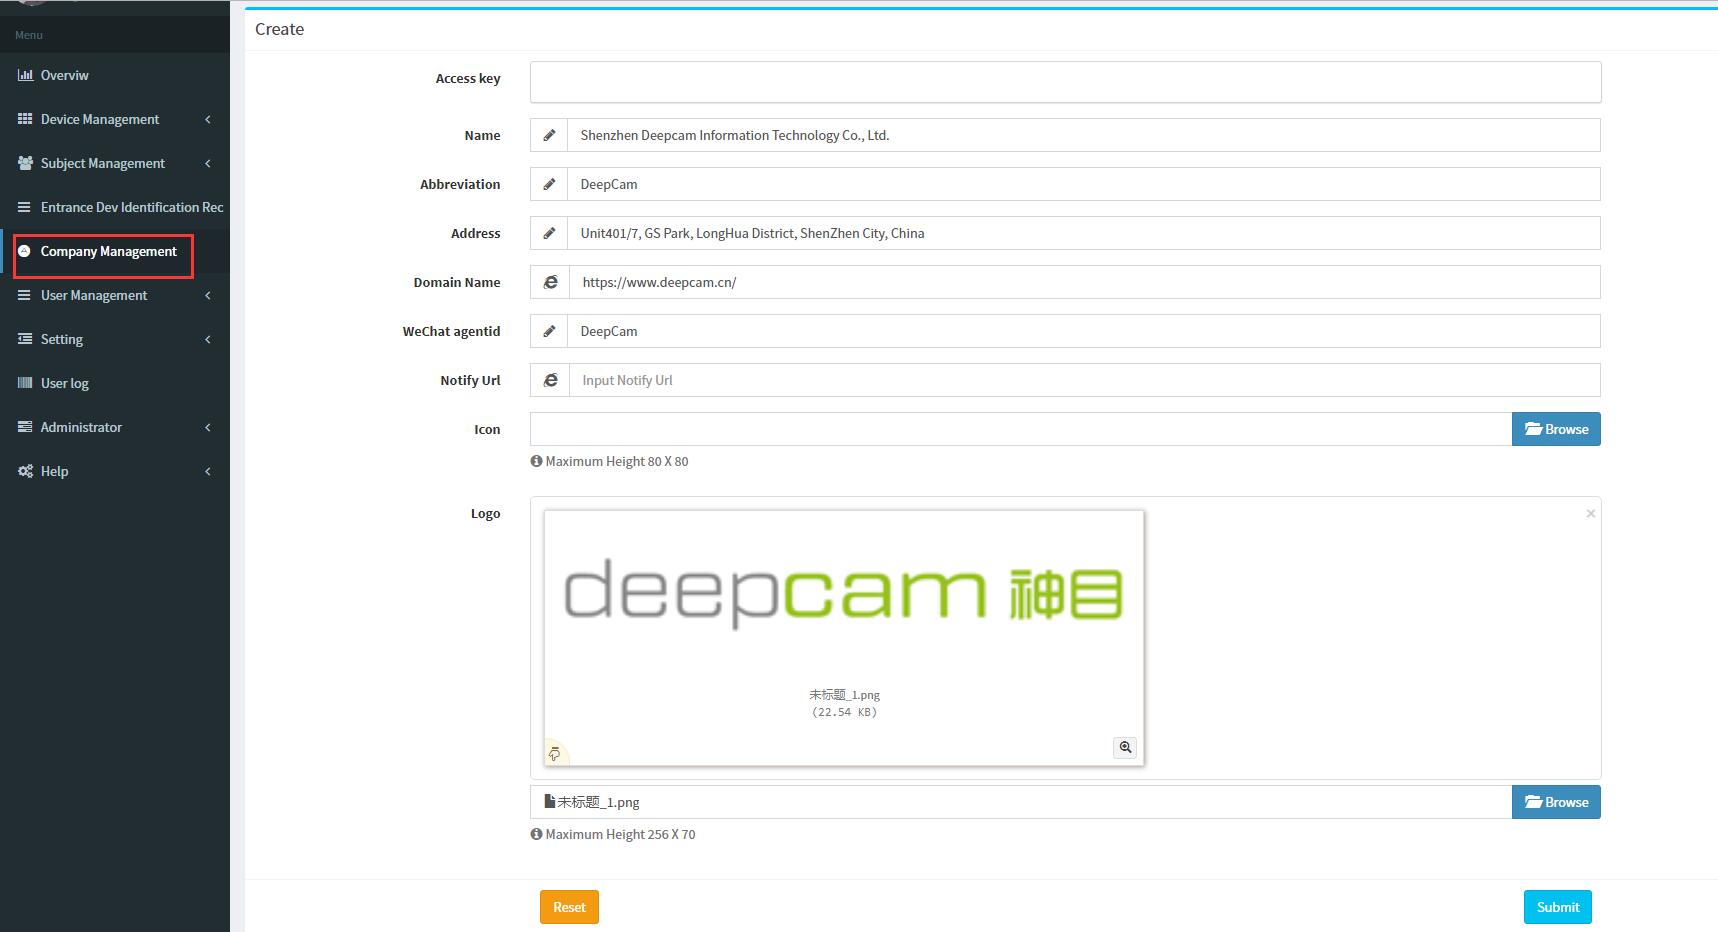
- Log in to the Administrator’s account, click “Company Management”, create a company information, fill in the company information as required, as shown in the following figure:
5. Click on “User Management” – “User List” – “New” to create a user account and fill in user-related information, as shown in the following figure:

6. When the user account is created, you can return to the user login page and login the account, as shown in the following figure:
Administrator account is used when providing company management, user management, system configuration and other related settings for customers. Usually, please login user account operation on user page.
Device Addition and Settings
Adding DeepCam 7-inch tablet
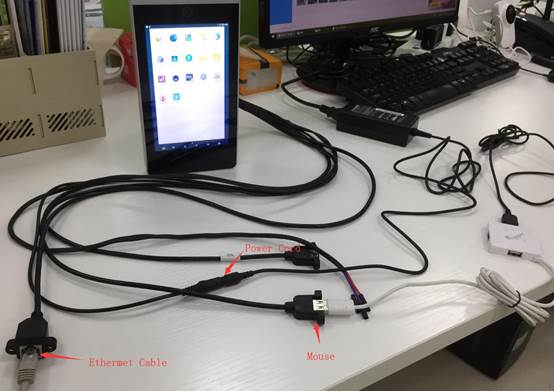
- Hardware List
1x DeepCam 7-inch tablet
1x Ethermet
1x Mouse
- Wiring Instructions
Wiring as shown below
- Steps
3.1 Install Access Control and attendance APK
3.1.1 Complete the wiring and confirm that the device is connected to the network.
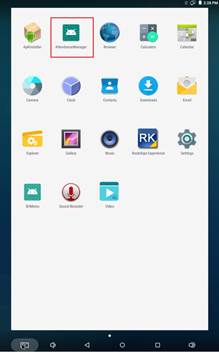
3.1.2 Download and install the Access Control and attendance APK as shown below:
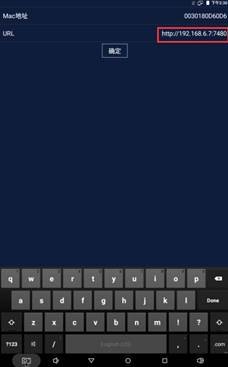
3.1.3 Open the APP, click the left mouse button three times, enter the settings interface, view the device Mac address, and change the URL to the IP address of BMW system, as shown below:
3.2 BMW User Management Platform Operation
3.2.1 Click “DcFaceDevMgr” Shortcut Icon, log in BMW User Management Platform, as shown below,
3.2.2 Add Device
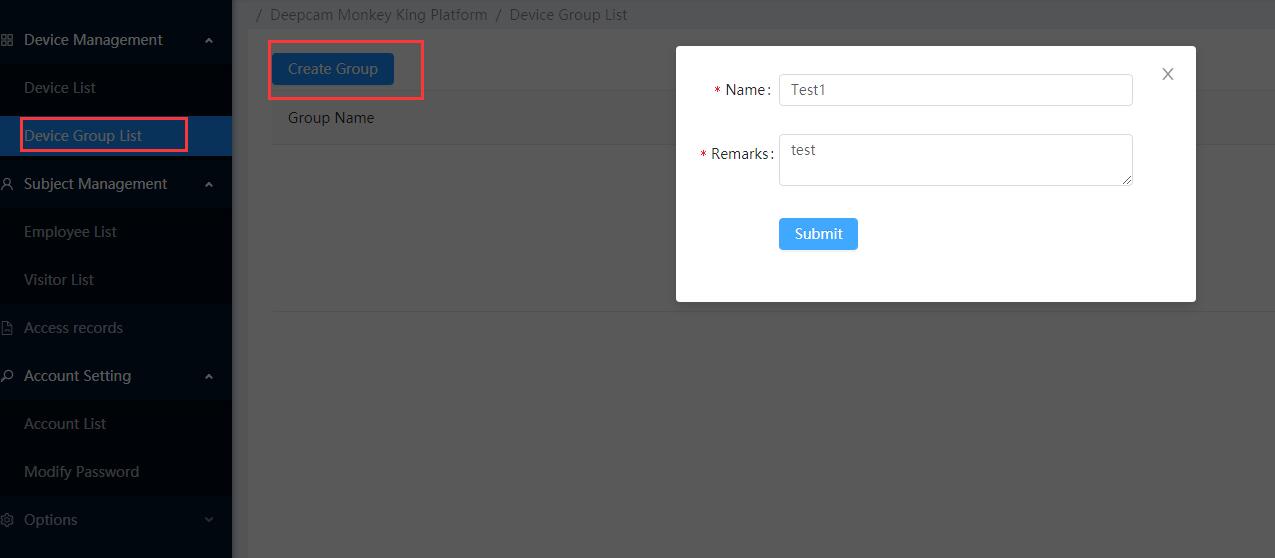
Click “Device Management”-“Device Group List”-“Create Group”
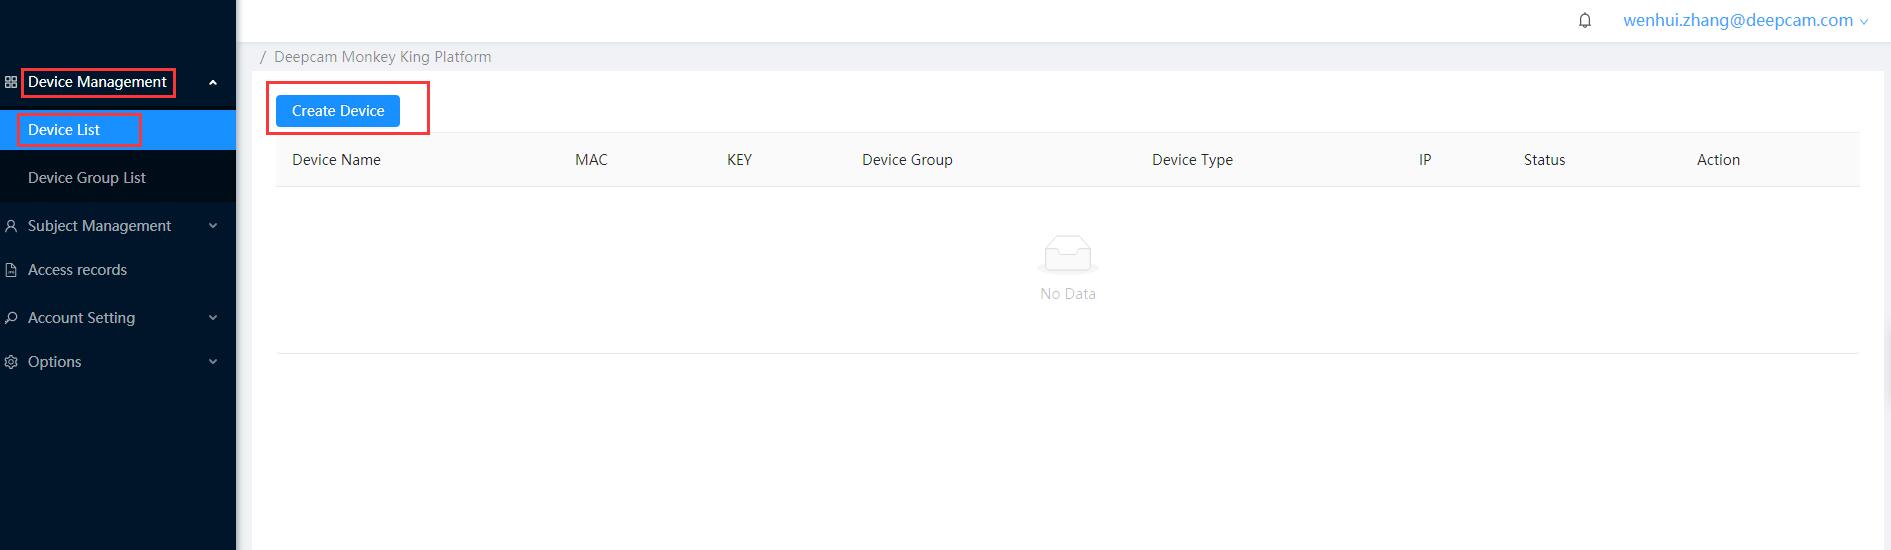
 Click “Device Management”-“Device List”-“Create Device”,to add access control device to BMW Management system.
 Fill in the relevant information as required. The access control device is classified as “Android terminal device”. Follow Step 3.1.3 to get the MAC address of the device. The example is as follows:

After the device is added, you can check the device status in the Device List, as shown below:

3.2.3 Add Face Picture
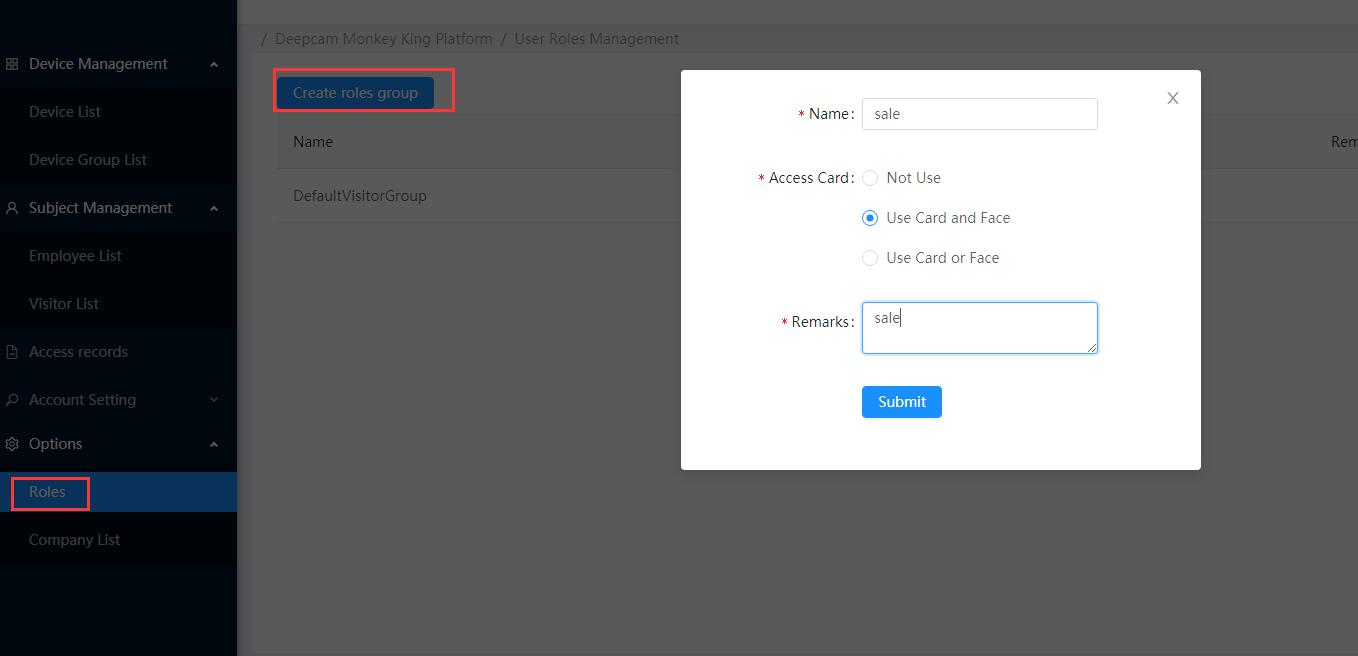
Click “Options”-“Roles”-“Create roles group”

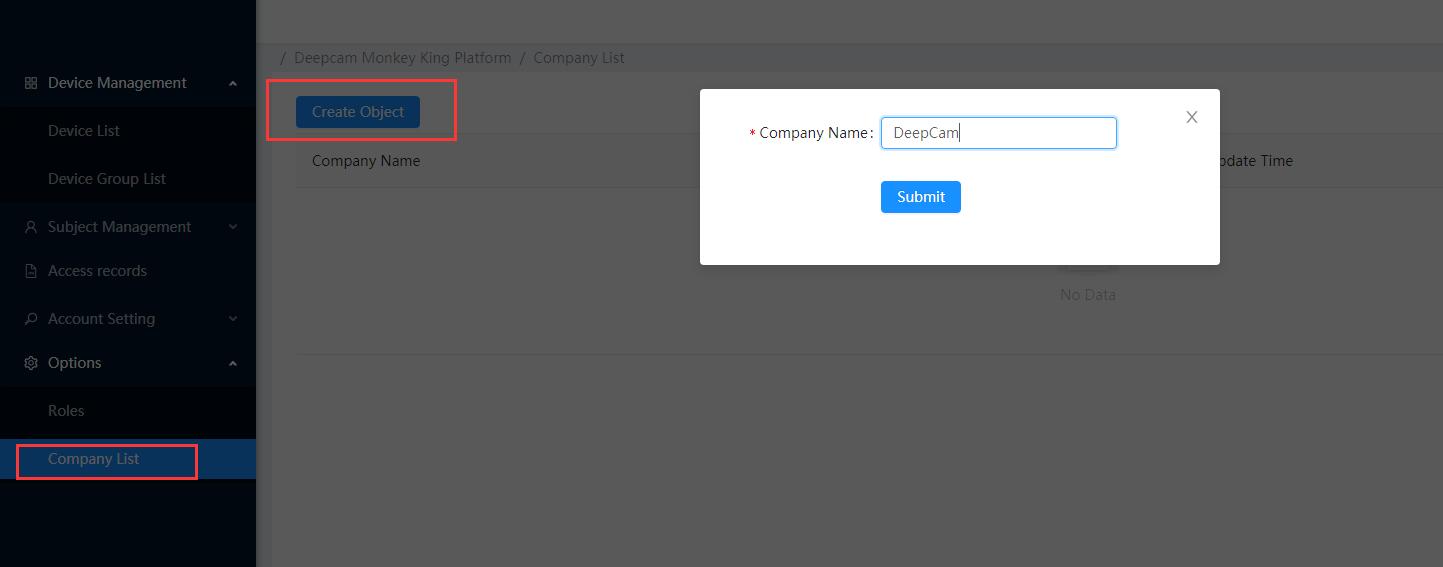
Click “Company List”-“Create Object”

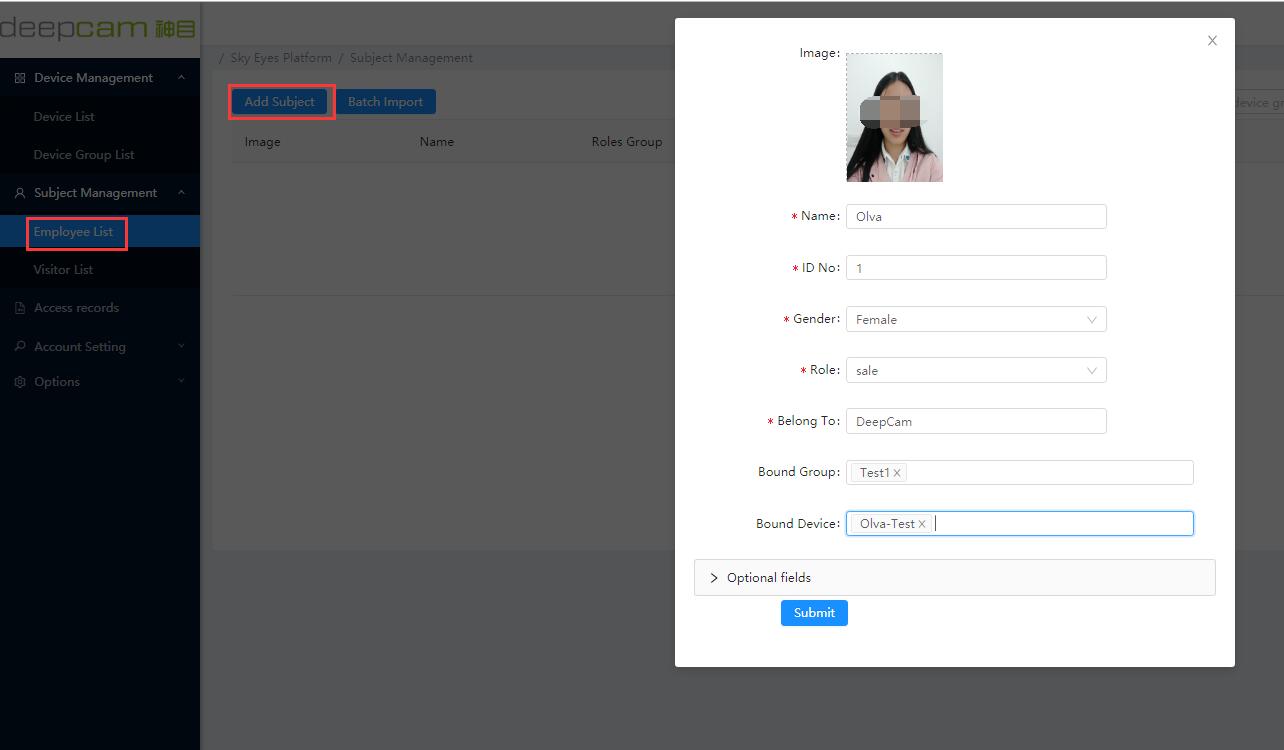
Click “Subject Management”-“Employee List”,select “Add Subject” or “Batch Import”
a. Select “Add Subject” to add individual personnel information, add face images as required, and fill in relevant face information. If a group is specified or a device is specified, the face information is only sent to the specified sub-group or device; if the person is not assigned a group or a specified device, the information of the person will be sent to all devices. An example is as follows:

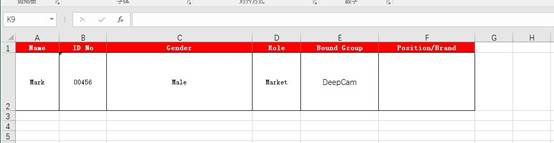
b. Select “Batch Import” to add batches of personnel information. First click “Download Template” to download the batch import form template, as shown below:
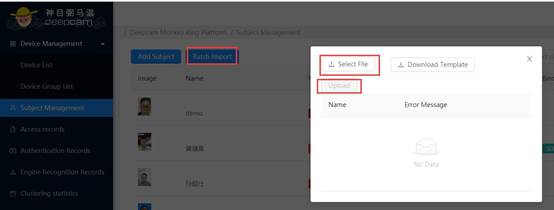
Click “Select File”, to select the completed form, and click “Upload”,as shown below:
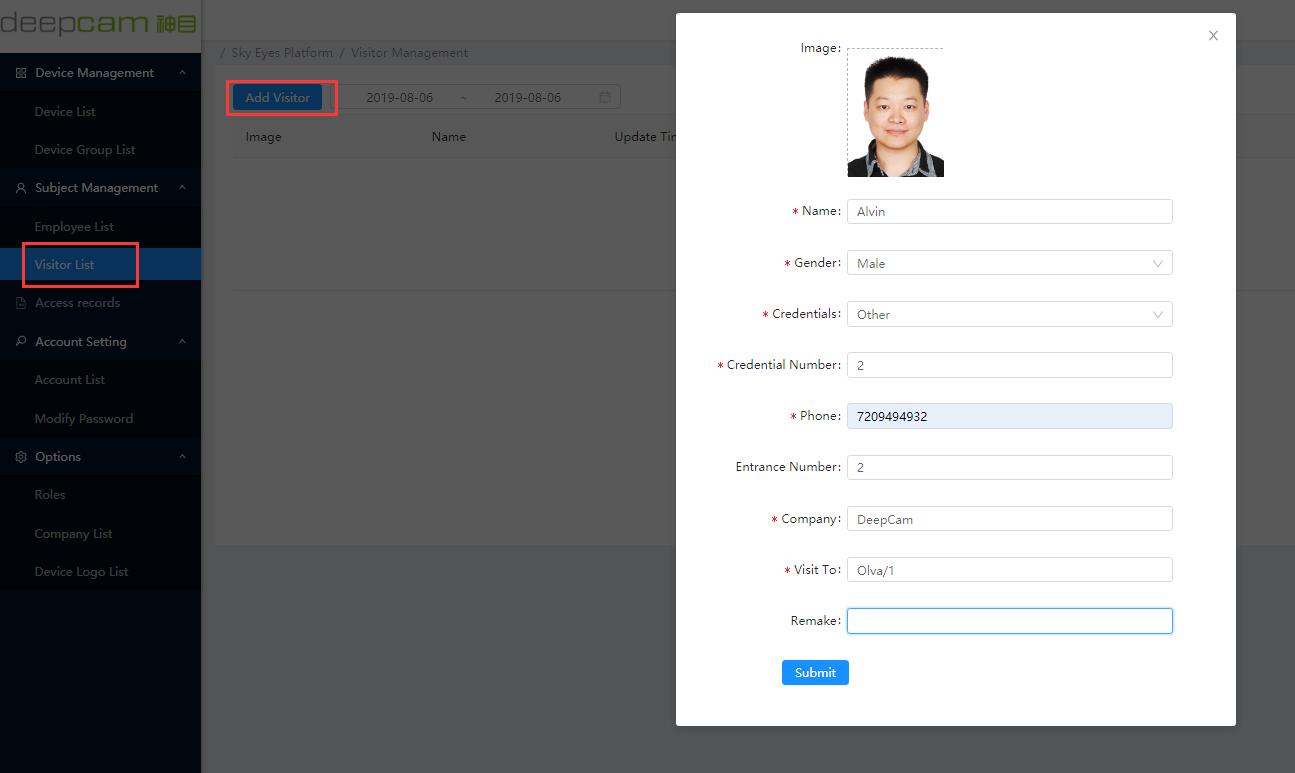
Click “Subject Management”-“Visitor List”- “Add Visitor” to add a visitor information, as shown below,

3.2.4 Edit Device Settings
Click “Device Management” – “Device List”, find the device you want to edit, click “Edit”, you can set the device in the background, as shown below:

3.2.5 View Access Record
Click on “Access Records” to view the identification record and visitor record, as shown below:

Note: If you want to get VIP and visitor data, please check “Upload Subject&Visitor ” when setting up the device.
Leave a Reply
You must be logged in to post a comment.