This post details the steps to install a light webserver on the pcDuino.
Installing lighttpd:
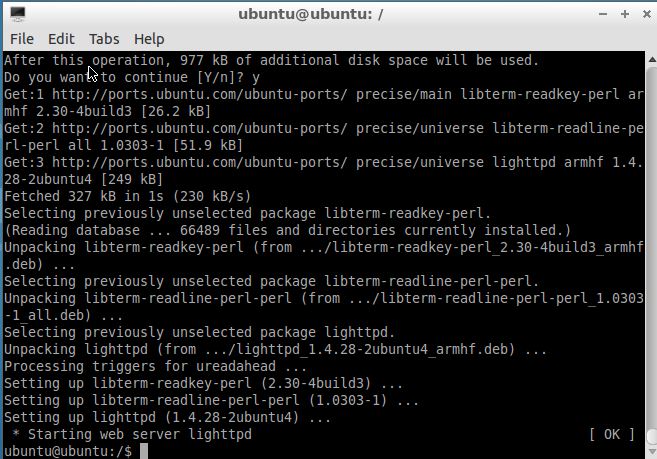
To install the lighttpd web server, type the command on the terminal:
$sudo apt-get install lighttpd
Install mysql database (optional)
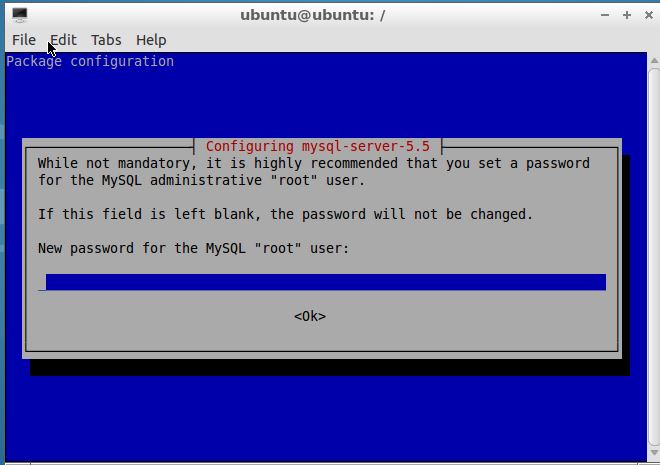
Mysql is the most popular database server, whilst there are other alternatives some of which may require less resources most third party software for Linux is designed to use Mysql.If required it can be installed using:
$sudo apt-get install mysql-server
During the installation, it will ask the password of the root user:
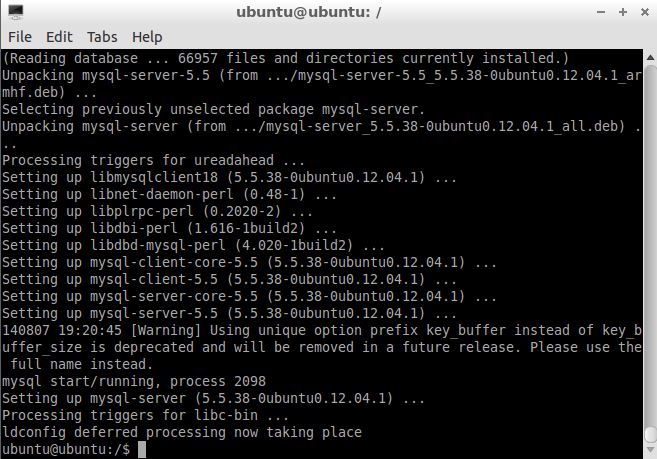
After the installation is finished, it will show:
Install PHP
The following commands will install PHP version 5:
$sudo apt-get install php5-common php5-cgi php5
Note it’s important to install in the order listed above. If you try to install php5 without first installing the php5-cgi package then it will install Apache as well, which we don’t want for this light-weight lighttpd server.
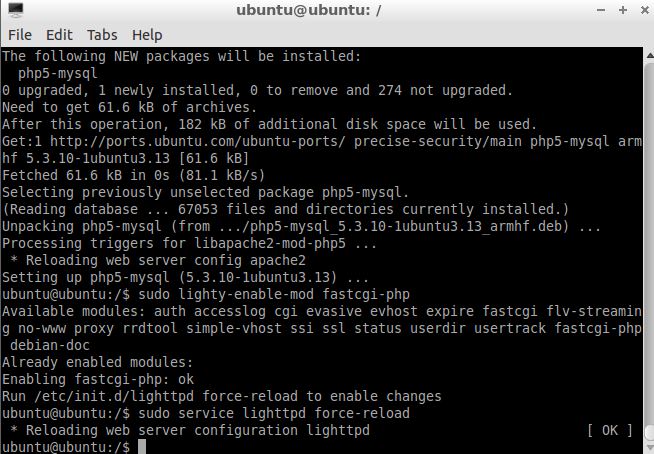
If you installed mysql then you should also issue the following command to install the php mysql libraries to allow PHP to access the mysql database.
$sudo apt-get install php5-mysql
To enable the server to handle php scripts the fastcgi-php module should be enabled by issuing in the command:
$sudo lighty-enable-mod fastcgi-php

Then reload the server using:
$sudo service lighttpd force-reload
Set permissions on the web directory /var/www/
It is useful to change the permissions on the www directory to allow your user to update the webpages without needing to be root.
Change the directory owner and group
$sudo chown www-data:www-data /var/www
allow the group to write to the directory:
$sudo chmod 775 /var/www
Add the ubuntu user to the www-data group:
$sudo usermod -a -G www-data ubuntu
Testing the server
The ip address of pcDuino can be found by typing ‘$ifconfig’ in the pcDuino terminal. In this case, the IP address is 192.168.1.20. We launch the browser in one of the PC that lives in the same local network as pcDuino, and we get:

Horay! We are done with the installation!
Twitter:@pcDuino_NO1
Facebook: pcDuino
Leave a Reply
You must be logged in to post a comment.