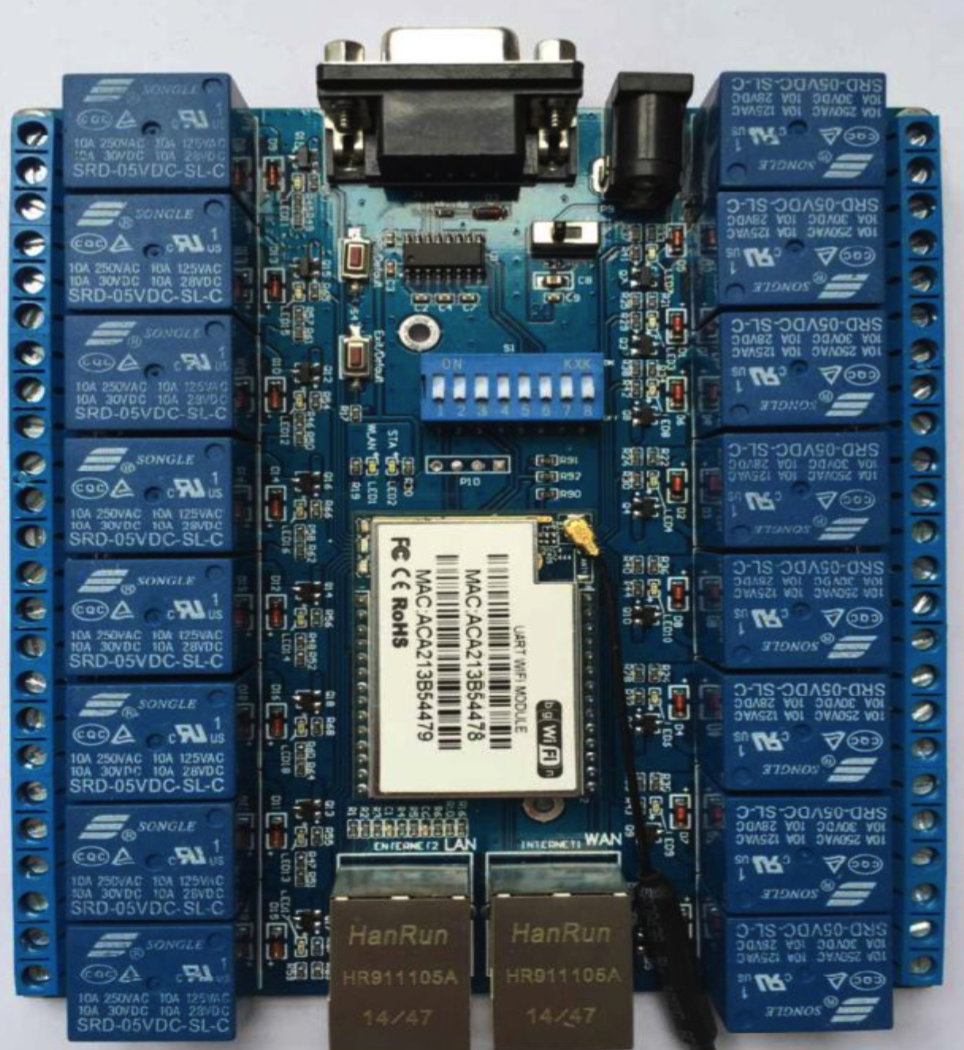
CuteDigi has a 16-channel plug and play P2P WiFi relay kit. In this post, we show how to set it up.
Before we use it, we need to install the WiFi antenna as below:
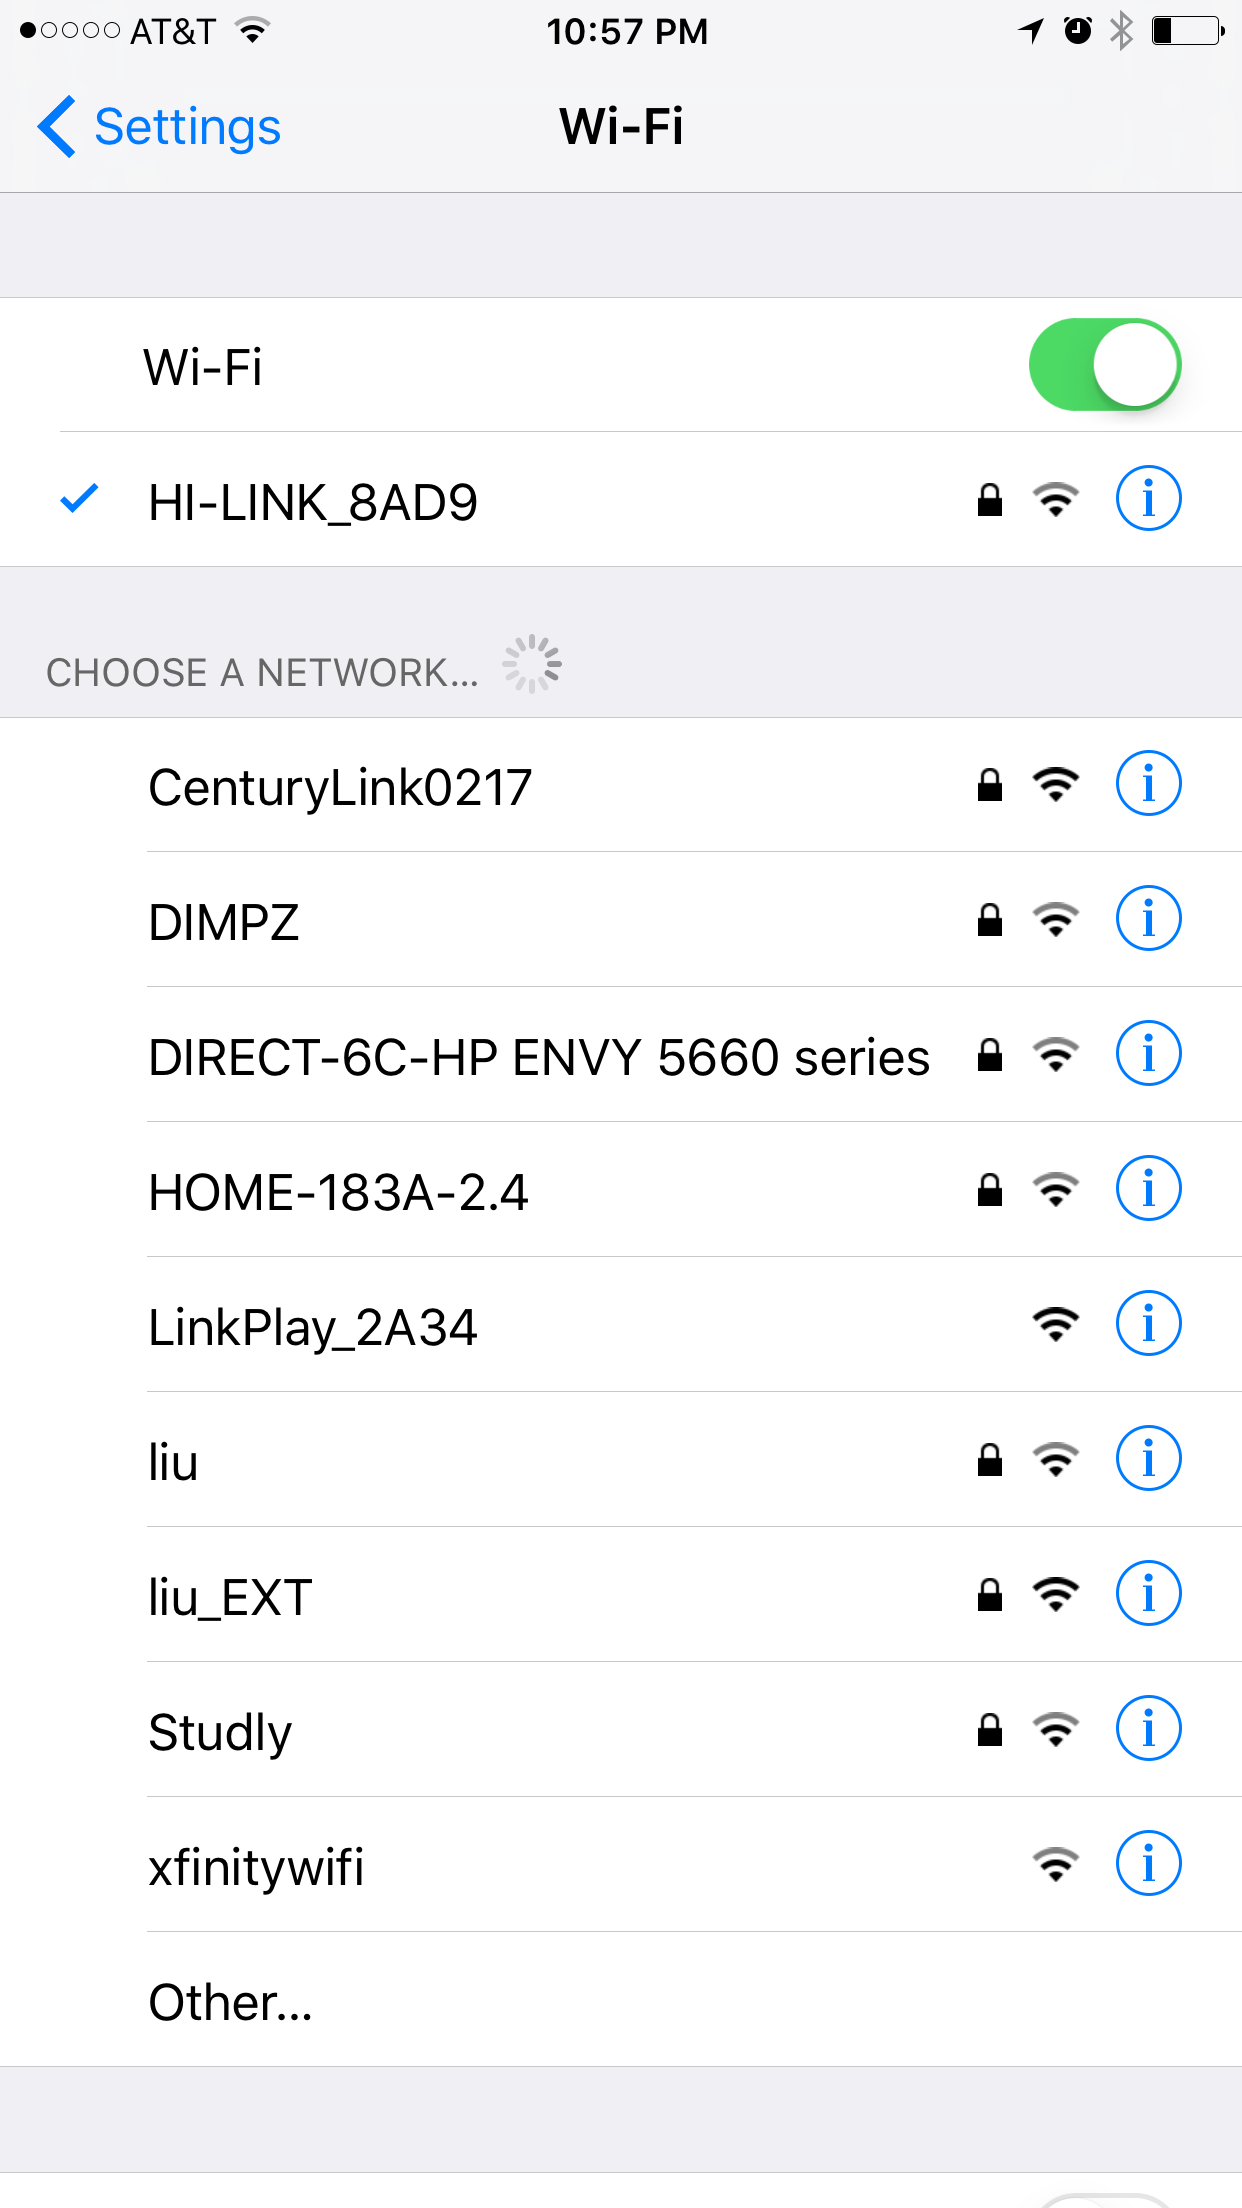
Plug in the power supply and move the switch to ON position. The WiFi plug and play relay will boot into an access point starting with ‘HI-LINK_XXXX’. ‘XXXX’ is different for each items. Connect your PC or smartphone to this access point with a password of ‘12345678’.
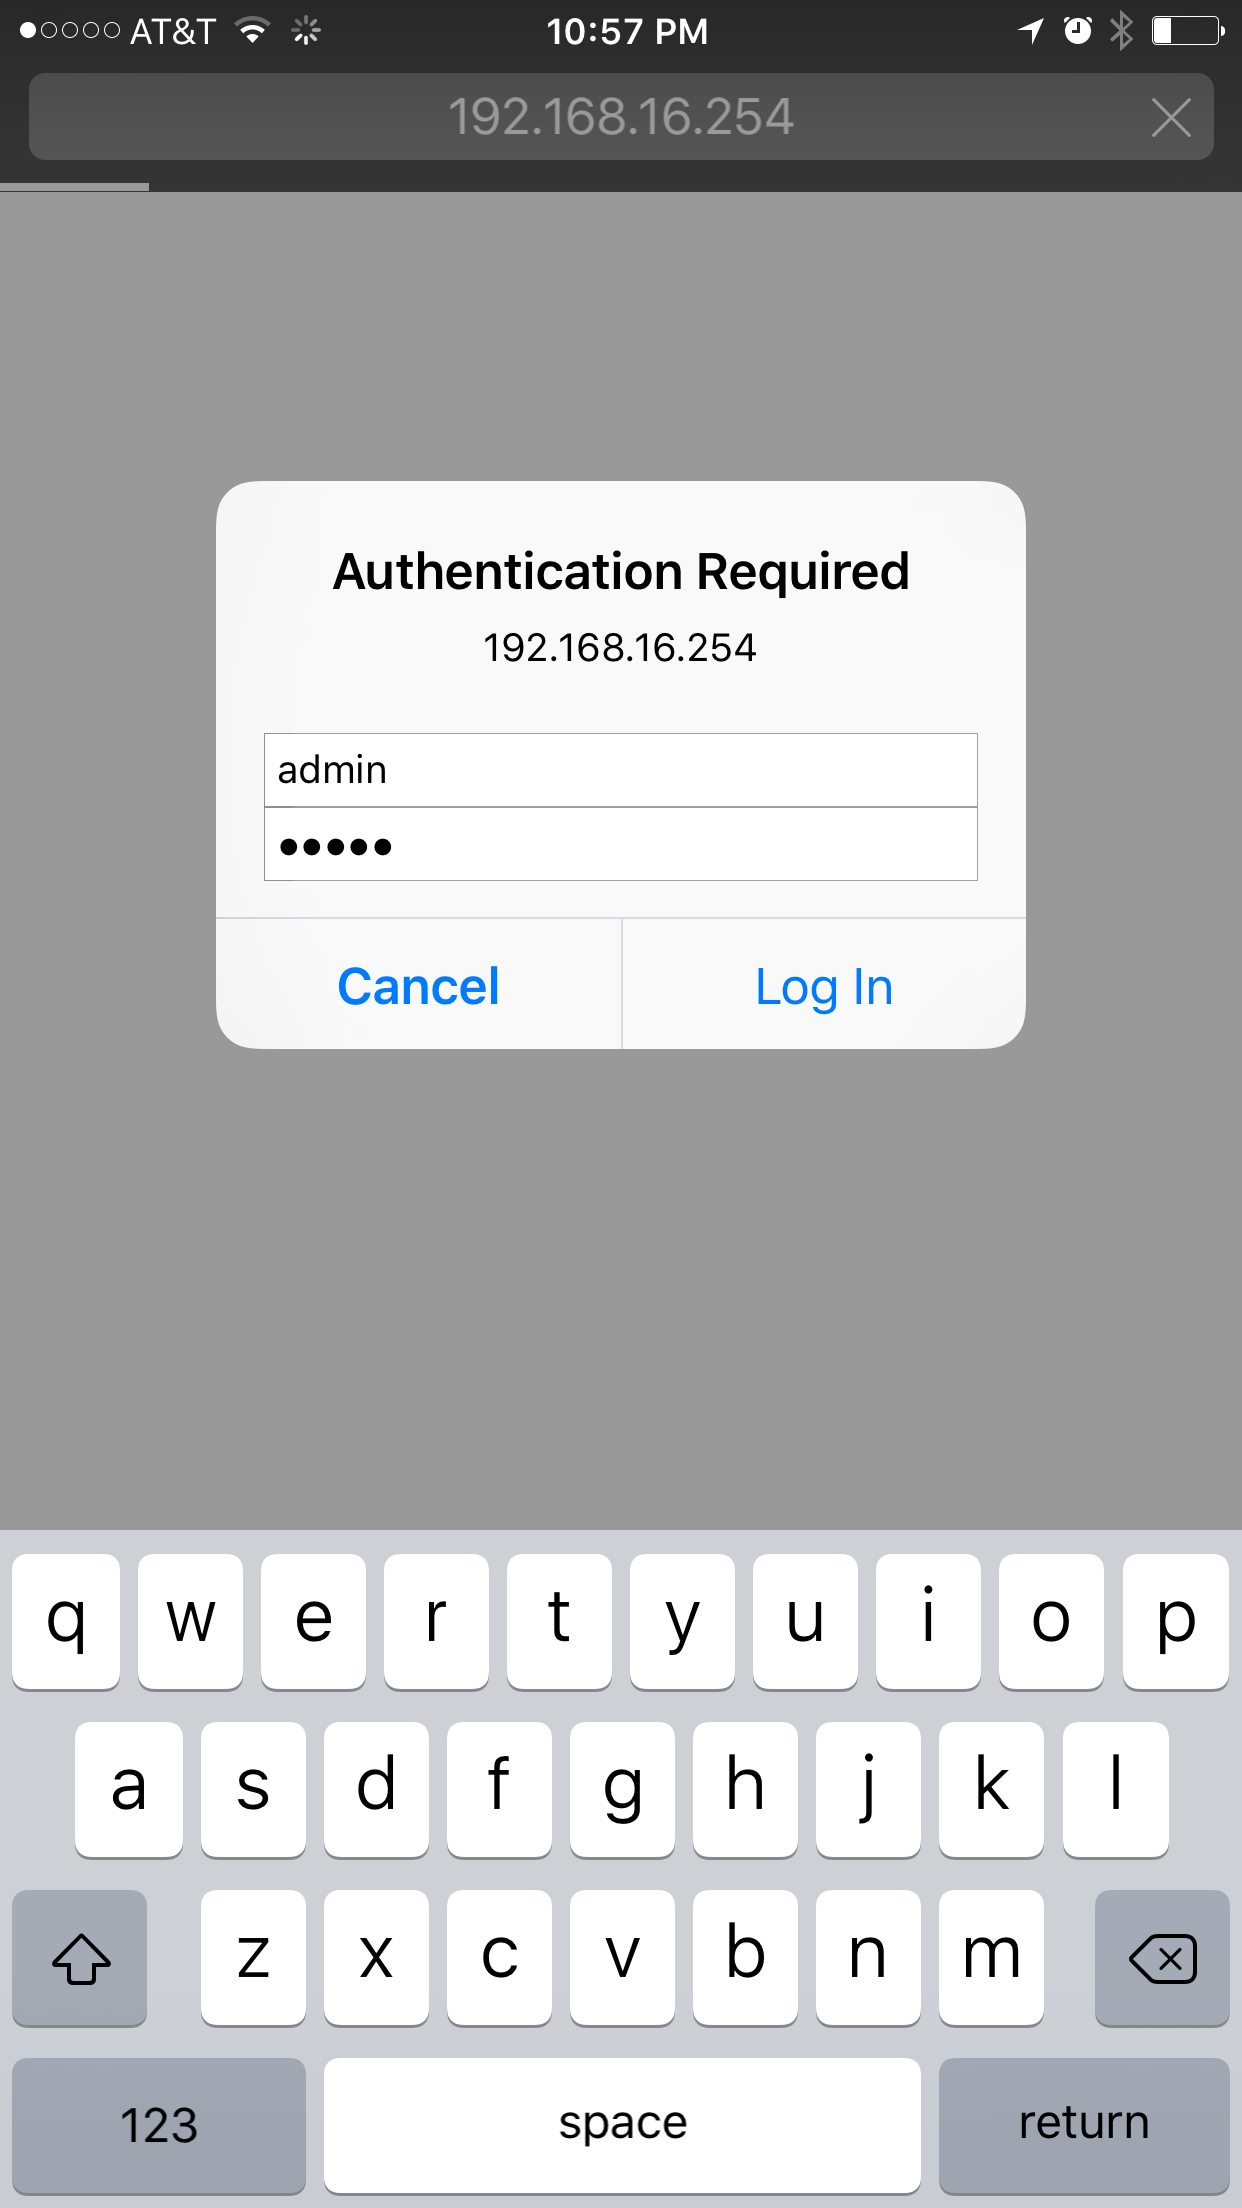
First, we need to find out the P2P setting by enter http://192.168.16.254/p2p.asp in the
bowser. The username is ‘admin’ and password is ‘admin’:
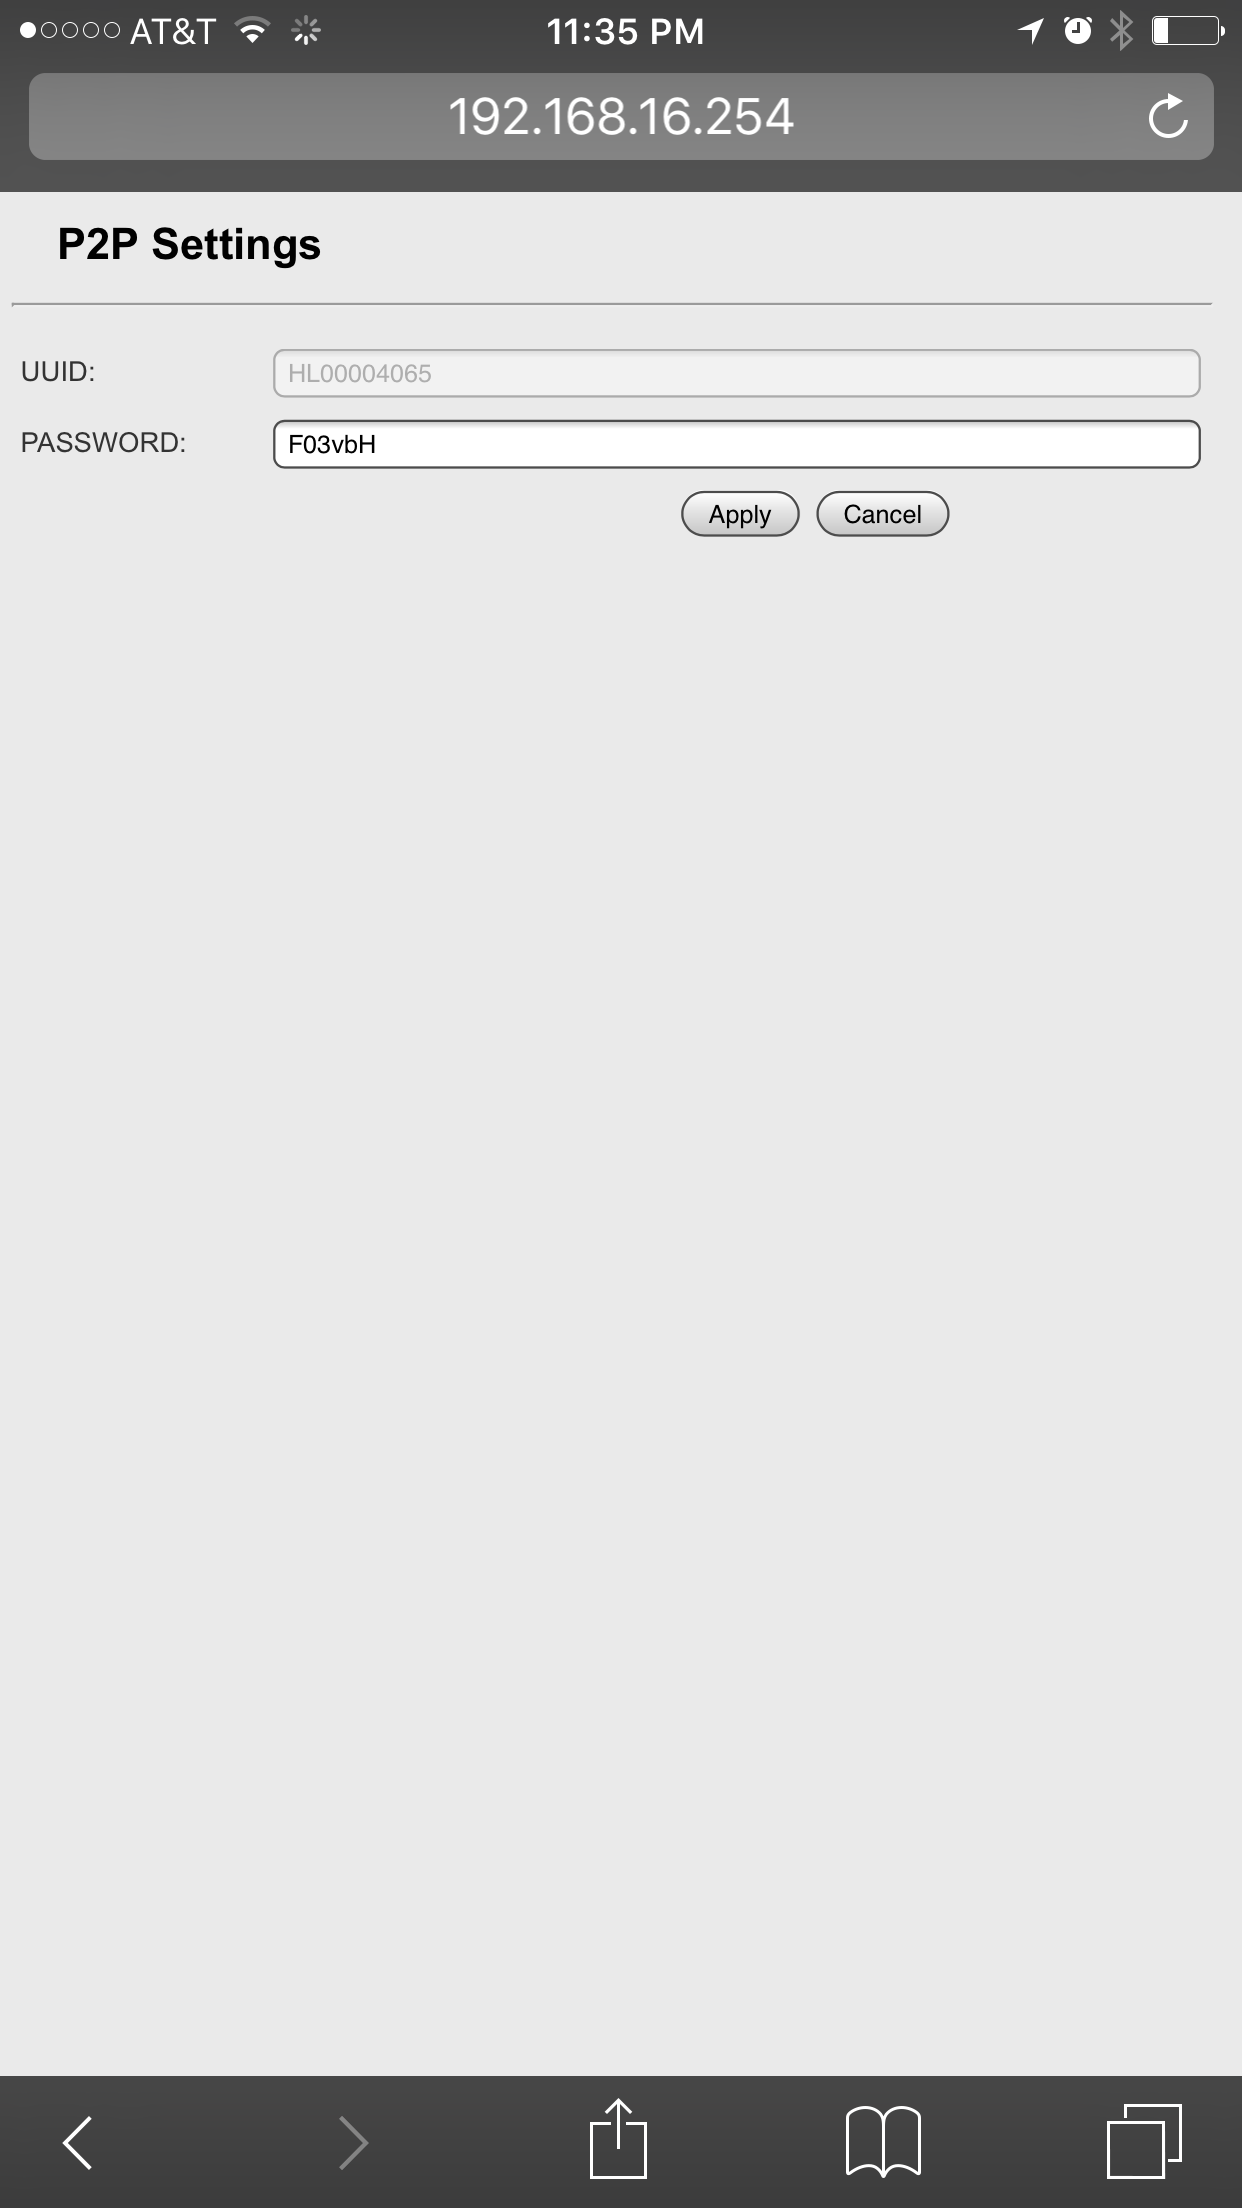
Modify the password and write down the UUID and the new password. We will need them when we control the relay.
The next step is to configure the Wifi plug and play to connect to your home router.
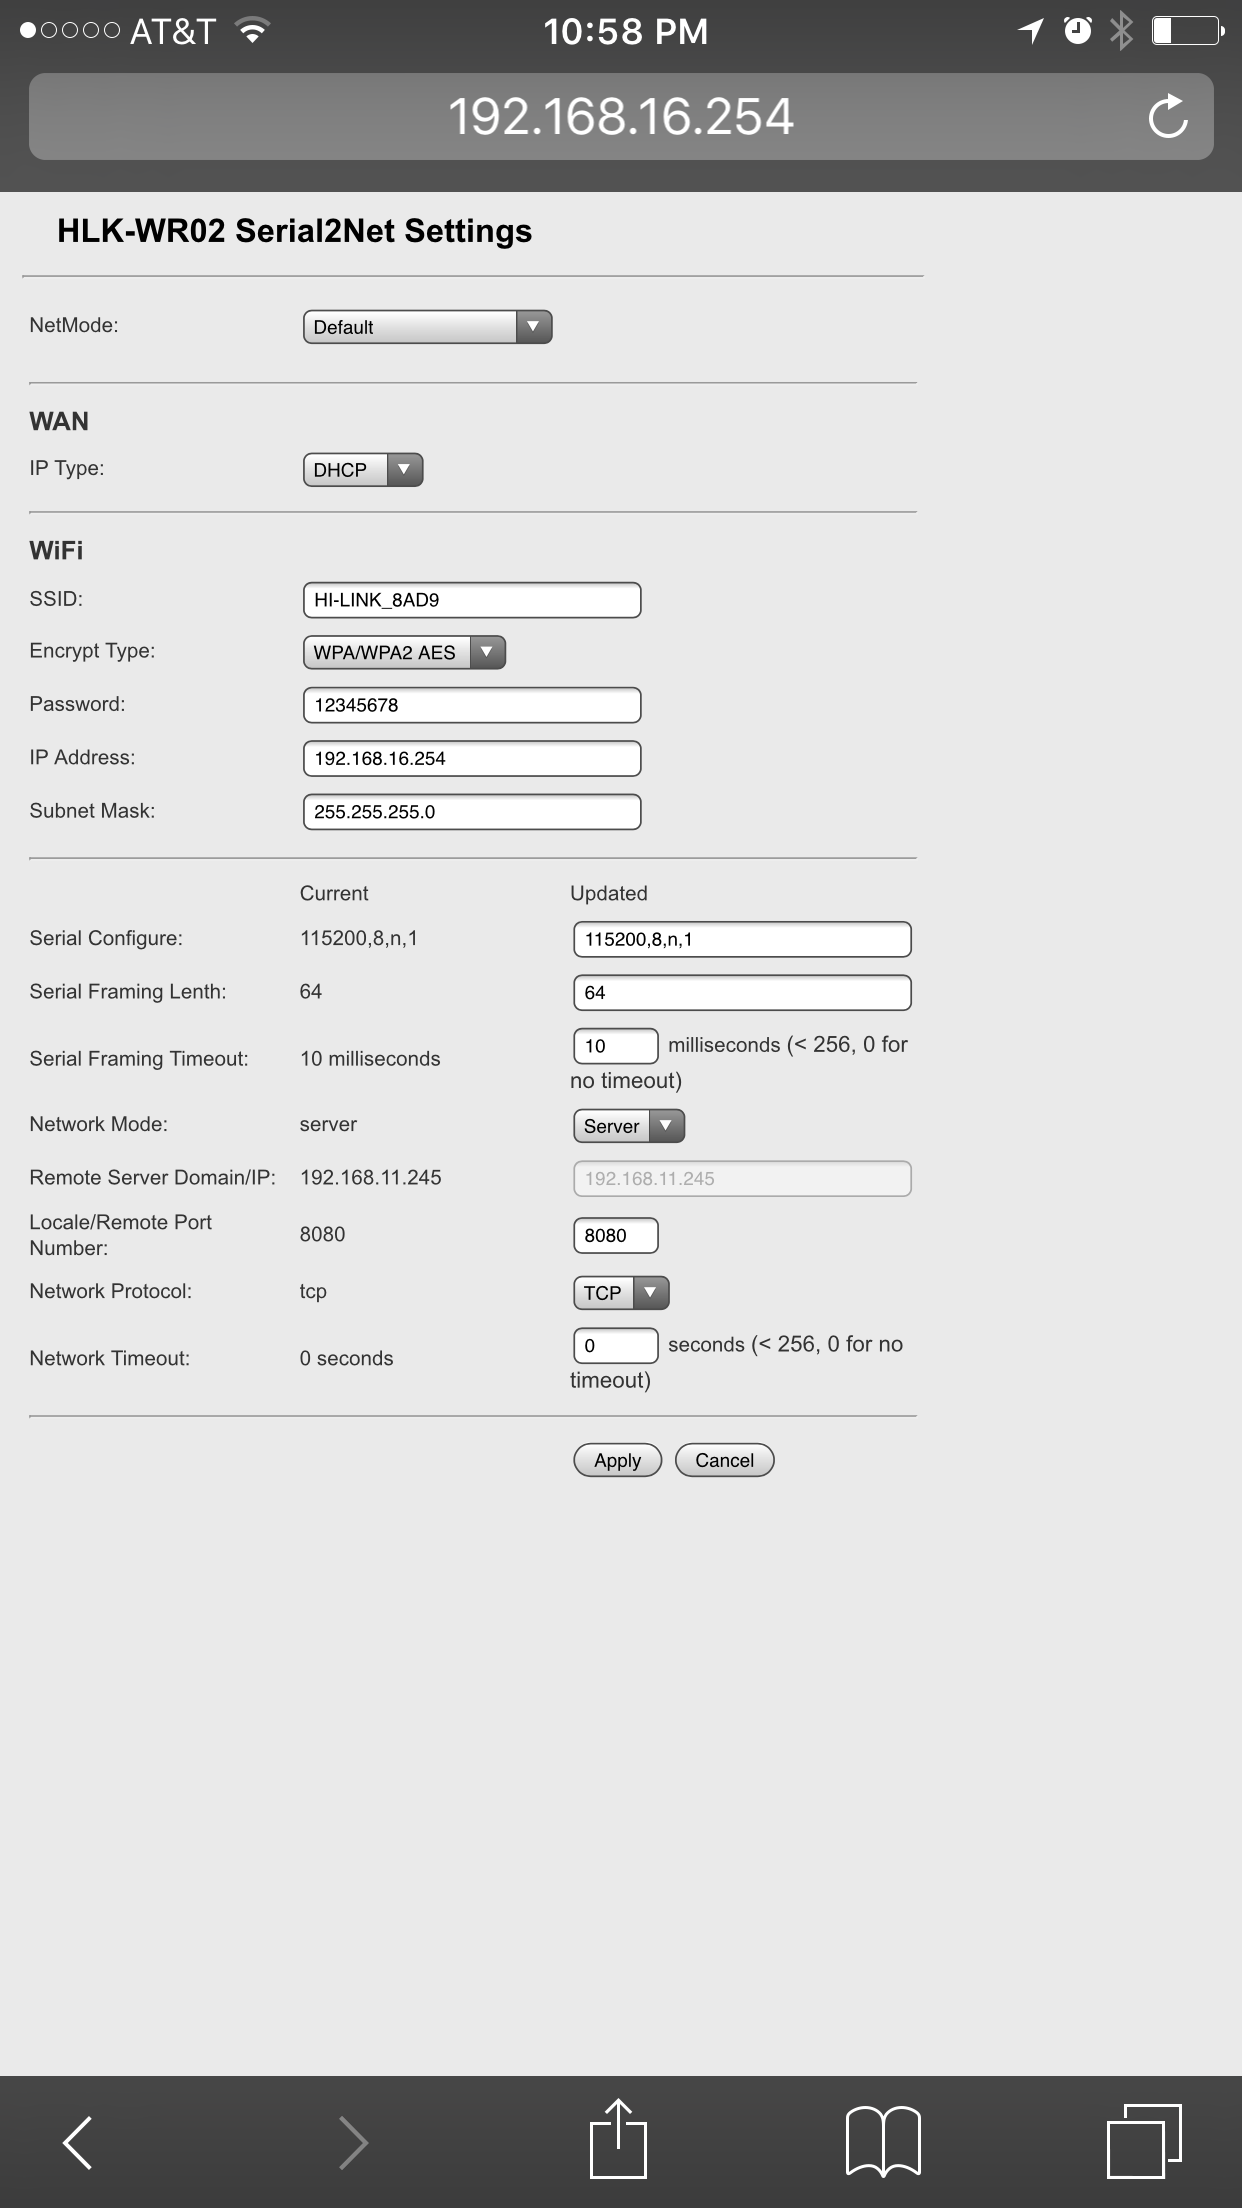
Enter http://192.168.16.254/ser2net.asp in your browser.
When it prompts, the username is ‘admin’, and password is also ‘admin’.
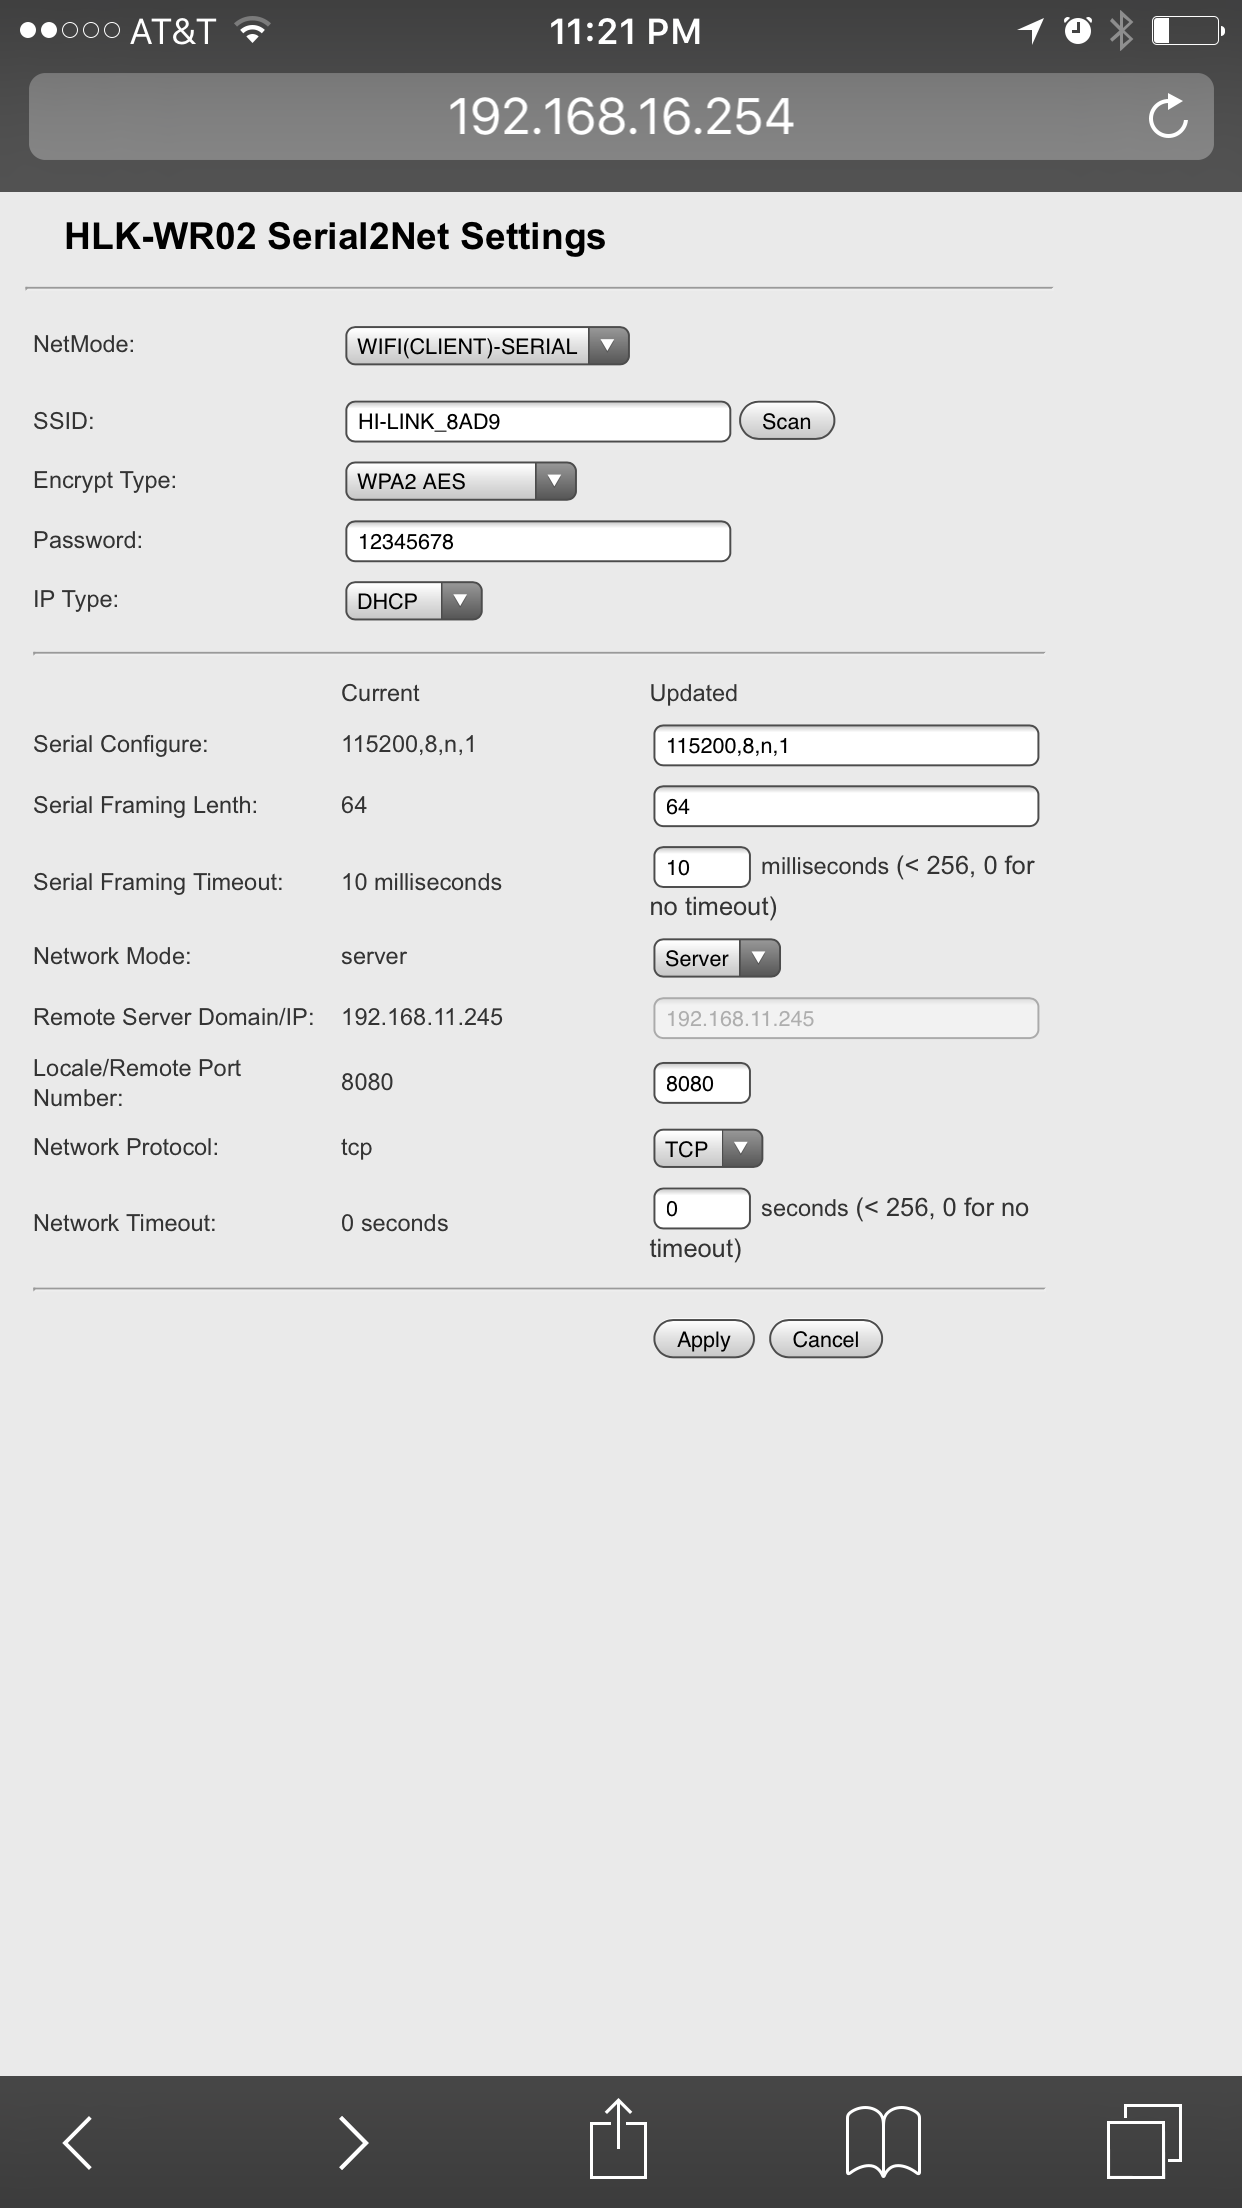
Now we need to change the netmode to ‘WiFi(ClIENT)-SERIAL’:

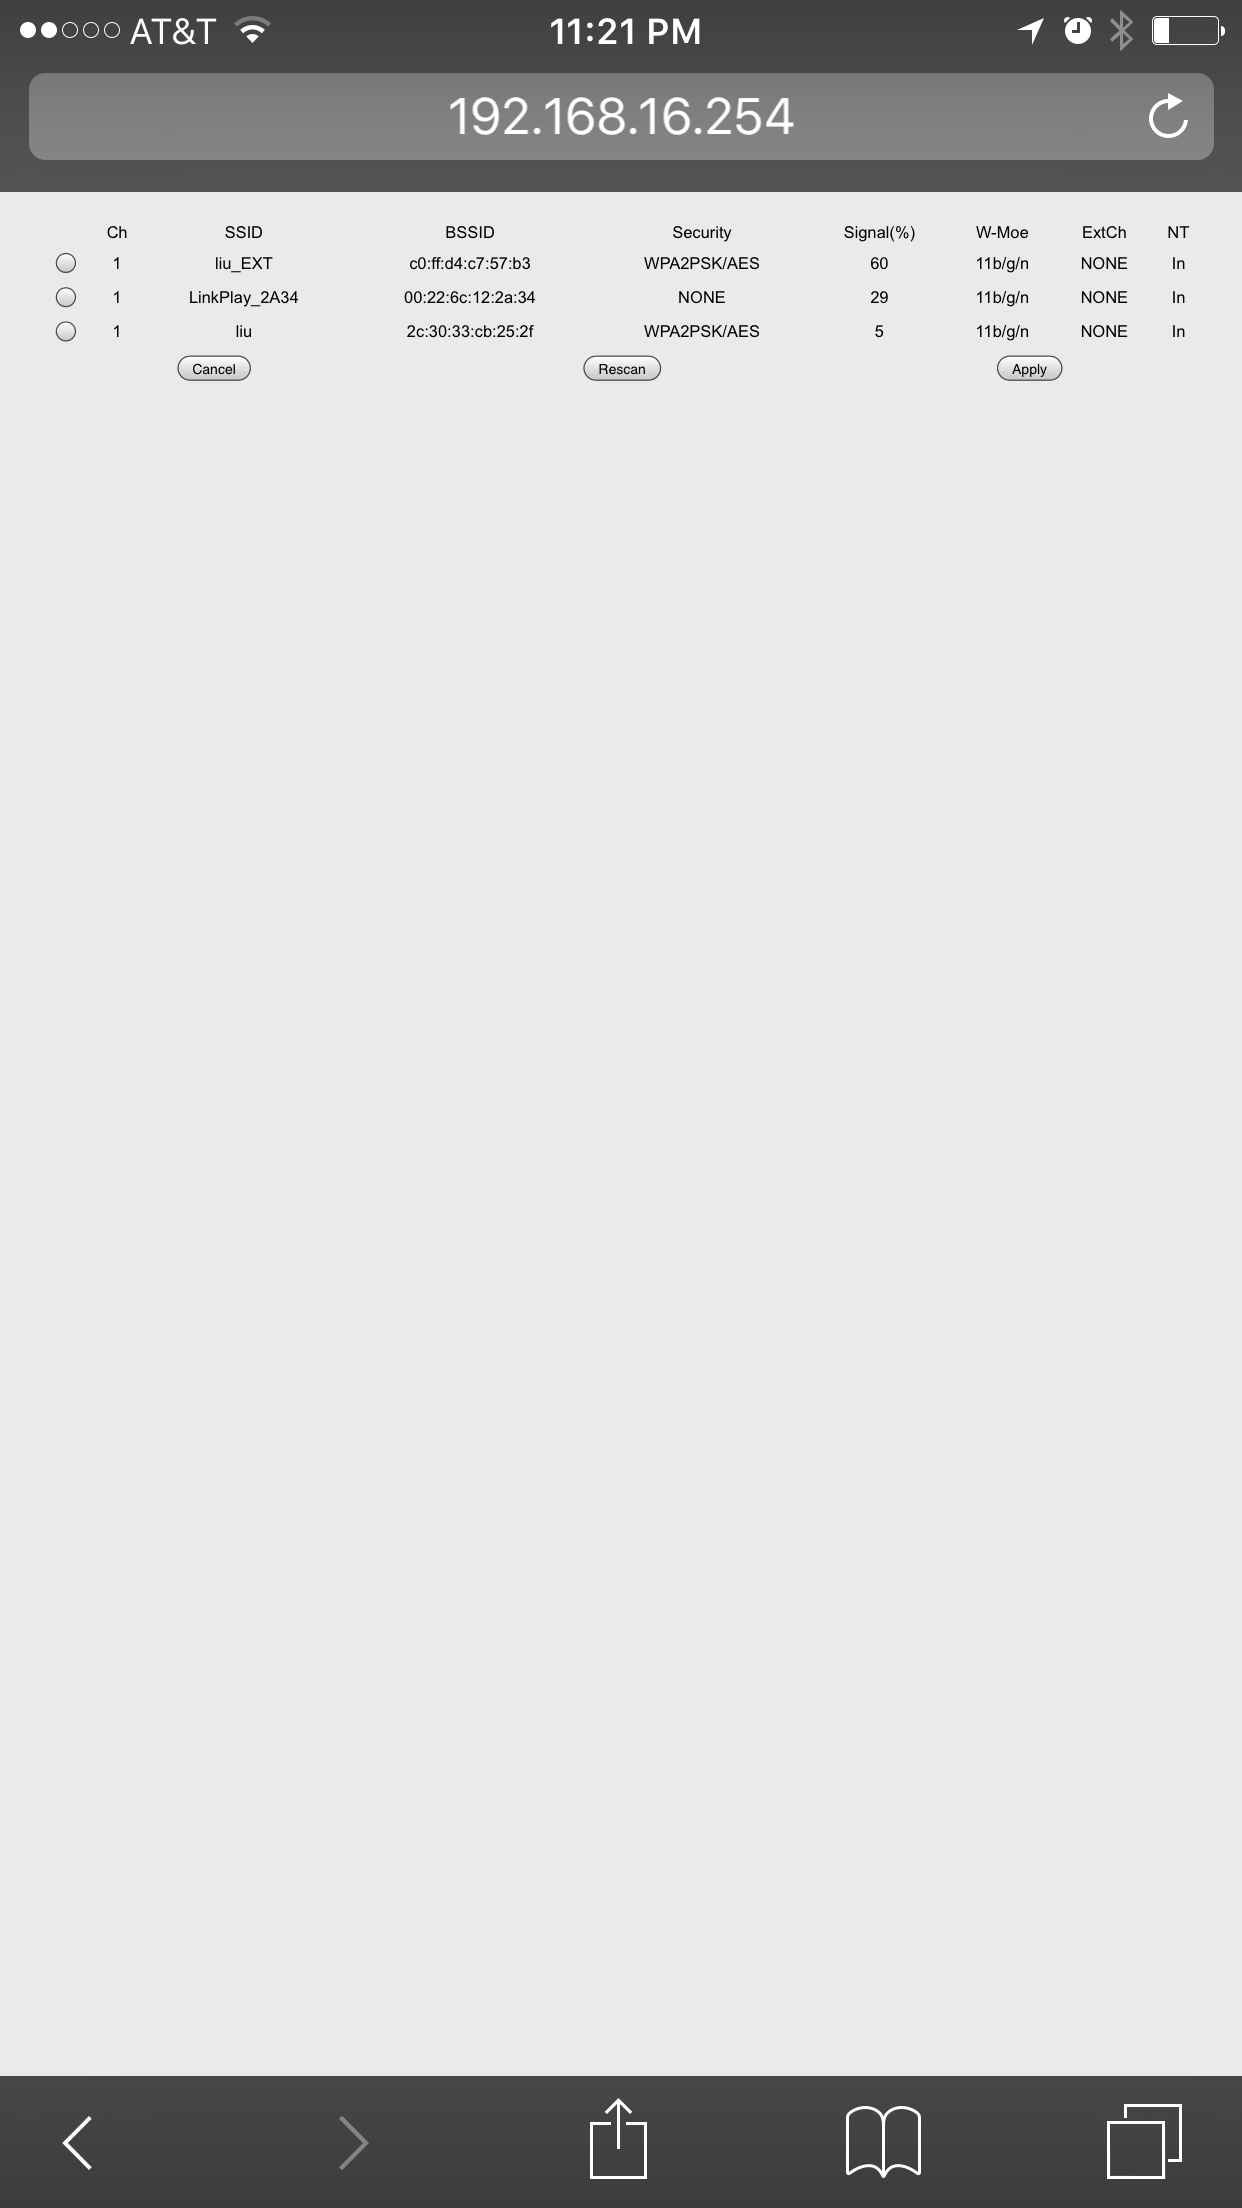
and then scan for the SSIDs:
Click ‘SCAN’:


After we hit the apply button, the wifi plug and play relay will reboot, and the self hosted access point ‘HI-LINK_XXXX’ will disappear, and the wifi relay will connect to your home router.
Install the windows APP, withe UUID and password, we can control the relay wherever we are!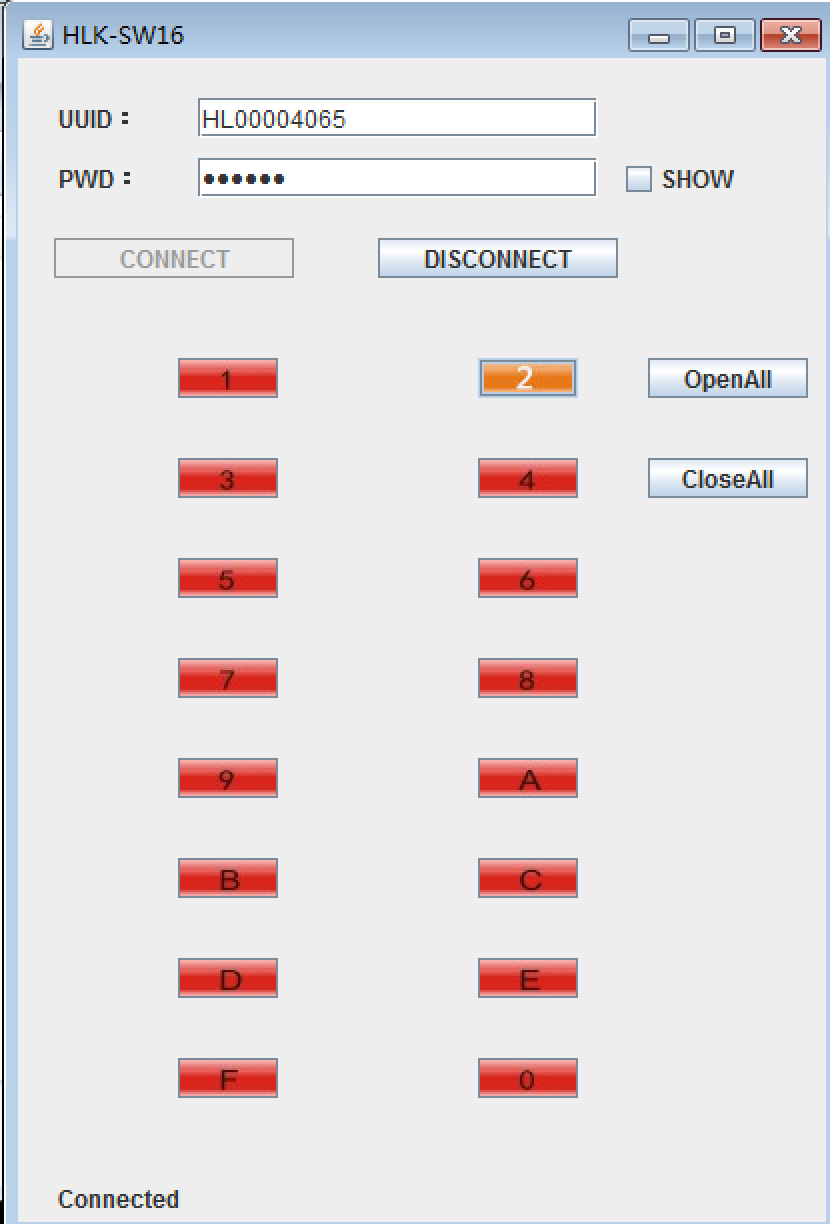
Side note:
After configuration, if we want to change the router that the wifi router connects, we follow the steps below:
- Power on wifi relay.
- Wait for longer than 35 seconds, press and hold the ‘WPS’ button for 6 seconds or longer.
- Power cycle wifi relay, and it should boot into the self hosted AP mode.
The android app can be downloaded at:
- app to control relays
Leave a Reply
You must be logged in to post a comment.