[vc_row][vc_column][vc_column_text]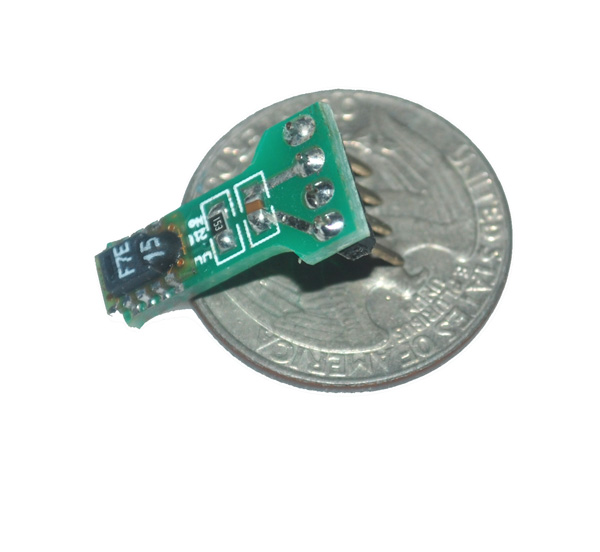

SHT1X (10/11/15) sensor which integrates the sensing element and signal processing circuit on a mini PCB, and outputs full calibration digital signals.
Sensor includes a humidity sensitive components and temperature measure, and they are on the same chip, with 14 A/D converter and a serial interface circuit to realize the seamless connection.
Therefore, the product has excellent quality, quick response, strong anti-jamming capability, high performance ratio.
Every sensor are calibrated in the extremely precise humidity chamber, the calibration coefficients are stored with program form in OT, and used for inner signals to calibrate.
SHT10/11/15 uses a two wire communication interface similar to I2C, and makes it really easy to be integrated into the host system.[/vc_column_text][vc_tour][vc_tab title=”Parts List” tab_id=”1393382286-1-32423c-5deb”][vc_column_text]
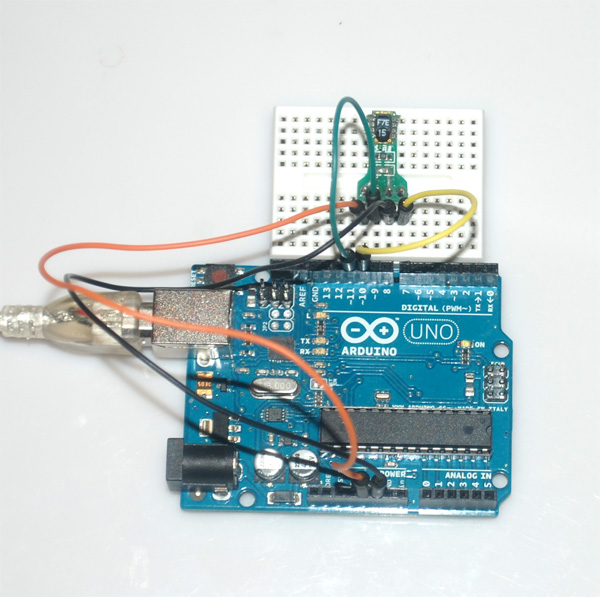
- 1 x Arduino UNO
- 1 x SHT15 breakout
- 1 x mini breadboard
- 4 x Male to male jumper wires
 [/vc_column_text][/vc_tab][vc_tab title=”Wiring instructions” tab_id=”1393382286-2-24423c-5deb”][vc_column_text]
The pin definition of SHT15 from top to bottom is as follows:
- Data
- Ground
- SCK
- VCC
The wire diagram is:
- SHT15 VCC –> Arduino UNO +5V,
- SHT15 GND –> Arduino UNO GND
- SHT15 Data –> Arduino UNO D10
- SHT15 Sck –> Arduino UNO D11
 [/vc_column_text][/vc_tab][vc_tab title=”Running test” tab_id=”1393442313978-2-6423c-5deb”][vc_column_text](1)We wire the parts according to the wiring diagram:
(2)Download the arbuino library in attachment,and put it into the directory ‘arduino-0021/libraries’ :
NOTE: We tested the library on Arduino 1.0 and 1.5, although it does compile, but the results are wrong. Please stay with Arduino IDE before version 1.0.

(3)Click File -> Examples -> SHT1x -> ReadSHT1xValues,open a toutin,and burn it into arduino:

(4)After the burning,open the serial port monitor,modify baud rate to 38400, you can see the current temperature and humidity sensor degree:
 [/vc_column_text][/vc_tab][vc_tab title=”Download the attachment” tab_id=”1393442318007-4-10423c-5deb”][vc_column_text]
ArduinoLibrary:SHT1x
Datasheet:SHT1x_Datasheet
[/vc_column_text][/vc_tab][/vc_tour][/vc_column][/vc_row]
Leave a Reply
You must be logged in to post a comment.