[vc_row][vc_column width=”1/1″][vc_column_text]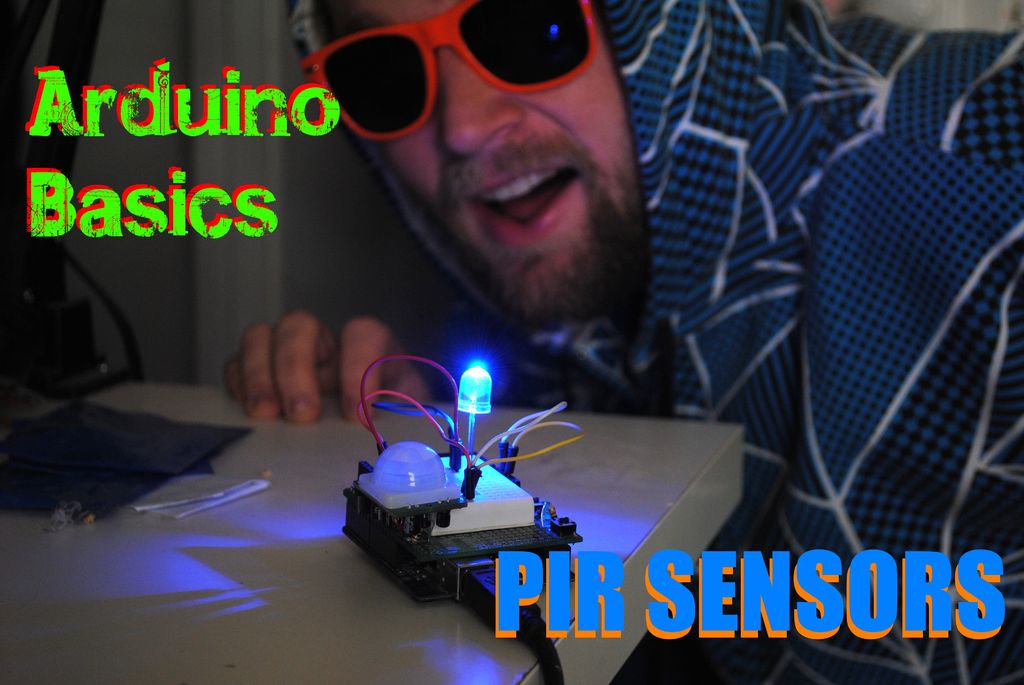
Welcome to the next installment of Arduino Basics!
This instructable will teach you how to use a PIR sensors with the arduino, and we wil build a simple motion detector!
[/vc_column_text][vc_tour][vc_tab title=”Step 1: Supplies” tab_id=”1407980343-1-6″][vc_column_text]
For this instructable you will need the following:
Electronics:
| Part | Supplier (pictures are clickable!) |
| Arduino | |
| LED | |
| PIR sensor | |
| Solid wire | |
[/vc_column_text][/vc_tab][vc_tab title=”Step 2: Setup” tab_id=”1407980343-2-15″][vc_column_text]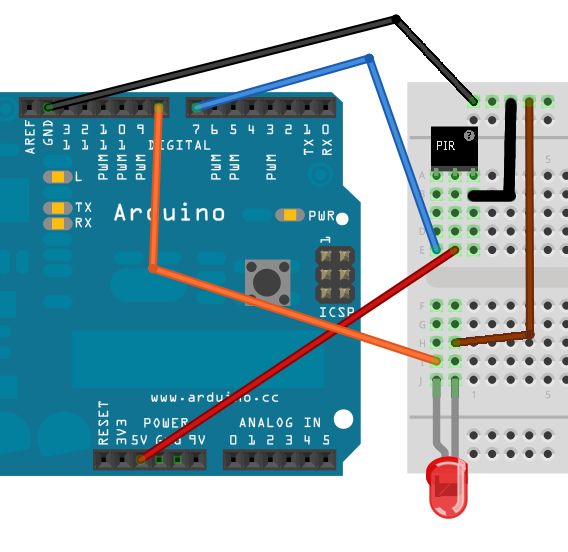
The wiring is pretty simple, the PIR sensor has screen printed: + – out
Hook the + to 5v, – to ground and out to pin 7
The take the LED and put power to pin 8 and ground to ground.
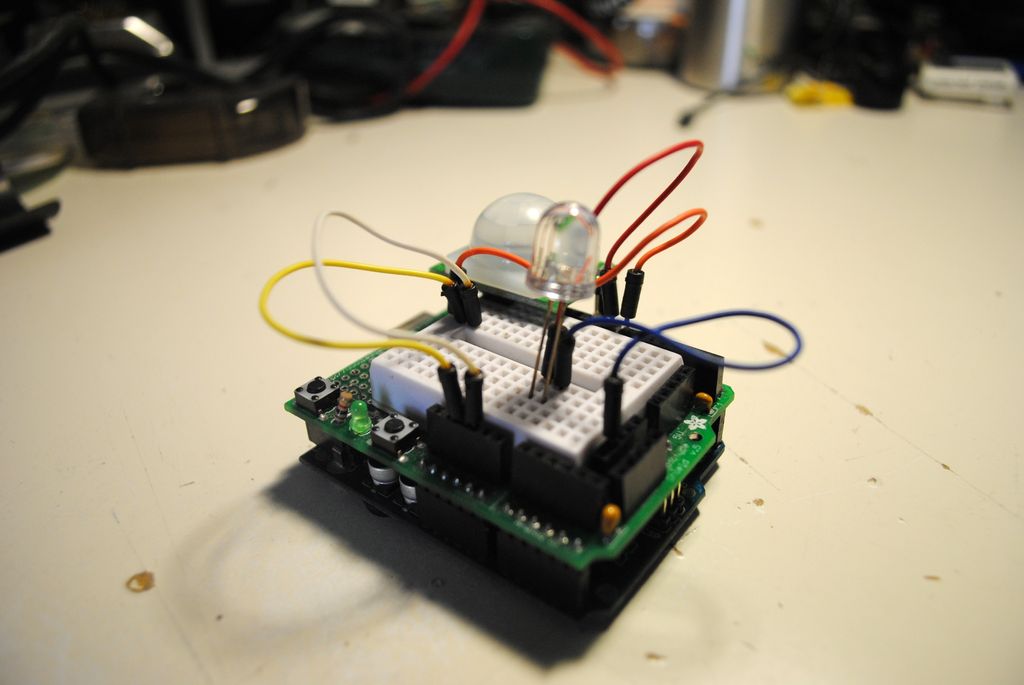
If its confusing, take a look at the pictures![/vc_column_text][/vc_tab][vc_tab title=”Step 3: Code” tab_id=”1407981491130-2-1″][vc_column_text]
This code is lifted from the arduino.cc site here, the code I used is also attached.
/*
 * //////////////////////////////////////////////////
 * //making sense of the Parallax PIR sensor's output
 * //////////////////////////////////////////////////
 *
 * Switches a LED according to the state of the sensors output pin.
 * Determines the beginning and end of continuous motion sequences.
 *
 * @author: Kristian Gohlke / krigoo (_) gmail (_) com / http://krx.at
 * @date:   3. September 2006
 *
 * kr1 (cleft) 2006
 * released under a creative commons "Attribution-NonCommercial-ShareAlike 2.0" license
 * http://creativecommons.org/licenses/by-nc-sa/2.0/de/
 *
 *
 * The Parallax PIR Sensor is an easy to use digital infrared motion sensor module.
 * (http://www.parallax.com/detail.asp?product_id=555-28027)
 *
 * The sensor's output pin goes to HIGH if motion is present.
 * However, even if motion is present it goes to LOW from time to time,
 * which might give the impression no motion is present.
 * This program deals with this issue by ignoring LOW-phases shorter than a given time,
 * assuming continuous motion is present during these phases.
 *
 */

/////////////////////////////
//VARS
//the time we give the sensor to calibrate (10-60 secs according to the datasheet)
int calibrationTime = 30;

//the time when the sensor outputs a low impulse
long unsigned int lowIn;

//the amount of milliseconds the sensor has to be low
//before we assume all motion has stopped
long unsigned int pause = 5000;

boolean lockLow = true;
boolean takeLowTime;

int pirPin = 7;    //the digital pin connected to the PIR sensor's output
int ledPin = 8;

/////////////////////////////
//SETUP
void setup(){
  Serial.begin(9600);
  pinMode(pirPin, INPUT);
  pinMode(ledPin, OUTPUT);
  digitalWrite(pirPin, LOW);

  //give the sensor some time to calibrate
  Serial.print("calibrating sensor ");
    for(int i = 0; i < calibrationTime; i++){
      Serial.print(".");
      delay(1000);
      }
    Serial.println(" done");
    Serial.println("SENSOR ACTIVE");
    delay(50);
  }

////////////////////////////
//LOOP
void loop(){

     if(digitalRead(pirPin) == HIGH){
       digitalWrite(ledPin, HIGH);   //the led visualizes the sensors output pin state
       if(lockLow){
         //makes sure we wait for a transition to LOW before any further output is made:
         lockLow = false;
         Serial.println("---");
         Serial.print("motion detected at ");
         Serial.print(millis()/1000);
         Serial.println(" sec");
         delay(50);
         }
         takeLowTime = true;
       }

     if(digitalRead(pirPin) == LOW){
       digitalWrite(ledPin, LOW);  //the led visualizes the sensors output pin state

       if(takeLowTime){
        lowIn = millis();          //save the time of the transition from high to LOW
        takeLowTime = false;       //make sure this is only done at the start of a LOW phase
        }
       //if the sensor is low for more than the given pause,
       //we assume that no more motion is going to happen
       if(!lockLow && millis() - lowIn > pause){
           //makes sure this block of code is only executed again after
           //a new motion sequence has been detected
           lockLow = true;
           Serial.print("motion ended at ");      //output
           Serial.print((millis() - pause)/1000);
           Serial.println(" sec");
           delay(50);
           }
       }
  }
You can see from the code, the sensor first calibrates itself and then watches for movement. When it detects movement, the blue light goes on. You can watch the serial monitor to see how long the movement lasts.
pde file:
pir.pde[/vc_column_text][/vc_tab][vc_tab title=”Step 4: Further Projectse” tab_id=”1407982134689-3-2″][vc_column_text]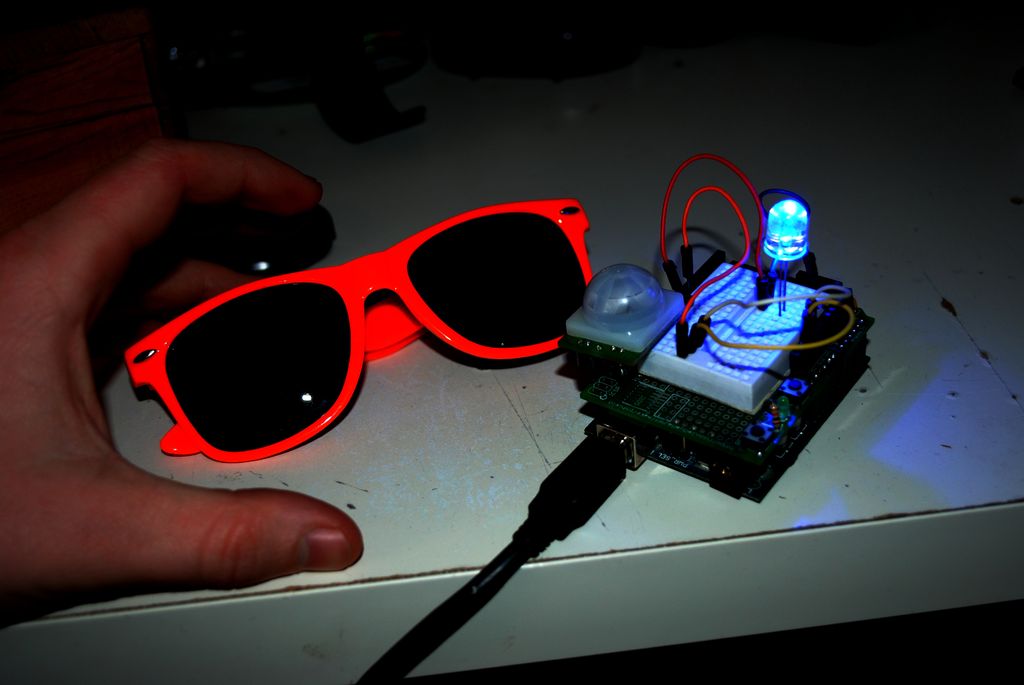
After these steps you have a very simple motion detector. From here you can use the PIR sensor to trigger events (like a siren or a text message that someone is in your room).
I just chose to use it to protect my stunnaz from blue light fearing monsters. It seems to work so far….
Please post your PIR sensor projects below and stay tuned for even more Arduino Basics!
via[/vc_column_text][/vc_tab][/vc_tour][/vc_column][/vc_row]
Leave a Reply
You must be logged in to post a comment.