[vc_row][vc_column][vc_column_text]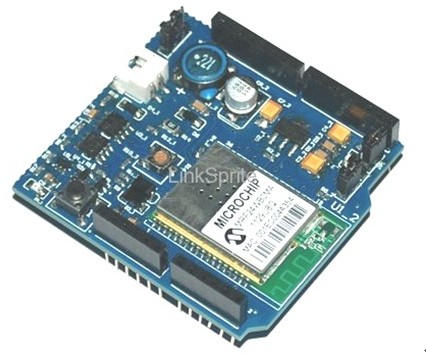
CuHead WiFi shield Version 2.0 is the shield you need to get Wi-Fi connectivity to your Arduino-based project. It also has the EEPROM that can be used to store the webpages. Moreover, it also has the battery charging components populated.
[/vc_column_text][/vc_column][/vc_row][vc_row][vc_column width=”1/1″][vc_tour][vc_tab title=”Parts List” tab_id=”1395558876-1-99″][vc_column_text]
- 1 x Wireless Router with Internal DHCP
- 1 x CuHead V2 WiFi shield
- 1 x Arduino UNO
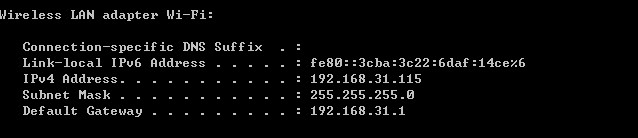
[/vc_column_text][/vc_tab][vc_tab title=”Check the network environment” tab_id=”1395558876-2-15″][vc_column_text]1. In the PC terminal, enter “#ipconfig” to check gateway:
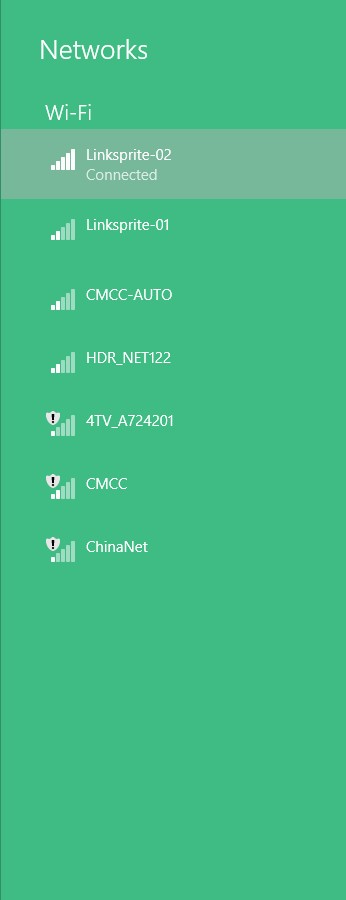
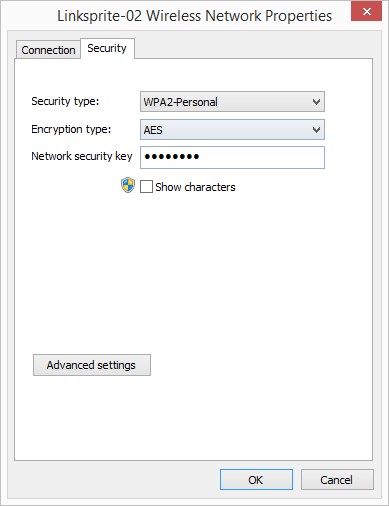
2. View wireless network encryption
In this project, our SSID is “Linksprite-02”, and we can see the encryption method is WPA2 encryption
 [/vc_column_text][/vc_tab][vc_tab title=”Wiring Diagram” tab_id=”1395561531760-2-10″][vc_column_text]Directly install CuHead WiFi Shield on Arduino, then connect Arduino to a computer through a USB cable .
[/vc_column_text][/vc_tab][vc_tab title=”Program Code” tab_id=”1395562473203-3-8″][vc_column_text]1. Download the code from github (http://www.github.com/linksprite).
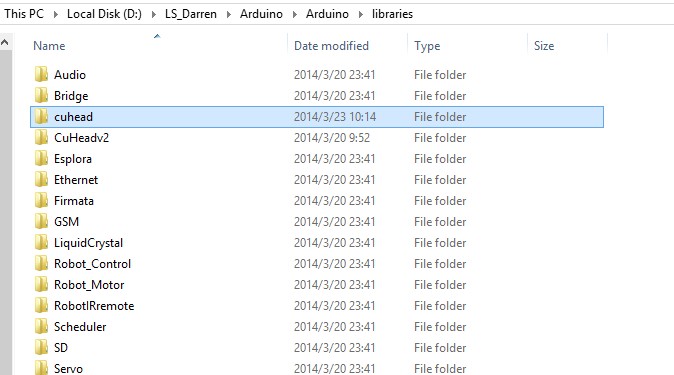
2. Rename the unzipped folder as cuhead, put it into the Arduino specified library file path (***/arduino/libraries)
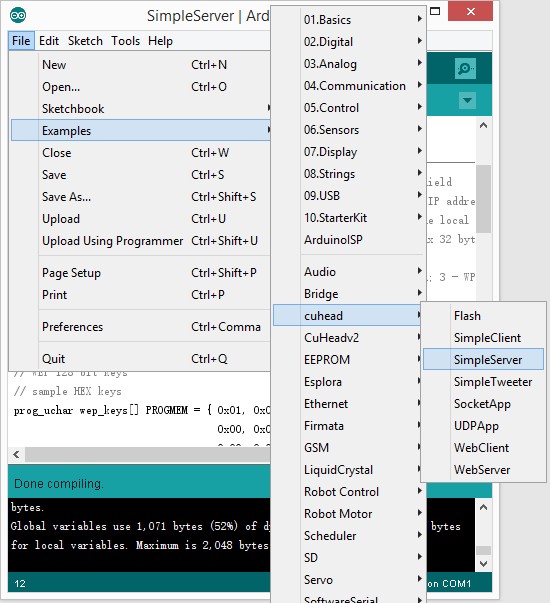
3. Open example -> cuhead -> SimpleServer:
4. Modify SimpleServer code
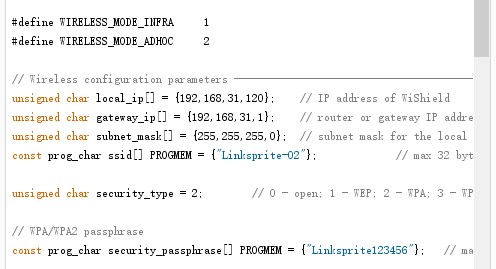
(1) In local_ip , set the IP address of CuHead WiFi shield (In this case, set to 120 because the routing of IP is 192.162.31.100 – 192.168.31.200 , we can modify it according to different network environment )
(2) gateway_ip is the gateway IP ( In this case , is 192.168.31.1)
(3) pro_char ssid[] is the WiFi name ( In this case , is Linksprite-02)
(4) prog_char security_passphrase[] store the WiFi password to CuHead
(5) security_type is the encryption mode, we check out is WPA2 in the previous step, in this step can change to 3 (In this experiment ,we found that 2 can also be ok)
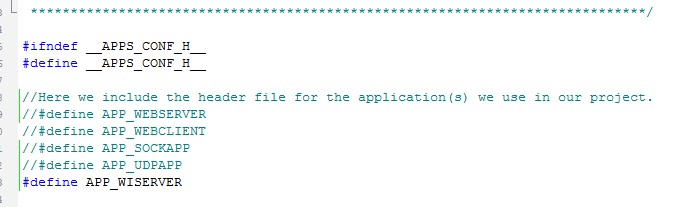
(6) modify the apps-config.h file under the cuhead library, we can modify it as follows:
 [/vc_column_text][/vc_tab][vc_tab title=”The Results” tab_id=”1395564810416-4-4″][vc_column_text]After we load the code to Arduino, waiting for about several minutes, CuHead red LED will turn on, which indicates that Arduino has already connected to the router.

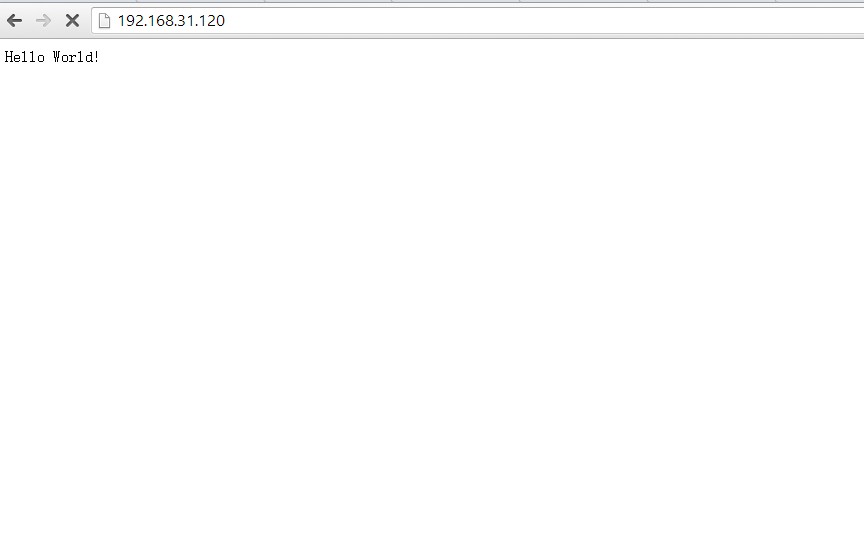
Open the browser, enter the IP address of CuHead that we defined in the code: 192.168.31.120. We will see the following web page:
 [/vc_column_text][/vc_tab][/vc_tour][/vc_column][/vc_row]
Leave a Reply
You must be logged in to post a comment.