[vc_row][vc_column width=”1/1″][vc_tour][vc_tab title=”Install” tab_id=”1389239567-1-92″][vc_column_text]Cloud9 IDE (http://www.c9.io) is an online development environment for Javascript and Node.js applications as well as HTML, CSS, PHP, Java, Ruby and 23 other languages.
We recommend that Cloud 9 IDE run on a SD card with capacity larger than 4GB. Please refer to chapter 2 on how to migrate program/data from NAND to a SD card.
Install required packages
$ sudo apt-get install git libssl-dev python-software-properties
Build nodejs ( required by cloud9 IDE )
$ git clone git://github.com/joyent/node.git
$ cd node
$ git checkout v0.8.22
$ make
$ sudo make install
After nodejs installed, you can delete the source to save space.
Build cloud9 IDE
$ git clone https://github.com/ajaxorg/cloud9.git
$ cd cloud9/
$ npm install
[/vc_column_text][/vc_tab][vc_tab title=”Run cloud9 on pcDuino” tab_id=”1389239567-2-22″][vc_column_text]$ ./bin/cloud9.sh -l 0.0.0.0
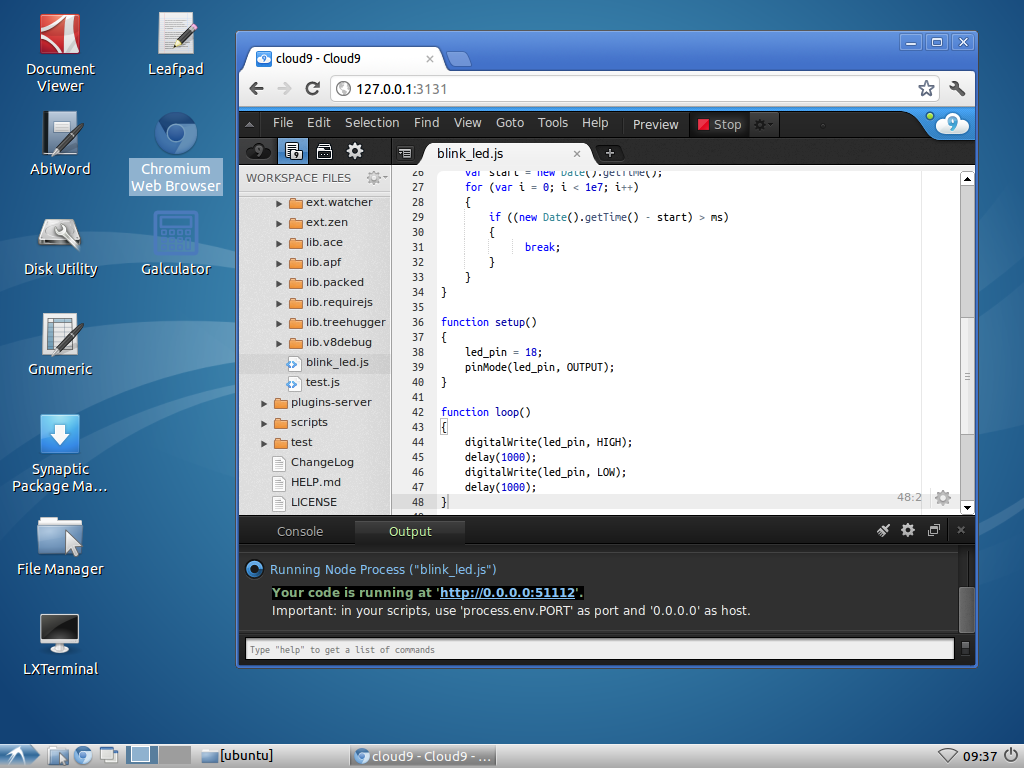
If you are going to run on pcDuino, use the Chrome browser on pcDuino, and point to http://127.0.0.1:3131.
If you are going to run on a PC or other device, use the Chrome browser on pcDuino, and point to http://board-ip-address:3131. The ip address of pcDuino can be found by using:
$ ifconfig
[/vc_column_text][/vc_tab][vc_tab title=”Run js test code on cloud9 IDE” tab_id=”1389243391662-2-7″][vc_column_text]
It’s very easy to run js code from cloud9.
Just write the code ( example blink_led.js ), then press button “RUN” on menu bar.
Run on pcDuino:
Run on PC:
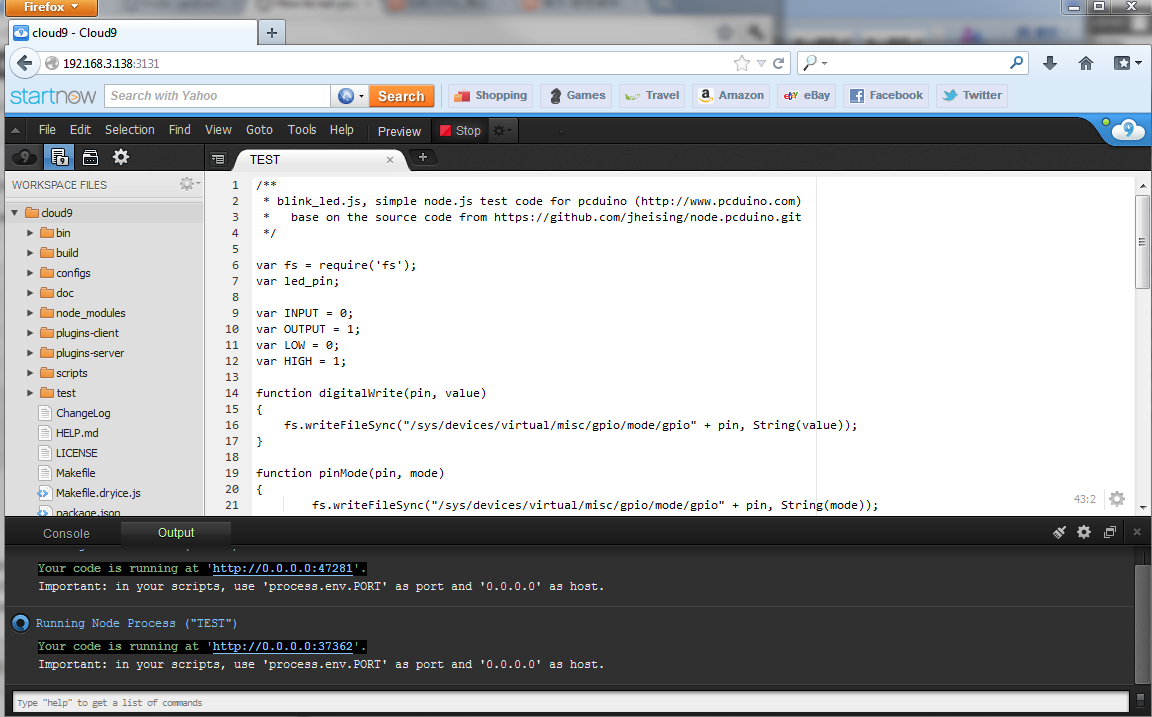
The following is the example code:
blink_led.js:
/**
* blink_led.js, simple node.js test code for pcduino (http://www.pcduino.com)
* base on the source code from https://github.com/jheising/node.pcduino.git
*/
var fs = require(‘fs’);
var led_pin;
var INPUT = 0;
var OUTPUT = 1;
var LOW = 0;
var HIGH = 1;
function digitalWrite(pin, value)
{
fs.writeFileSync(“/sys/devices/virtual/misc/gpio/mode/gpio” + pin, String(value));
}
function pinMode(pin, mode)
{
fs.writeFileSync(“/sys/devices/virtual/misc/gpio/mode/gpio” + pin, String(mode));
}
function delay(ms)
{
var start = new Date().getTime();
for (var i = 0; i < 1e7; i++)
if ((new Date().getTime() – start) > ms) break;
}
function setup()
{
led_pin = 18;
pinMode(led_pin, OUTPUT);
}
function loop()
{
digitalWrite(led_pin, HIGH);
delay(1000);
digitalWrite(led_pin, LOW);
delay(1000);
}
function main()
{
setup();
while(1)
{
loop();
}
}
main();
[/vc_column_text][/vc_tab][vc_tab title=”Run C/C++ program on cloud9 IDE” tab_id=”1389243534234-3-10″][vc_column_text]
Running C/C++ is almost the same as running a program from terminal.
Write your code first (example 00.pcDuino/blink_led.c ).
Run the following commands from command input box (at the bottom of cloud9 IDE):
cd 00.pcDuino/
g++ blink_led.c -larduino -I/usr/include/pcduino -o blink_led
./blink_led
The following is the example code:
blink_led.c
#include
int led_pin=18;
void setup()
{
pinMode(led_pin, OUTPUT);
}
void loop()
{
digitalWrite(led_pin, HIGH);
delay(100);
digitalWrite(led_pin, LOW);
delay(100);
}
[/vc_column_text][/vc_tab][/vc_tour][/vc_column][/vc_row]
Leave a Reply
You must be logged in to post a comment.