[vc_row][vc_column][vc_column_text]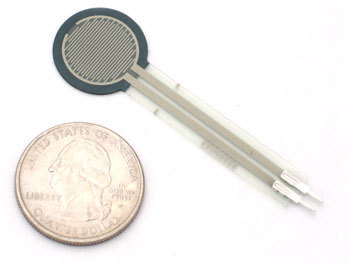
Pressure sensor converts pressure to electric signal as output. The pressure sensor is composed of elastic sensitive element and displacement sensitive components (or strain gauge). The role of elastic sensitive element is to make the measured pressure in a certain area and converted to the displacement or strain, and then displacement sensor or strain gauge is transformed into electrical signal into a certain relationship with the pressure. It is widely used in various industrial control environment.[/vc_column_text][/vc_column][/vc_row][vc_row][vc_column width=”1/1″][vc_tour][vc_tab title=”Parts list” tab_id=”1393400695-1-52″][vc_column_text]1. one red 5mm LED
2. several dupont line
3. one breadboard
4. two 260R resistor
5. one pcduino v2
6. one FSR402 varistor[/vc_column_text][/vc_tab][vc_tab title=”Wiring Diagram” tab_id=”1393400695-2-49″][vc_column_text]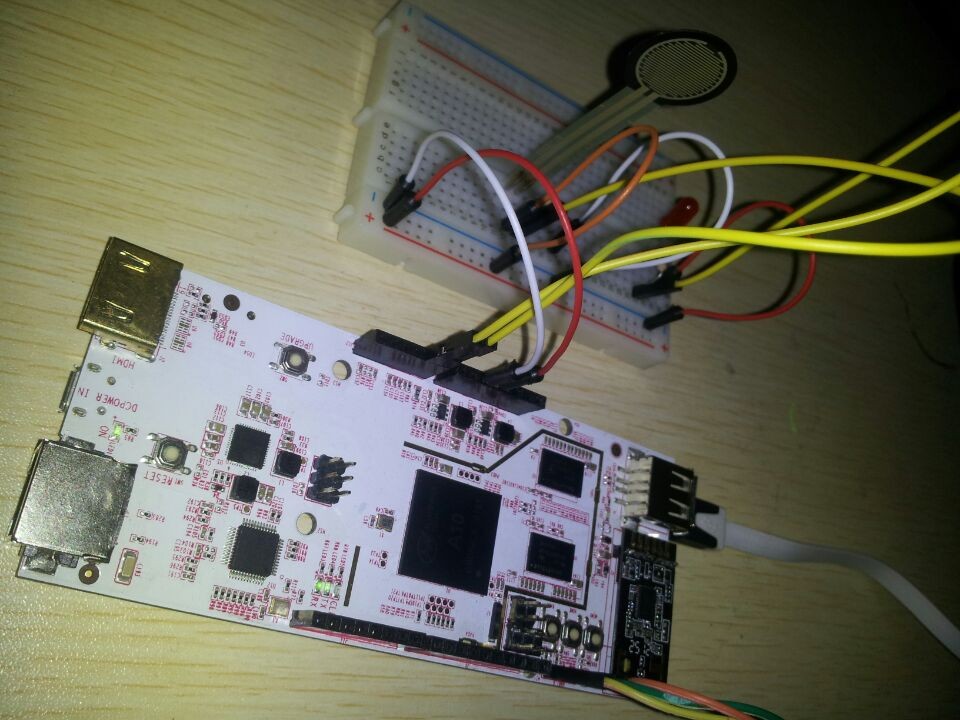
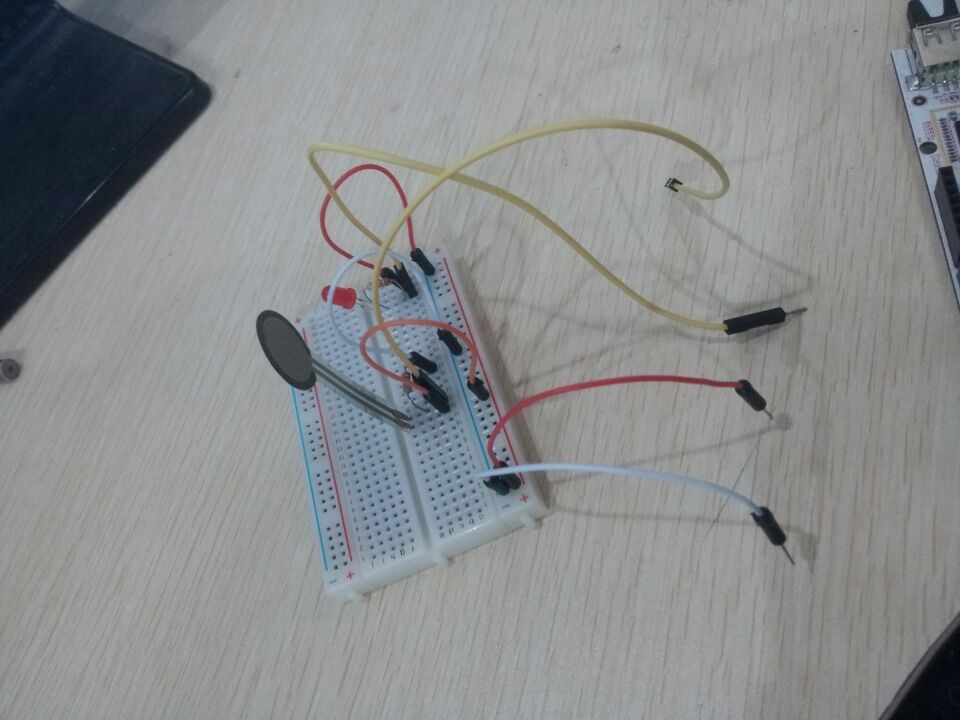
Below the right from top to bottom, 4 pin are corresponding to pcDuino A0, A1, 3.3V, GND
 [/vc_column_text][/vc_tab][vc_tab title=”Program code” tab_id=”1393400981202-2-9″][vc_column_text]
#include <core.h>

int pre_pin = 0;
int pre_data = 0;
int led_pin = 1;
void setup (){
 printf ("Begin test sensing pressure!\n");
 pinMode (pre_pin, INPUT);
}

void loop (){
 pre_data = analogRead (pre_pin);
 if (pre_data >= 58){
 digitalWrite (led_pin, HIGH);
 printf ("led on!\n");
 }
 else {
 digitalWrite (led_pin, LOW);
 printf ("led off!\n");
 }
}
[/vc_column_text][/vc_tab][vc_tab title=”Experimental result” tab_id=”1393401066517-3-6″][vc_column_text] Try to push the pressure sensor, can you see the light is on? The corresponding “LED on” and “LED” off will display on the screen
[/vc_column_text][vc_column_text]we use A0 and A1 of pcduino in this experiment, the two are 6 bit AD, so read value is 0 ~ 63. If use A2~A5(10 bit), the code should be changed to a big number between 0~1024, or LED will light on when touched.[/vc_column_text][/vc_tab][vc_tab title=”Attention” tab_id=”1393401481302-4-5″][vc_column_text]we use A0 and A1 of pcduino in this experiment, the two are 6 bit AD, so read value is 0 ~ 63. If use A2~A5(10 bit), the code should be changed to a big number between 0~1024, or LED will light on when touched.[/vc_column_text][/vc_tab][/vc_tour][/vc_column][/vc_row][vc_row][vc_column width=”1/1″][vc_column_text]
I am text block. Click edit button to change this text.
[/vc_column_text][/vc_column][/vc_row]
Comments are closed.