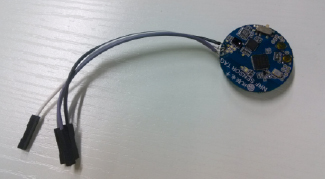
Openhapp has a bluetooth 4.0 BLE sensors tag with iBeacon station function that is powered by NRF51822. On the board, the following sensors are integrated:
- 3-axis accelerometer MPU6050
- Bosch temperature and pressure sensor BMP180
- Ambient light sensor AP3216
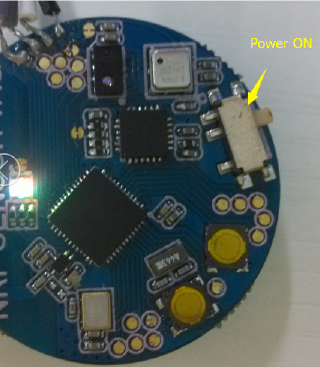
- Power switch

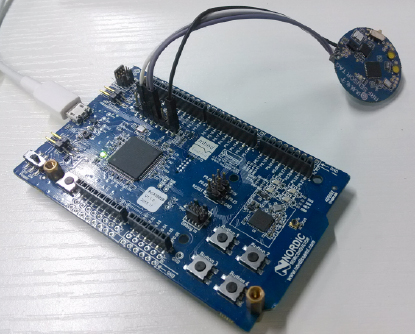
It will be nice if we can use mbed to program the openhapp Bluetooth sensor tag. In this post, we show how to use Nordic nRF51-DK as a mbed programmer to program the openhapp Bluetooth sensor tag.
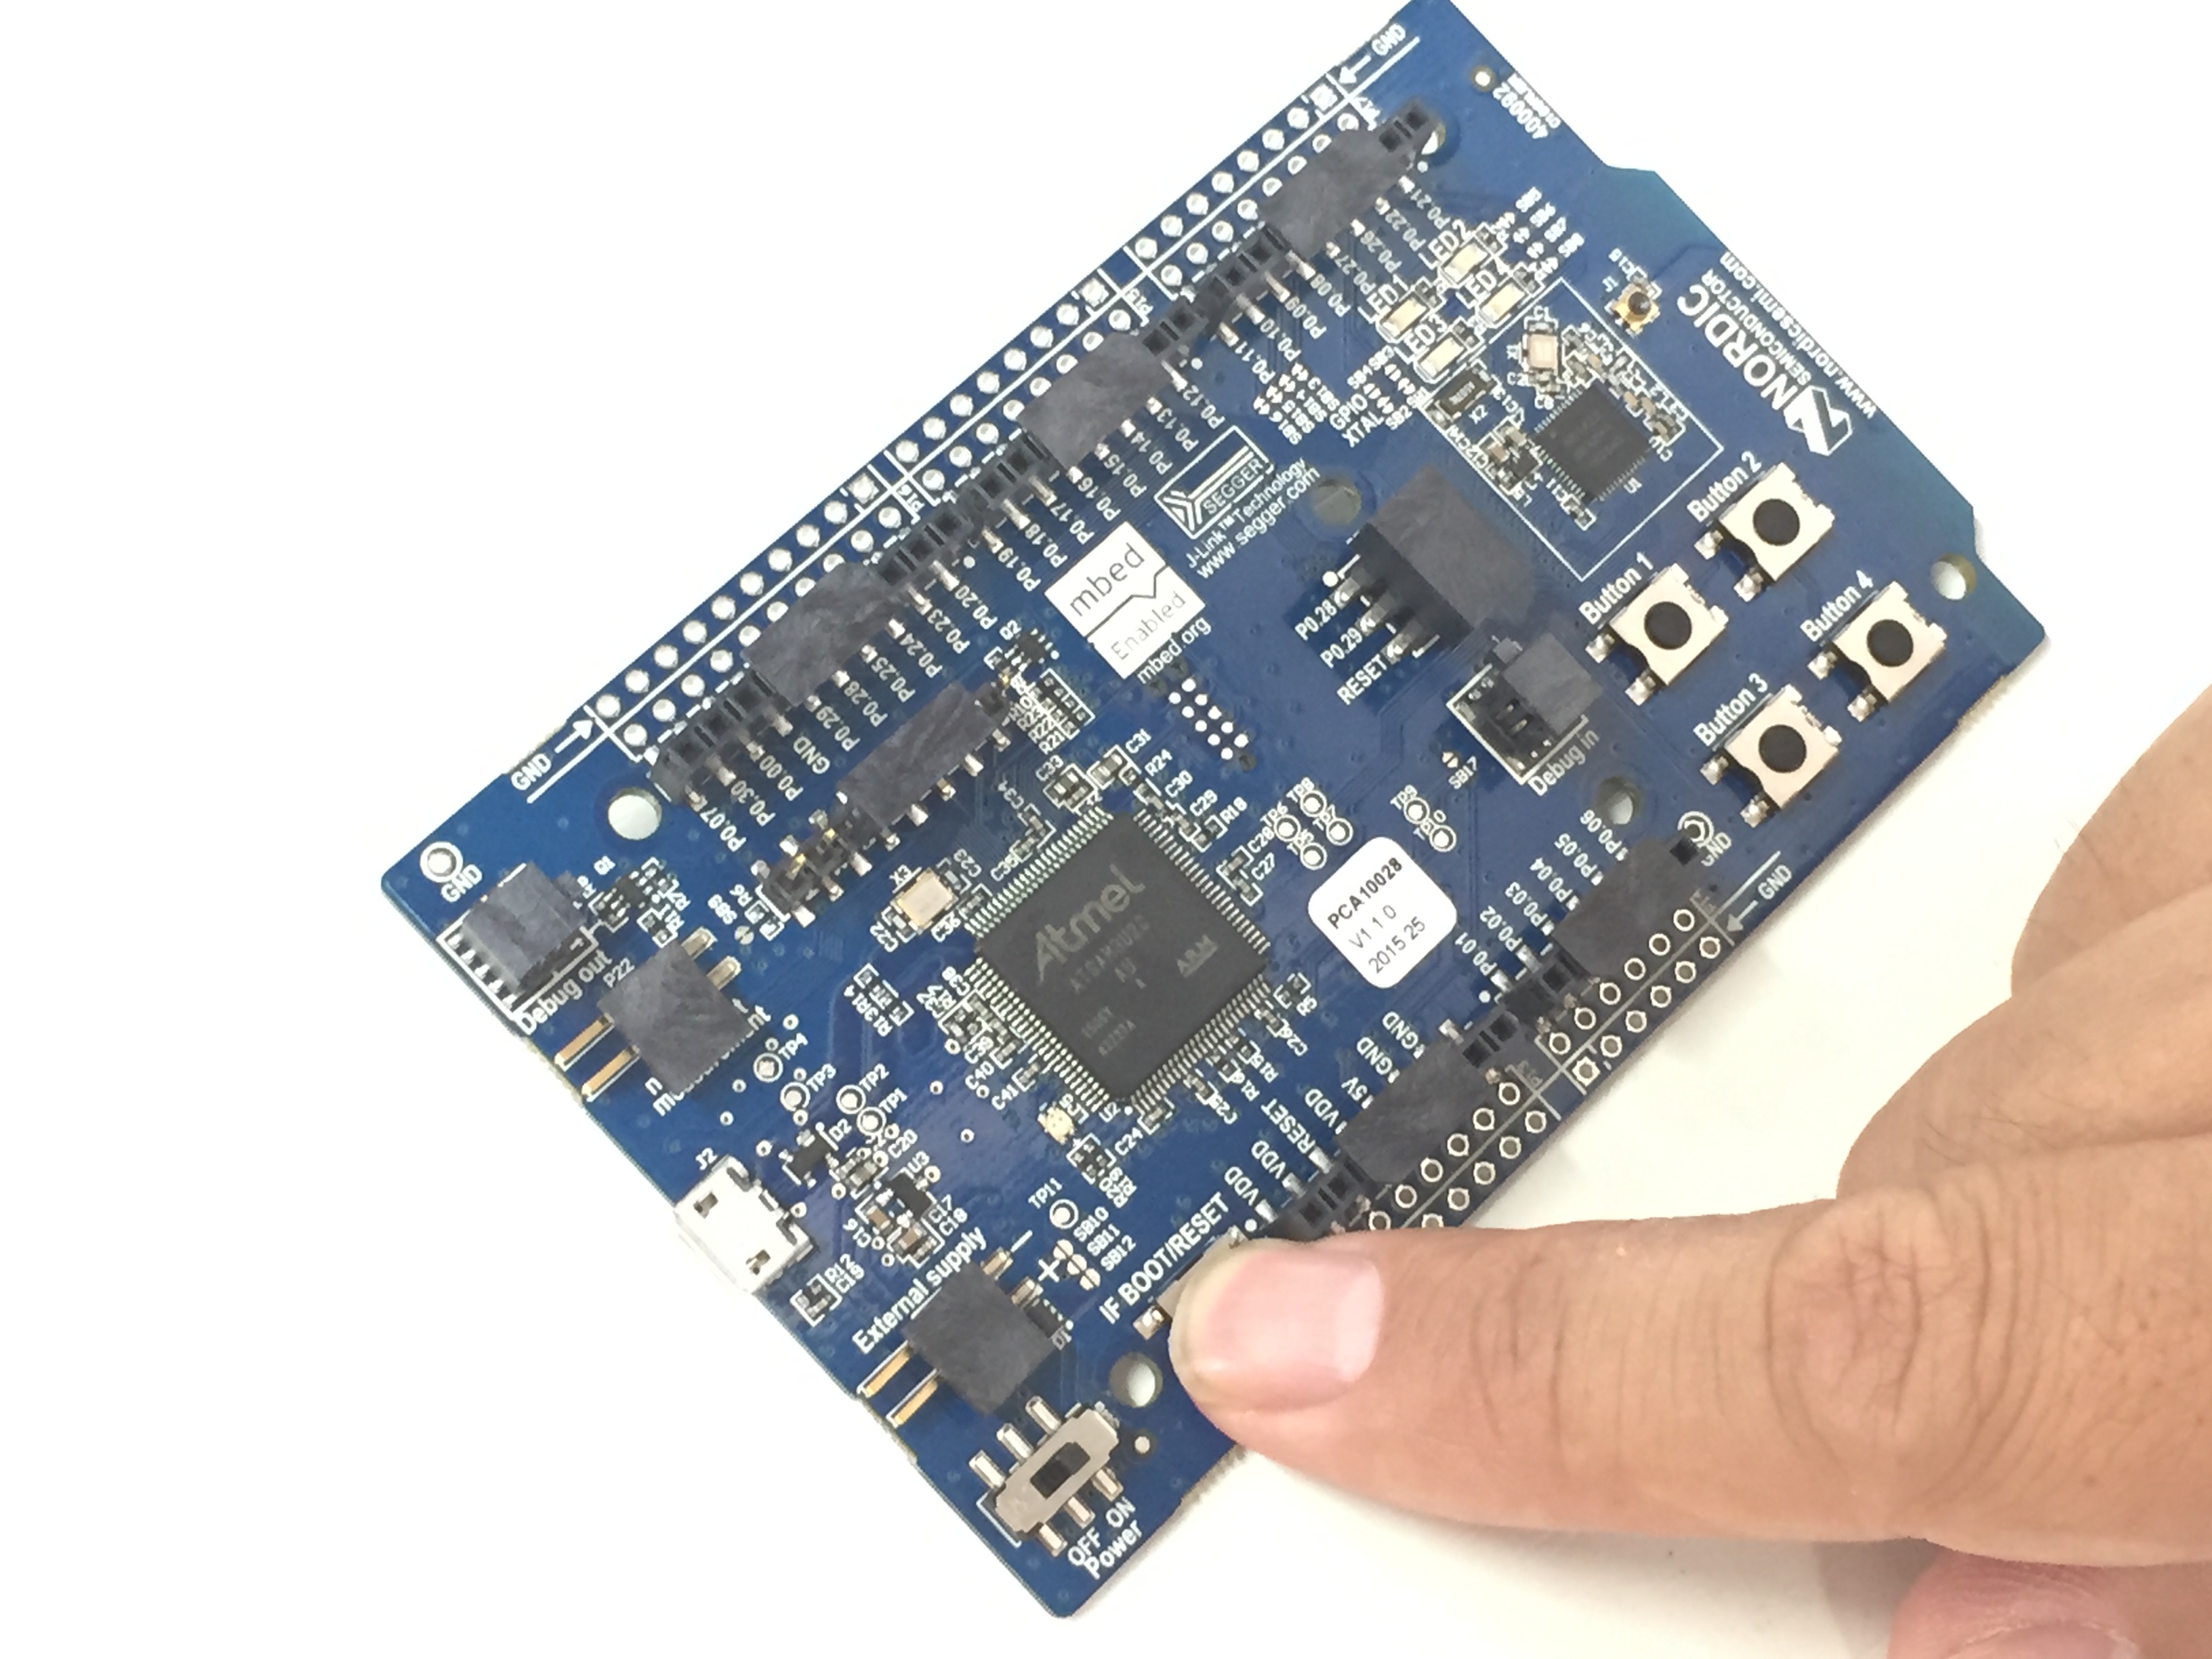
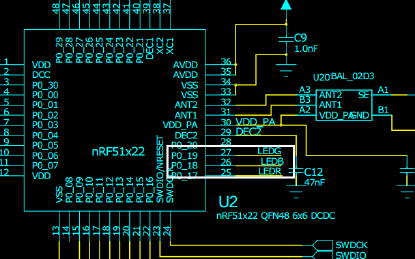
If we look at the schematic of nRF51-DK, we can find the headers for programming external board:
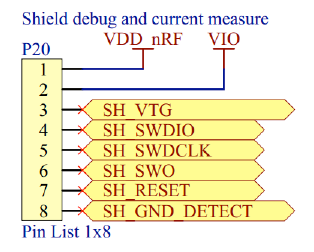
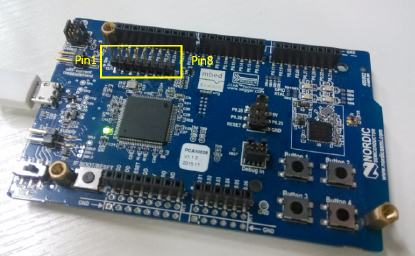
The physical location of this header can be found on nRF51-DK as below:
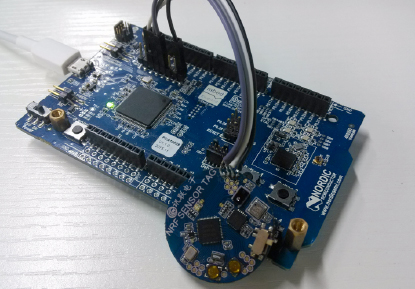
Wire out the 4-wire debug of openhapp bluetooth sensors tag. We can cut one side of the 0.1″ female to female jumper wires, and solder them to the debug points:
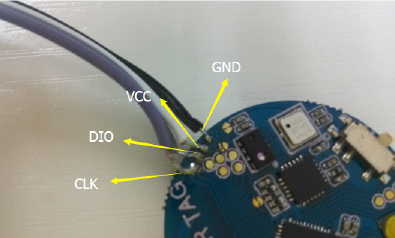
Wire instructions (we connect the debug port of the openhapp sensors tag to the programmer headers of nRF51-DK):
- nRF51DK- SH_SWCLK –> sensors tag – CLK
- nRF51DK – SH_SWDIO –>sensors tag – DIO
- nRF51DK- SH_VTG –>sensors tag – VCC
- nRF51DK – SH_GND –>sensors tag -GND
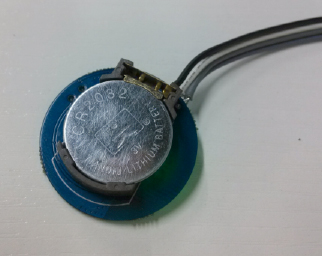
When we program the sensors node, the sensors node needs to be powered externally by a button cell. We install the CR2032 battery on the back of the sensors node, and turn on the power switch of the sensor node:
We will blink the LED on the sensors node. First we look at the schematic of the sensor node and found that LED are connected to P0_17/18/19 of the NRF51:
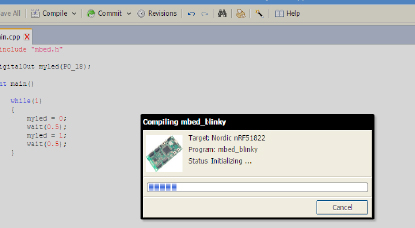
Open mbed web IDE environment, and enter the following code:
#include "mbed.h"

DigitalOut myled(P0_18);

int main()
{
    while(1)
    {
        myled = 0;
        wait(0.5);
        myled = 1;
        wait(0.5);
    }
}
Note: When we select the target board, it should NOT be Nordic nRF51-DK, and we should select Nordic nRF51822 (Click the upper right corner of the IDE to select):

Click the button to build the code, and we will get a hex file:
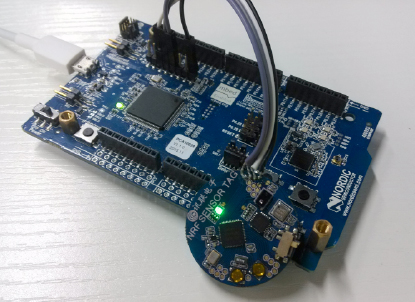
Drag and place it into the USB drive that starts with mbed to flash this hex file to the sensor tag. The LED on the sensor tag will start blinking:
Leave a Reply
You must be logged in to post a comment.