This tutorial will tell you how to quick access Ubuntu running on pcDuino8 Uno , just using an USB data line,without keyboard, mouse, and HDMI screen.
Prepare
- pcDuino8 Uno
- USB micro USB line
- Windows PC(XP/Win7/Win8)
- Windows tool: vncviewer
Install Driver(Take Win7 for example)
-
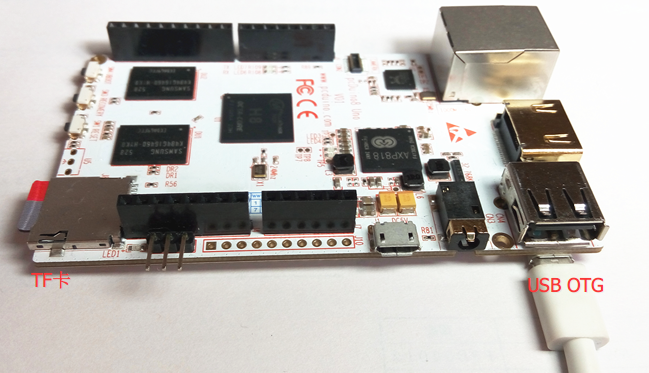
First connect pcDuino8 Uno to the computer’s USB port through USB OTG.
-
Open Device Manager in Windows.
- Right click Android under other devices and choose Update Driver Software.

- Choose the browse my computer for driver software.
- Under Common hardware types, choose Network adapters.
- Under Manufacturer choose Microsoft Corporation , and Network Adapter choose Remote NDIS based Compatible Device.
- Windows will prompt the warning information, click Yes, after a while it will prompt that the Windows has successfully updated your driver software.
Set the Static Address
- Right click the option( or win +x), choose Network Connections.
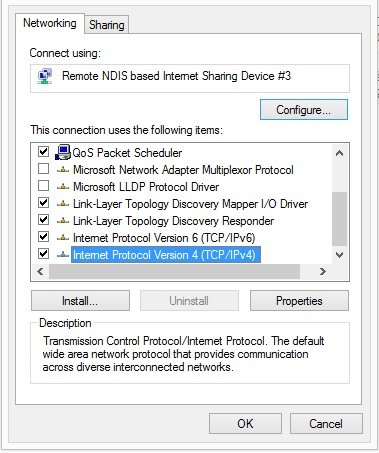
- Right click the Remote NDIS based Compatible Device, choose properties.
-
Double click Internet Protocol version 4 (TCP/IPv4).
-
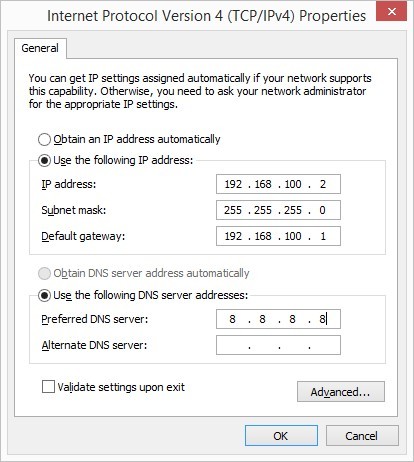
General set options as follow:
Use VNC to connect to pcDuino:
- Open the VNC Viewer, input the: 192.168.100.1 (which is the IP address of the pcDuino8 Uno) in the server:
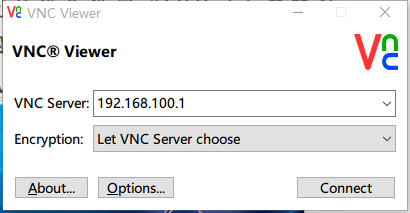
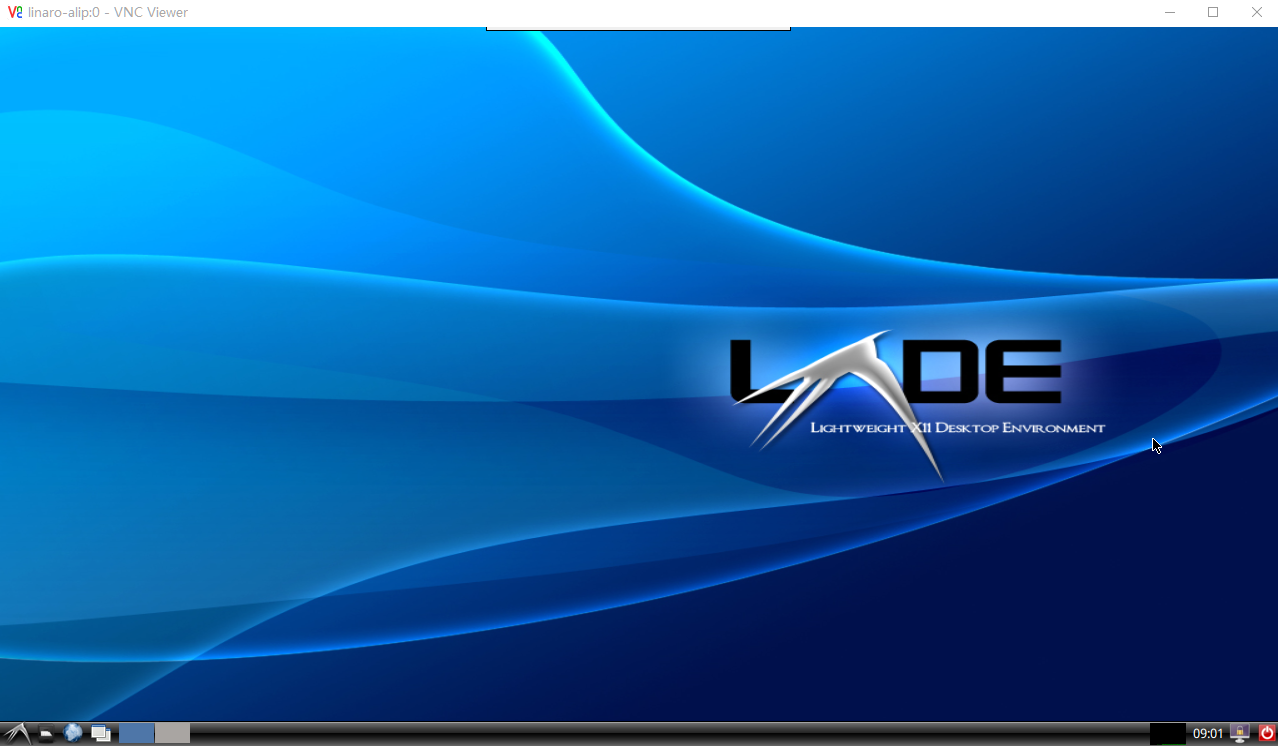
- pcDuino desktop will successfully show at the VNC from OTG.

Leave a Reply
You must be logged in to post a comment.